Interface Advanced
This chapter introduces more advanced automation interfaces. You can perform various detailed operations using these interfaces. This chapter contains a lot of content; if you are a first-time reader, we recommend that you patiently go through each section.
Tip
When writing automation code, you can directly enter the command lamda in the terminal on the right side of the remote desktop and execute the test code below, or perform element selection and click testing on your own. This can speed up development and verification.
Getting Elements
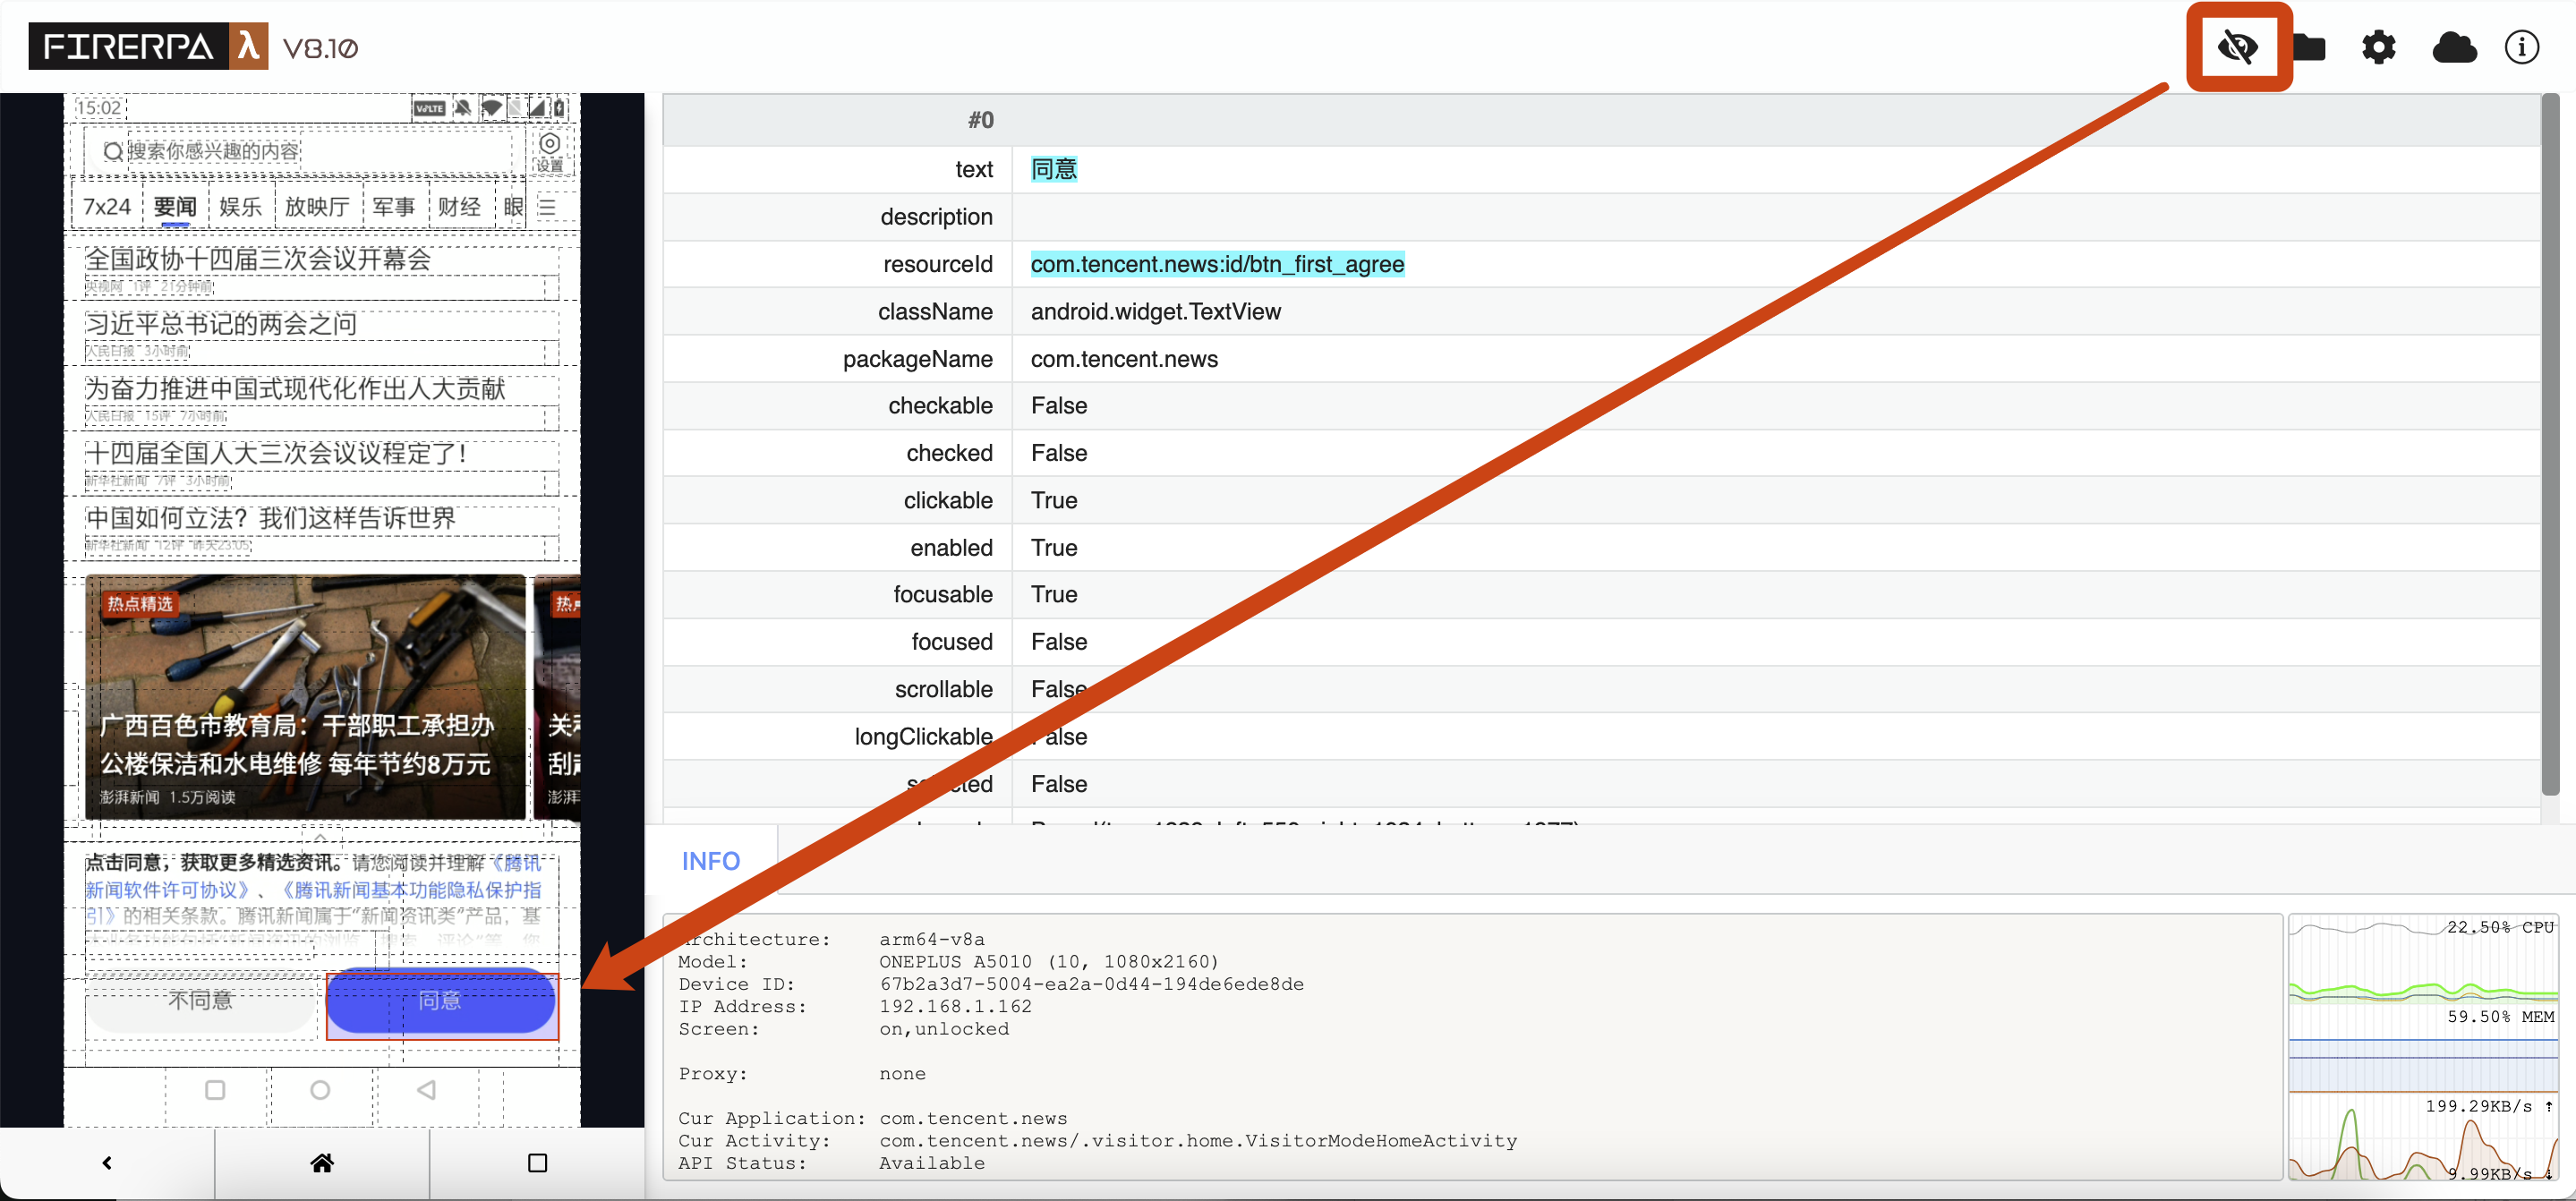
You may have already learned about it in the basics or earlier sections. You need to find the relevant element using a selector before you can operate. You should also have seen where to obtain selector parameters. The following introduction will revolve around this element. On the right side of this image, you can see information about the "Agree" element.
Attention
The element you directly click on the left interface may not be the actual element because it may overlap with other elements in size and position. Usually, multiple overlapping elements in position or size are displayed in the information bar on the right. You can scroll up and down to see which one is truly needed. You can also manually traverse all elements by pressing the TAB key on the left selection interface.
For the above element, we generally obtain it through text. The condition for using text is that no other element in the current interface also has text "Agree", this is the simplest method. You can also choose resourceId, but note that resourceId here does not represent a unique ID; it represents a resource ID, and an interface may contain many elements with the same resource ID. Other fields like packageName, checkable, etc. are not commonly used, but if text, resourceId, description, etc. are absent, you can try these fields. We can obtain this element through the following ways.
element = d(text="同意")
element = d(text="同意", resourceId="com.tencent.news:id/btm_first_agree")
element = d(resourceId="com.tencent.news:id/btm_first_agree")
Element Click
Call the following interface to perform a normal element click operation; it will simulate manually clicking "Agree".
element.click()
If you need to specify the position to click on the element, you can specify the corner parameter when calling the click interface. For example, Corner.COR_CENTER represents clicking the center point of the element; you can also click its top-left corner or bottom-right corner (Corner.COR_BOTTOMRIGHT).
element.click(corner=Corner.COR_TOPLEFT)
Performs a long press on the element, throws an exception if the element does not exist. This interface also supports corner, but cannot specify the long press duration.
element.long_click()
Clicks if the element exists; if the element does not exist, calling this interface will not raise an exception. This interface also supports corner.
element.click_exists()
>>> element.click_exists()
True
Existence Check
In many cases, before performing further operations, it is necessary to check the existence of an element. Otherwise, the subsequent process may encounter exceptions, or even perform wrong operations on the wrong interface. At this time, you can use the following interface to check existence.
element.exists()
Element Information
In some cases, you may want to obtain some information about the element, such as element coordinates, area information, or string information like text and description on the element. You can read element information through the following interface.
element.info()
For our test element mentioned above, the output information is as follows.
>>> info = element.info()
>>> print (info)
bounds { ... }
className: "android.widget.TextView"
clickable: true
enabled: true
focusable: true
packageName: "com.tencent.news"
resourceName: "com.tencent.news:id/btn_first_agree"
text: "\345\220\214\346\204\217"
visibleBounds { ... }
Hint
You may find that some fields are missing in the printed information above, such as description. This usually means that the field value is empty or false, and you can still access the related fields normally through attributes to get their values.
You can see that this information is somewhat complex; this is the default printing format of protobuf. You can directly access the corresponding attributes to print the actual value. For example, to read the text of the element, you can do as follows.
>>> info = element.info()
>>> print (info.text)
同意
Of course, there is also information related to the element's area coordinates; you can also access them. For instance, if you want to get the area information corresponding to the element, you can print the area information as follows, or save it as a variable for later operations.
>>> info = element.info()
>>> print (info.bounds)
The output or returned value is an area information (Bounds); you will find that this is also a parameter used by some screenshot interfaces. You can pass this parameter to the screenshot interface to take a separate screenshot of the element. However, we have already encapsulated a more convenient method for you.
You may also want to get the width and height of the element to calculate offsets, for example, to compute the relative offset of other elements. You can use:
>>> info = element.info()
>>> print (info.bounds.width, info.bounds.height)
484 138
Or get the center point or corner points of the element, such as top-left, bottom-right, etc. The following interfaces usually return a Point object, and you can also obtain the corresponding X and Y device screen coordinates from the Point object.
>>> info = element.info()
>>> print (info.bounds.center())
x: 792
y: 1908
>>> print (info.bounds.center().x)
792
The following call is used to get the corner coordinates of the element. The example gets the coordinates of the top-left corner; in addition, it also supports getting the coordinates of the four corners: bottom-right, top-right, bottom-left, etc.
>>> info = element.info()
>>> print (info.bounds.corner("top-left"))
x: 550
y: 1839
>>> print (info.bounds.corner("top-left").x)
550
Element Iteration
You can also iterate over all elements matched by the selector. Normally, in the current context, the selector may match only one element. If you want to test iteration, please choose a selector that will match multiple elements. You can directly use a for loop or other methods on the selector to iterate.
for i in element: print (i)
Or if you know there are multiple matched elements and want to obtain the specified Nth matched element, you can use the following interface.
element_3rd = element.get(3)
Element Count
Normally you may not use this interface directly. The following call can obtain the number of elements matched by your current selector.
>>> element.count()
1
Element Screenshot
We support element-level screenshots, allowing you to capture the image of an element separately without taking a full-screen screenshot and then cropping.
element.screenshot(quality=60)
After screenshotting, you can directly use the getvalue() method to get the binary data of the screenshot, or pass it directly to PIL Image.
>>> element.screenshot(quality=60).getvalue()
b'\xff\xd8\xff\xe0\x00\x10JFIF\x00\x01\x01\x00\x00\x01\x00\x01\x00\x00\xff\xe2\x02(ICC_PROFILE\x00\x01\x01\x00\x00\x02\x18\x00\x00\x00\x00\x02\x10\x00\x00mntrRGB XYZ \x00\x00...
Or if you do not need to process further, you can choose to save the screenshot directly to a local file.
>>> element.screenshot(quality=60).save("image.png")
Waiting for Element
In some cases, you may need to determine whether the current page has finished loading. Usually, you can judge whether the page has loaded completely by checking whether the relevant element has appeared. The following example waits for the "Agree" element to appear, with a maximum wait time of 10 seconds.
Hint
The waiting time here is in milliseconds, so 10 seconds requires *1000, 10 seconds = 10000 milliseconds.
element.wait_for_exists(10*1000)
>>> element.wait_for_exists(10*1000)
True
Additionally, we support waiting for an element to disappear, i.e., waiting for the element to disappear from the interface.
element.wait_until_gone(10*1000)
>>> element.wait_until_gone(10*1000)
False
Text Input
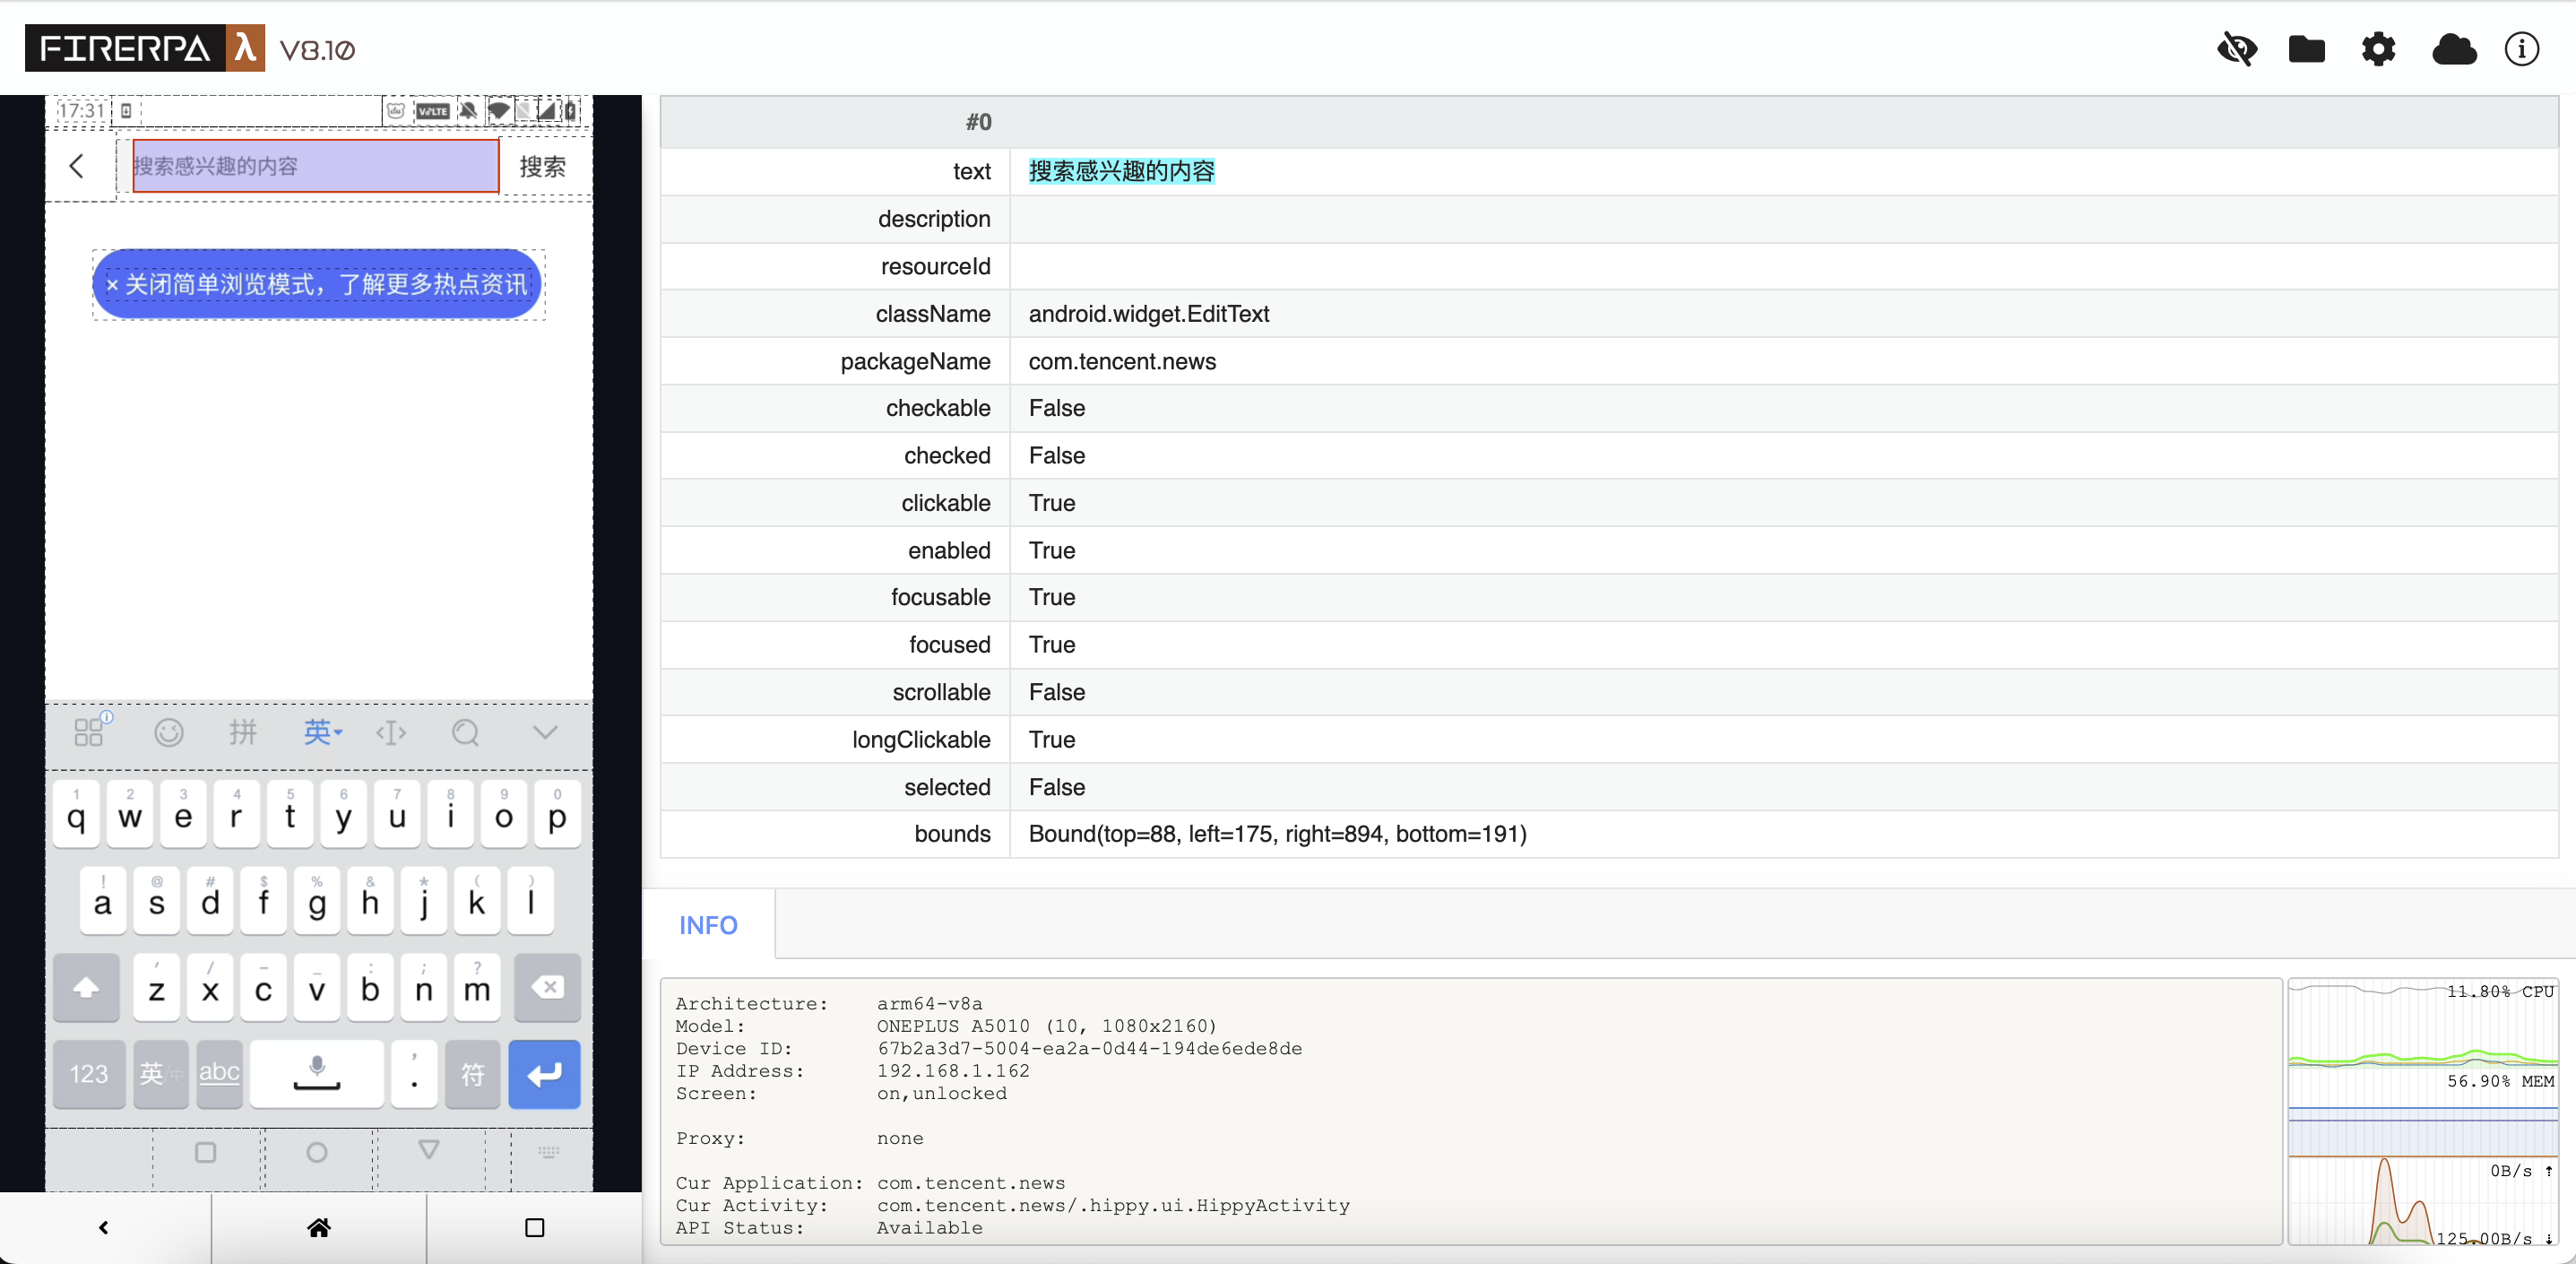
Text input is something to pay attention to. We cannot input text into a button because it is a button. Now we will select an input box element to introduce; the basic information of this element is as follows.
Attention
There are some points to note when getting input box elements: Please note that when obtaining input box elements, your input method must be in the pop-up state, then search for the relevant element, and it is recommended to search carefully, otherwise what you get may not be the actual input box.
Hint
In the automation process, making the input method pop-up only requires you to first click the input box displayed in the parent container in your code.
For the above input box, we can call the following interface to input the string 你好世界 (Hello World). You can also input English or other Unicode strings; just use as follows to input text into the box.
>>> element = d(text="搜索感兴趣的内容")
>>> element.set_text("你好世界")
True
If you want to get the text content currently displayed in the input box, you can call it like this.
Attention
Note that here we changed the selector. The initial selector used the text attribute, but after inputting text, the element content changed, causing the original selector to no longer match, so we switched to another selector. Choosing an appropriate selector is important, but this example is just for demonstration, so it is acceptable.
>>> element = d(className="android.widget.EditText")
>>> element.get_text()
'你好世界'
You can also clear the currently input content. Usually, when inputting text, the existing text is automatically cleared, but you can also manually clear it.
Hint
Continuously using the key interface to press the BACKSPACE key in a loop can also achieve a similar effect.
>>> element = d(className="android.widget.EditText")
>>> element.clear_text_field()
True
Note
In extreme cases, some places cannot use this interface to input text properly, and we are working on supporting it.
Normal Swipe
Use the following interface to perform swipe operations on the interface, such as swiping up and down to scroll through a list. The following call implements swiping up; the larger the step value, the slower the swipe speed, which is suitable for swipes requiring higher precision.
Attention
In simple cases, this operation does not need to provide a selector parameter. If you encounter a situation where swiping is not possible, set the selector condition to a suitable element yourself, such as an element with a scrollable attribute or the first-level container of the list.
d().swipe(direction=Direction.DIR_UP, step=32)
>>> element = d(resourceId="com.tencent.news:id/important_list_content")
>>> element.swipe(direction=Direction.DIR_UP, step=32)
True
Fling
Fling simulates the behavior of a quick swipe by a person; this operation will quickly swipe the screen, suitable for simulating fast browsing operations. The following example flings from top to bottom; in the example the selector is empty, but you still need to decide whether to fill in the selector according to the actual situation.
d().fling_from_top_to_bottom()
Fling from bottom to top:
d().fling_from_bottom_to_top()
Fling from left to right:
d().fling_from_left_to_right()
Fling from right to left:
d().fling_from_right_to_left()
Attention
In simple cases, this operation does not need to provide a selector parameter. If you encounter a situation where swiping is not possible, set the selector condition to a suitable element yourself, such as an element with a scrollable attribute or the first-level container of the list.
>>> element = d(resourceId="com.tencent.news:id/important_list_content")
>>> element.fling_from_bottom_to_top()
True
Other Operations
# Drag this app into the "Shopping" folder (modify according to actual situation)
element.drag_to(Selector(text="购物"))

#########
# Find sibling or child elements
#########
# Sometimes there are duplicate elements or elements without obvious features that are difficult to locate.
# At this time, you can narrow down the search scope by finding child/sibling elements.
# Child elements, for example: a chat login box, the input boxes inside are child elements of the login box.
# Sibling elements, for example: the username and password fields in a chat input box are sibling elements (under normal circumstances).
form = d(resourceId="login_form")
form.child(index=1)
# This will get the child element with index 1 under login_form.
form.child(index=1).sibling()
# You can also find the "Forgot Password" button that is a sibling of login_form this way
# (in fact, you could already determine by string, so you don't need to do this, this is just a demonstration).
form.sibling(textContains="找回密码")
# They are elements themselves, and you can perform any element operations on them.


# Other: Swipe continuously down/left/right until reaching the end.
# Because it may not always be possible to swipe to the end or detect reaching the end,
# so the max_swipes parameter is required.
d().fling_from_top_to_bottom_to_end(max_swipes=32)
d().fling_from_bottom_to_top_to_end(max_swipes=32)
d().fling_from_left_to_right_to_end(max_swipes=32)
d().fling_from_right_to_left_to_end(max_swipes=32)

#########
# scroll: More mechanical swiping
#########
step = 60
max_swipes = 32
# Swipe from top to bottom (with step count)
d().scroll_from_top_to_bottom(step)
# Swipe from bottom to top
d().scroll_from_bottom_to_top(step)
# Swipe from left to right
d().scroll_from_left_to_right(step)
# Swipe from right to left
d().scroll_from_right_to_left(step)

# Other: Swipe continuously down/left/right until reaching the end.
# Same as the fling description above.
d().scroll_from_top_to_bottom_to_end(max_swipes, step)
d().scroll_from_bottom_to_top_to_end(max_swipes, step)
d().scroll_from_left_to_right_to_end(max_swipes, step)
d().scroll_from_right_to_left_to_end(max_swipes, step)