Remote Desktop
FIRERPA’s remote desktop function provides device access within a network or across networks. You can see and operate the phone screen in real-time, just as if the device were beside you. The remote desktop function is only designed for Chrome 95+, does not support multiple people operating simultaneously, and it is recommended to use the latest version of Chrome browser to access.
Opening Remote Desktop
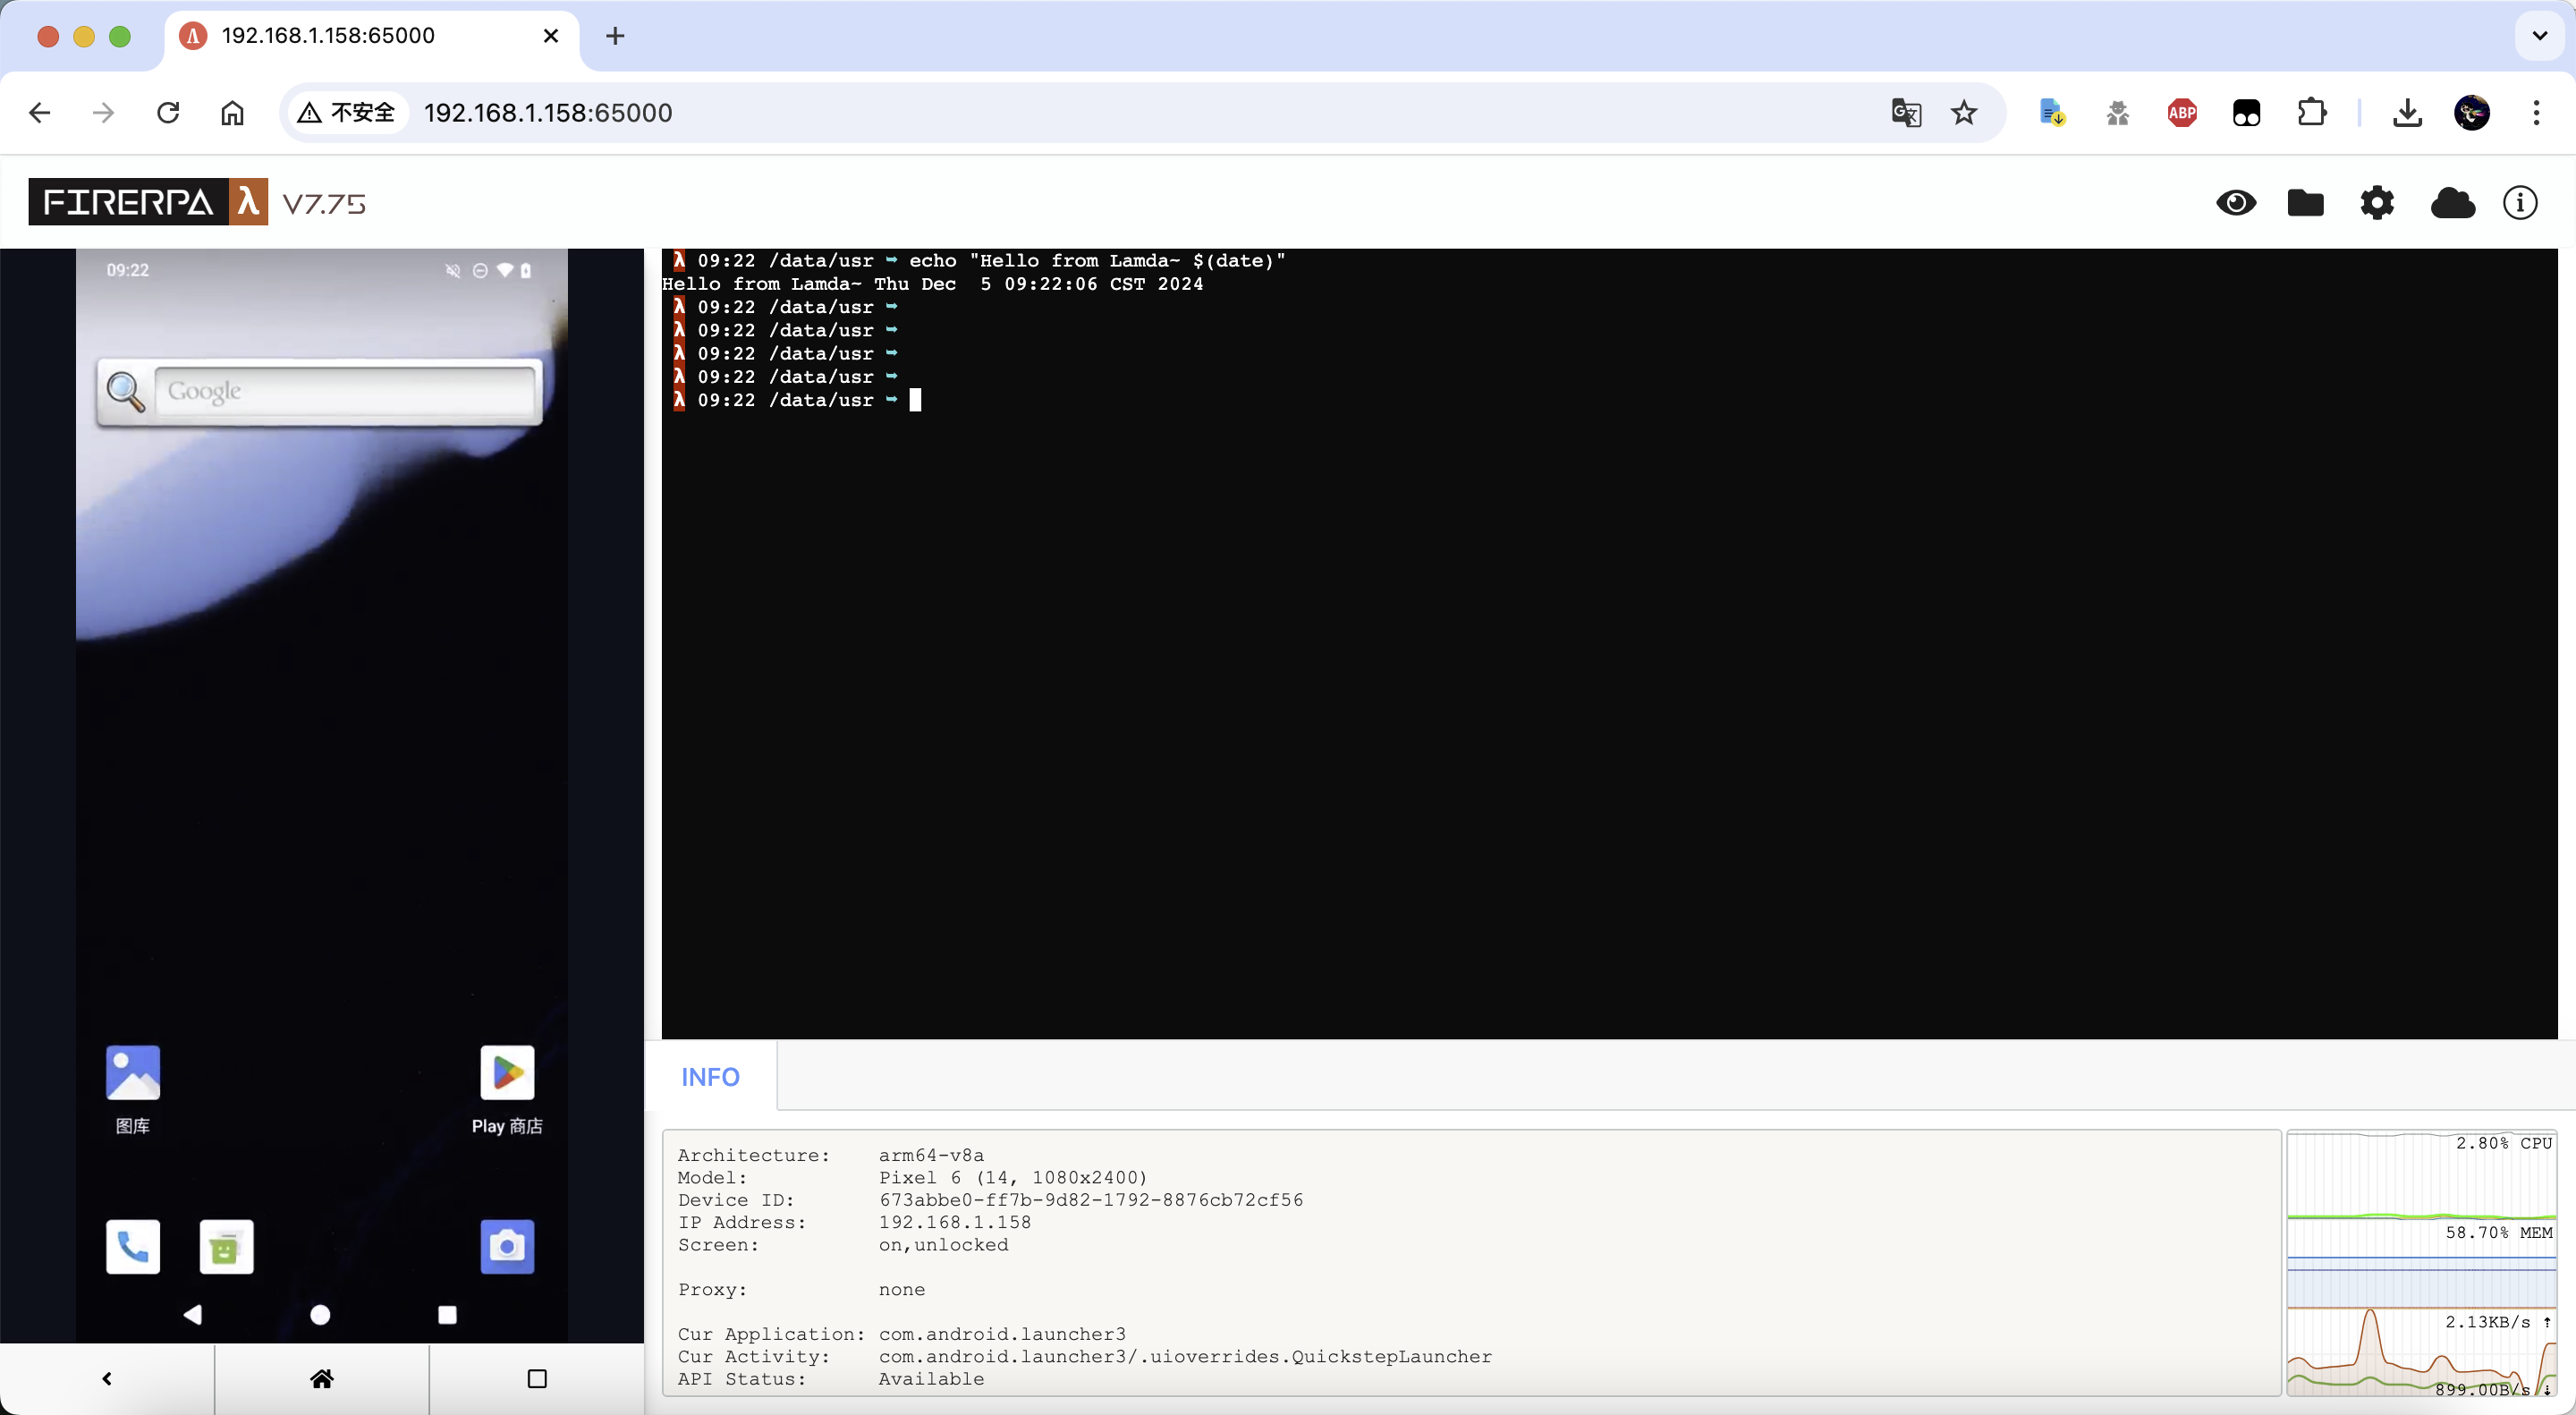
You can directly open the link http://192.168.0.2:65000 in your browser to access the remote desktop. You can operate the device and execute commands through the root simulation terminal on this interface.
Attention
Remote desktop does not support multiple users accessing simultaneously. Only the first user to access can control the device screen. Other accesses will prompt VIEW ONLY.
If you specified an encryption certificate --certificate when starting the server, the remote desktop will require you to enter a password to continue accessing, and you need to change the http:// in the link to https:// to access via HTTPS. Similarly, after opening, you still need to enter a password to access. You can use a text editor to open the encryption certificate and find the default login password on the first line. Of course, you can also set a custom login password by defining ssl-web-credential=12345 in the properties.local file.
File Upload
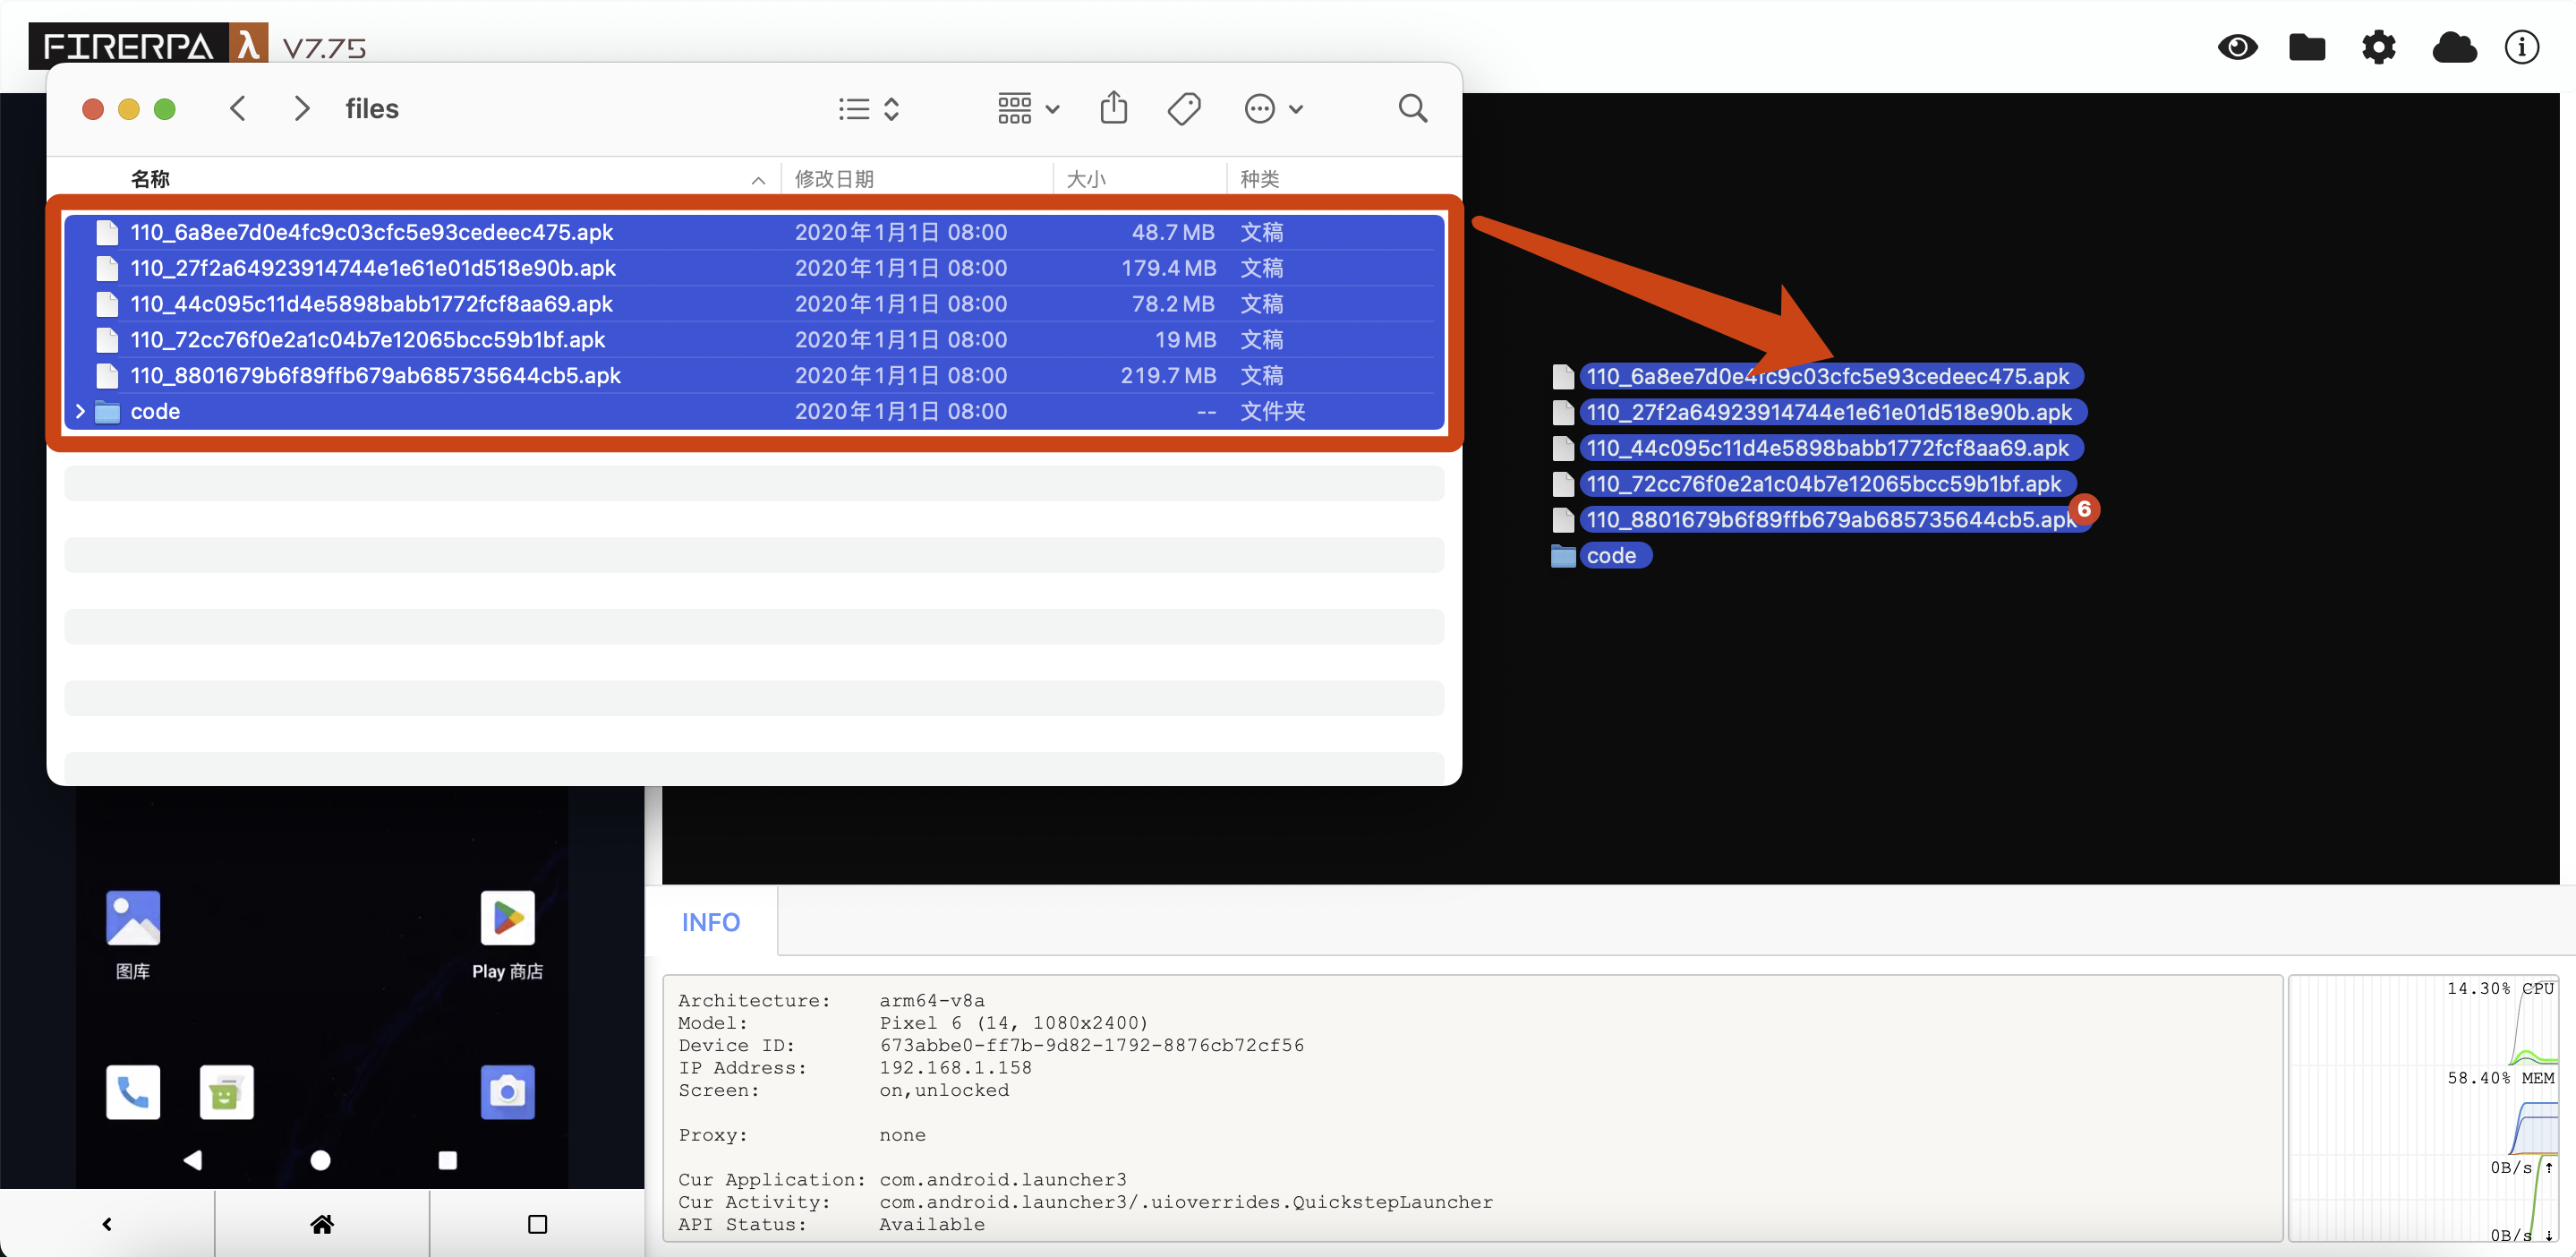
You can directly upload local files on the remote desktop. To upload files or folders, please directly drag the file or directory to the black terminal on the right side of the page to upload to the device. It supports uploading multiple files or folders simultaneously. A single file must not exceed 256MB, and it only supports uploading up to 2,000 files at the same time. The permissions of any file uploaded to the device are 644, and files will always be stored in the /data/usr/uploads directory (or another directory you set in the settings).
File Download
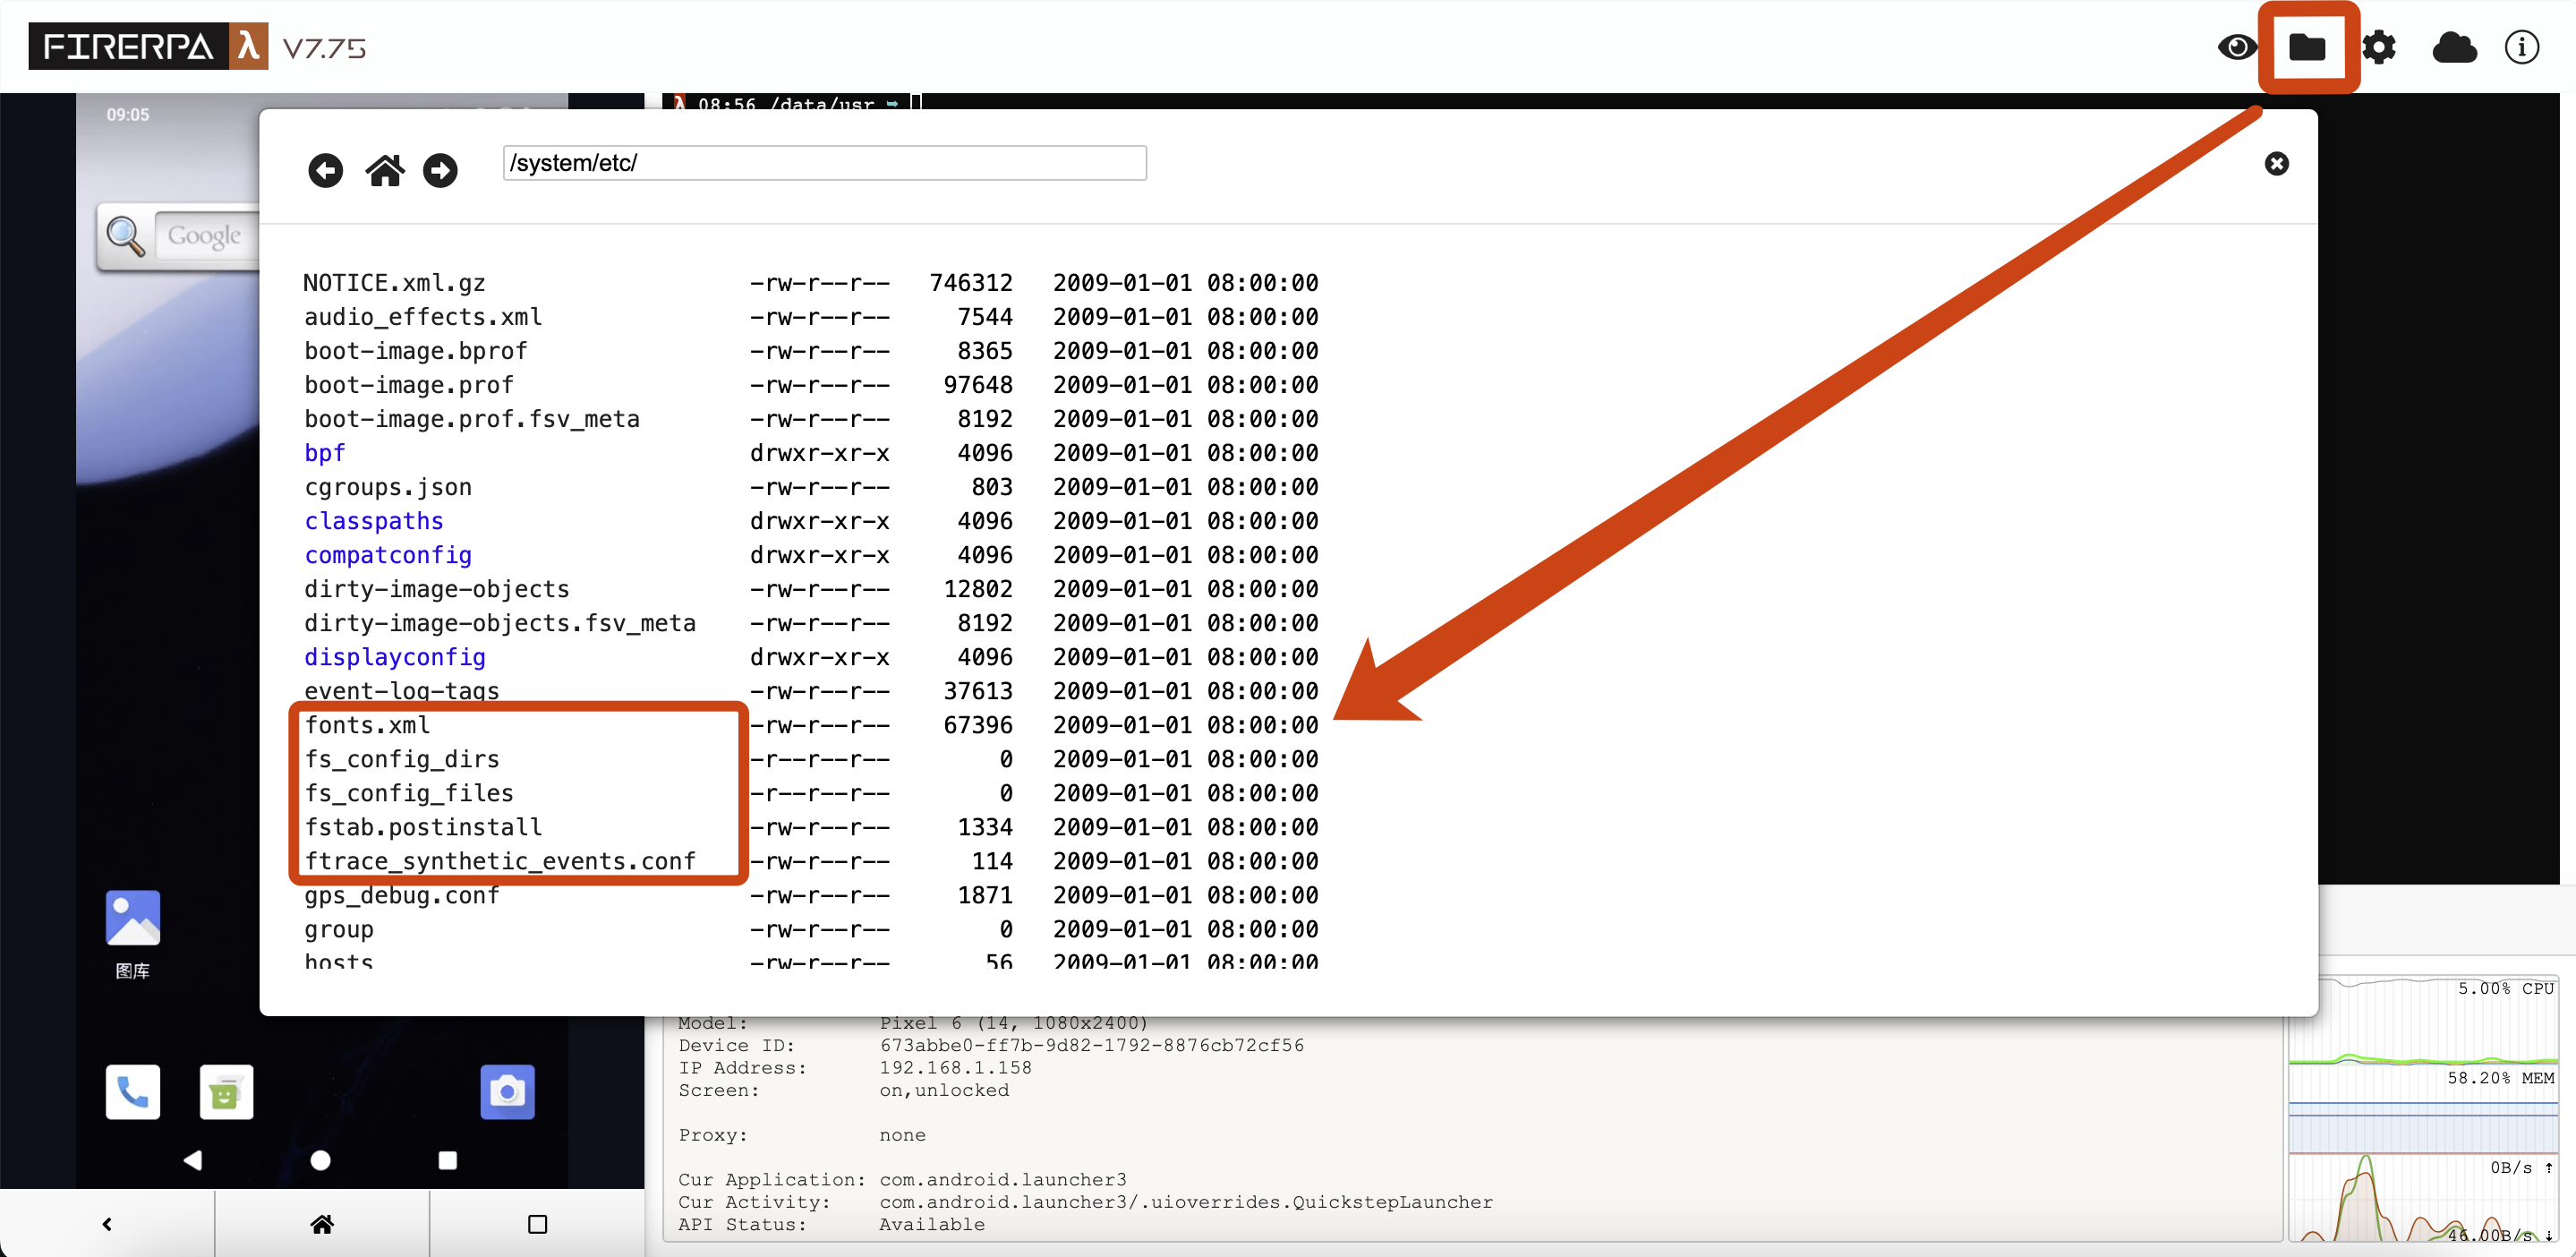
You can directly open http://192.168.0.2:65000/fs/ in your browser (note that the / at the end is necessary). After opening, it will display the files and folders on the device in an index form. You can browse directories or select files to download here. Alternatively, you can also click the folder icon in the upper right corner of the remote desktop, select the desired file, and click download.
Remote Desktop Settings
You can customize the remote desktop’s default file upload path, video frame rate, resolution scaling ratio, image quality, clipboard sharing, etc. It supports H.264 encoding (which uses less traffic and is smoother in some cases, only supported by the latest browsers). You can adjust these through the small gear in the upper right corner of the remote desktop. Under normal circumstances, you can enable video_h264 to improve the smoothness of network transmission, but if your device itself does not have strong enough computing performance, we do not recommend enabling it. We do not recommend adjusting video_scale unless your device’s native resolution is too small (<720p). This parameter represents the scaling ratio of the original screen. video_backend is used to select the video backend. We provide two backends: Default and System. Default is a software encoding backend, while System is a hardware encoding backend. video_quality represents video quality. Lower quality also means lower bit rate, which is relatively smoother. video_fps is the frame rate of the video. You can also enable two-way clipboard sharing by turning on the share_clipboard switch. Please note that adjusting the above parameters may not necessarily produce a positive effect. Please adjust them based on actual situations and performance.
Hint
Due to browser restrictions, the clipboard sharing function needs to enable HTTPS or be accessed via localhost to work properly.
You can find the settings icon (gear) in the upper right corner of the page after logging into the remote desktop to modify the above settings.

Remote desktop does not support Chinese input. You can input regular English characters. If you need more user-friendly operations such as keyboard input, please first look at the chapter Connecting to Built-in ADB below. After completing adb connect to FIRERPA, you can install other related screen projection software such as Genymobile/scrcpy. Please check its documentation for specific usage methods.