OSError: [Errno 30] Read-only file system
```
## Modify File Permissions
This interface is used to modify the permissions of a file on the device.
```python
d.file_chmod("/data/usr/file.txt", mode=0o777)
```
```python
>>> d.file_chmod("/data/usr/file.txt", mode=0o777)
name: "file.txt"
path: "/data/usr/file.txt"
st_mode: 33279
st_atime: 1230768000
st_mtime: 1230768000
st_ctime: 1230768000
```
```python
>>> result = d.file_chmod("/data/usr/file.txt", mode=0o777)
>>> print (oct(result.st_mode))
0o100777
```
## Get File Information
This interface is used to get information about a file on the device.
```python
d.file_stat("/data/usr/file.txt")
```
```python
>>> d.file_stat("/data/usr/file.txt")
name: "file.txt"
path: "/data/usr/file.txt"
st_mode: 33279
st_atime: 1230768000
st_mtime: 1230768000
st_ctime: 1230768000
```
```python
>>> result = d.file_stat("/data/usr/file.txt")
>>> print (result.name)
'file.txt'
```
--- END OF file-io.md ---
--- DOCUMENT: frida-export.md ---
--- SOURCE: https://device-farm.com/docs/content/en/frida-export.md ---
# Exporting Interfaces with Frida
This feature allows you to use methods exported via Frida RPC as extended FIRERPA interfaces. You can achieve ultimate control over the app by writing your own functional hook code. This feature requires familiarity with writing Frida hook scripts. If you have existing scripts, you will need to slightly modify them to use our specific methods.
```{attention}
Starting from version 9.0, the built-in Frida 17.x requires you to package `frida-java-bridge` into your script yourself. Otherwise, you will encounter "Java not defined" errors. This is an official change from Frida. According to the official change instructions, you need to create a new Node.js project and include the Java bridge. For details, please refer to https://github.com/oleavr/frida-agent-example or use our provided `tools/frida_script_generate.py` to re-package your original JS script.
```
## Writing the Export Script
You need to write scripts in a specific format. Exported function names must follow the naming convention, which must be camelCase with a lowercase first letter. For definitional names like HTTP, the method name should not use all uppercase letters. For example, a name like `sendHTTPRequest` should be written as `sendHttpRequest` in the export script, not using the all-caps HTTP. The following is the general structure a script should follow.
```js
Java.perform(function() {
const String = Java.use("java.lang.String")
rpc.exports.exampleFunc1 = function (a, b) {
return performRpcJVMCall(function() {
return String.$new("Execute on JVM thread:" + a + b).toString()
})
}
rpc.exports.exampleFunc2 = function (a, b) {
return performRpcJVMCallOnMain(function() {
return String.$new("Execute on Main UI thread:" + a + b).toString()
})
}
rpc.exports.exampleFunc3 = function (a, b) {
return performRpcCall(function() {
return a + b
})
}})
```
In the example script above, you can see three types of method definitions. The `return performRpc` code block pattern is mandatory to ensure your values are returned correctly. The meanings of these three different `performRpc` call blocks are as follows:
```js
return performRpcJVMCall(function() {
// Execute on JVM thread
})
```
The `performRpcJVMCall` code block means your code will be executed in the JVM. Inside this block, you can use JVM-related features, such as `Java.use` or other operations involving the app's Java layer.
```js
return performRpcJVMCallOnMain(function() {
// Execute on UI thread
})
```
The `performRpcJVMCallOnMain` code block means your code will be executed in the JVM and on the main UI thread. For operations involving the UI or the main thread, you must execute them within this block to succeed. At the same time, you need to ensure your code does not block the main thread, as this could cause the app to become unresponsive or even crash.
```js
return performRpcCall(function() {
// Execute Normal JS code
})
```
The `performRpcCall` code block allows you to execute only basic JS code. You cannot use Java layer logic here.
```{attention}
You may still need to wrap the entire code block with `Java.perform` to ensure that the Java logic executes correctly.
```
Now that you understand the basic logic for writing our code, you can adapt your own code by wrapping it in this format. If you just want to test it, you can also copy this code directly to get started. We will use this hook code for the explanations below.
## Injecting the Export Script
The method for injecting the export script here is exactly the same as the one described in the `Persisting Frida Scripts` chapter.
```python
app = d.application("com.android.settings")
app.attach_script(script, runtime=ScriptRuntime.RUNTIME_QJS, standup=5)
```
After calling the injection interface, your script should be injected. You can execute the following call to check if the script is running correctly.
```python
app.is_script_alive()
```
## Calling Exported Methods
Calling the exported methods within the script is very similar to using native FIRERPA interfaces. Please see the example code.
```python
app = d.application("com.android.settings")
app.exampleFunc1("FIRE", "RPA")
```
For multi-instance apps, you need to get the instance of the specific app.
```python
app = d.application("com.android.settings", user=UID)
app.exampleFunc1("FIRE", "RPA")
```
The calling method above is equivalent to the one below. You can see that `Func1` in the method name has been changed to `_func1`. Both forms are acceptable.
```python
app.example_func1("FIRE", "RPA")
```
```python
>>> app.example_func1("FIRE", "RPA")
'Hello World:FIRERPA'
>>> app.example_func2("FRI", "DA")
'Hello World:FRIDA'
>>> app.example_func3("FIRE", "RPA")
'FIRERPA'
```
## Calling Exported Methods (HTTP Interface)
In addition to supporting calls from the client, we also support calling via HTTP. You can use it in the following format.
```{tip}
Since version 8.15, exported methods also support being called via the JSON-RPC 2.0 protocol (MultiCall mode is not yet supported).
```
You can make calls directly using `jsonrpclib` as shown below. Alternatively, if you are familiar with the JSON-RPC 2.0 protocol, you can write your own code to make requests. This is the most standardized protocol implementation with the most comprehensive documentation available.
```python
import jsonrpclib
server = jsonrpclib.Server('http://192.168.0.2:65000/script/com.android.settings/0')
server.example_func1("FIRE", "RPA")
```
Of course, you can still continue to use the previous calling protocol shown below, which is relatively simpler but less standardized.
```python
import json
import requests
url = "http://192.168.0.2:65000/script/com.android.settings/exampleFunc1?user=0"
res = requests.post(url, data={"args": json.dumps(["FIRE", "RPA"])})
print (res.status_code, res.json()["result"])
```
The query parameter `user` in the URL is the UID of the app instance. It defaults to 0 and does not need to be specified. For multi-instance apps, you must specify the UID here.
The code above calls the script's exported interface via HTTP. `com.android.settings` is the application package name, and `exampleFunc1` is the name of the exported function. The request parameter `args` must be serialized using `json.dumps`. The parameter list can also contain multiple arguments, depending on the number of parameters your method requires. Providing an empty list `[]` indicates that the exported function has no parameters.
If your FIRERPA has interface certificates enabled, you need to use HTTPS for access and provide the certificate password.
```python
headers = {"X-Token": "certificate_password"}
res = requests.post(url, data={"args": json.dumps(["LAM", "DA"])}, headers=headers, verify=False)
print (res.status_code, res.json()["result"])
```
## HTTP Status Codes
When calling via the HTTP interface, there are specific status codes that you may need to check. The statuses and their meanings are as follows:
| Status Code | Description |
| ----------- | ----------------------------------- |
| 200 | OK |
| 410 | Script not injected or not installed |
| 500 | Script or parameter exception |
| 400 | Parameter error |
## Troubleshooting
If you encounter freezing or timeout issues when calling the interface via the API or HTTP, it is most likely because your app is in the background and has been forced to sleep by the system. Therefore, you may need to keep the app running in the foreground at all times.
--- END OF frida-export.md ---
--- DOCUMENT: frida-persist.md ---
--- SOURCE: https://device-farm.com/docs/content/en/frida-persist.md ---
# Persisting Frida Scripts
FIRERPA provides you with the ability to persist Frida scripts. You can conveniently inject scripts through the relevant APIs, and FIRERPA's script manager will automatically manage the injected scripts for you. Even if your script exits unexpectedly or the app process terminates, FIRERPA will automatically re-inject the script for you the next time your app is opened. This feature was introduced in version 7.80.
## Installing a Script
You can use this API to install your script into a target application. The script you install will be immediately injected into the application. The installed script will be automatically added to the script manager, which will continuously monitor and re-inject it for you.
```{attention}
The script manager only allows one script to be injected per app at a time. You cannot inject multiple scripts into the same application simultaneously.
```
```python
app = d.application("com.android.settings")
app.attach_script(script, runtime=ScriptRuntime.RUNTIME_QJS, standup=5)
```
The `script` parameter is the content of the Frida script you want to inject (bytecode is supported). The `runtime` is the corresponding runtime, defaulting to `qjs`. The `standup` parameter means that the injection will only occur 5 seconds after the app process starts (the time is calculated from process creation). This parameter has a minimum value of 1 second and a maximum of 300 seconds. It helps avoid crashes or other race condition issues caused by injecting into the app process too early. In spawn mode, this parameter should always be 0.
This API also supports spawn mode injection. However, please note that using spawn mode may interrupt your UI operation flow (if you need to operate the UI simultaneously). This is because in spawn mode, if the injected script crashes or the application exits, this mode will automatically relaunch the application, which can interfere with your UI operations. If you need to use spawn mode, please use the following parameters.
```python
app = d.application("com.android.settings")
app.attach_script(script, runtime=ScriptRuntime.RUNTIME_QJS, spawn=True, standup=0)
```
It's important to note the difference between spawn mode and normal mode. In normal mode, if the application exits for some reason, it will wait until the application is started again before performing the injection; it will not start the application on its own. Therefore, you may need to start the application yourself through code or manually for the injection to proceed. In spawn mode, however, even if the application exits, it will be automatically started, and the injection will be performed.
## Uninstalling a Script
This API will remove a Frida script that has been installed in an application. The script will also be detached from the application process, and FIRERPA's script manager will no longer monitor the script's health status or perform re-injections after a crash.
```python
app = d.application("com.android.settings")
app.detach_script()
```
## Checking if a Script is Installed
This API is used to check whether a script has already been installed in an application. You can use this status to determine if a re-installation is necessary.
```python
app = d.application("com.android.settings")
app.is_attached_script()
```
## Checking if a Script is Injected
This API is used to check if the script you installed is currently injected into the application process. Even if you have installed a script, it might not be injected into the app process because the app may not be running or the script may contain errors. You can use its return value to determine whether you need to start the relevant application or check for syntax errors in your injection script.
```python
app = d.application("com.android.settings")
app.is_script_alive()
```
## Viewing Script Logs
You can view console logs such as `console.log` from your script, as well as script error messages. However, you need to set this up in advance at startup. Please refer to the `Viewing Logs` chapter to learn how to set up a log file. Let's assume you have correctly set the log file to `/data/local/tmp/server.log`. Then, when you need to view the script logs, execute the following command. This will filter out all log information from the injected scripts. You can also use other commands like `tail -f` to continuously track the logs.
```bash
grep SCRIPT /data/local/tmp/server.log
```
## Offline Persistence
Offline persistence means you can place your FRIDA script as a configuration file on the phone, and FIRERPA will automatically load it upon startup. You don't need to use the APIs mentioned above for injection or uninstallation; you just need to write the script file in a specific format and place it in a designated directory. This feature supports directory monitoring, enabling real-time loading, unloading, and updating of scripts. Direct edits to files in the script directory will also be applied in real-time. Below is a simple YAML configuration for script persistence. The script content in this configuration is `console.log("Hello From Yaml Script")`.
```yaml
enable: true
application: "com.android.settings"
version: "2.10"
user: 0
runtime: "qjs"
script: !!binary "Y29uc29sZS5sb2coIkhlbGxvIEZyb20gWWFtbCBTY3JpcHQiKQ=="
emit: "http://myserver/reportData"
encode: "none"
standup: 10
spawn: false
```
Here is a detailed explanation of each configuration item in the example script configuration above:
| Field | Description |
|-------------|----------------------------------------------------------------------------|
| enable | Whether to enable this script |
| application | The application ID for script injection (e.g., com.android.settings) |
| version | The supported application version for the script ("N/A" means any version) |
| user | If it's a multi-instance app, specify the user ID of the instance (usually 999) |
| script | The script content in base64, supporting text or binary (please follow the template) |
| runtime | The script runtime (qjs, v8) |
| standup | The delay time for injection (calculated from the process start time) |
| spawn | Use spawn mode (will ignore `standup`) |
| encode | If the script reports data, specify the encoding here (zlib/none) |
| emit | If the script reports data, specify the destination here |
For more information on the `emit` data reporting feature, please see the `Using Frida to Report Data` chapter.
The above is a complete example of an offline script. After writing it, save the configuration file with a name like `{file_name}.yaml` and place it in the `/data/usr/modules/script` directory on the device. The system will automatically load your configuration. The system automatically detects changes in the `/data/usr/modules/script` directory. If you update or delete a YAML configuration, the system will also automatically update or uninstall your script.
--- END OF frida-persist.md ---
--- DOCUMENT: frida-report.md ---
--- SOURCE: https://device-farm.com/docs/content/en/frida-report.md ---
# Reporting Data with Frida
The feature for reporting data with Frida is based on the persistence feature. You can use your custom Frida scripts to automatically intercept data from method calls and report it using our specific methods. The data reporting feature allows you to easily upload data captured by your scripts directly to Redis or an external HTTP endpoint. You can then receive the reported data content through Redis or the HTTP endpoint. To maximize network performance, we also support reporting data after compression (zlib).
```{attention}
Starting from version 9.0, the built-in Frida 17.x requires you to package `frida-java-bridge` into your script yourself. Otherwise, you will encounter errors like "Java not defined". This is an official change from Frida. According to the official change notes, you need to create a new Node.js project and include the Java bridge. For details, please refer to https://github.com/oleavr/frida-agent-example or use our provided `tools/frida_script_generate.py` to re-package your original JS script.
```
## Writing the Reporting Script
First, you need to modify your Frida script. Typically, Frida scripts have functions like `send` and `log` that allow you to send data externally. For FIRERPA, you need to use a specific method to send the data. Below is a template code for intercepting okhttp traffic. It is just a demonstration script and may not work for you as is. This script is not much different from a regular script; the only difference is the use of an `emit` method, which is a built-in method in FIRERPA. You can use it to conveniently and systematically submit data to an external destination.
```js
Java.perform(function() {
Java.use("com.android.okhttp.internal.http.HttpEngine").getResponse.implementation = function() {
var response = this.getResponse()
var data = {}
data["url"] = response._request.value._url.value._url.value
data["body"] = response.body().string()
emit("report_data", JSON.stringify(data))
return response
}
})
```
The `emit` method has two parameters: `emit(name, content)`. Here, `name` represents the type of data. If your reporting destination is Redis, this name represents the Redis queue name. You should describe it as accurately as possible in English, for example, `product_info`. `content` represents the content of the data, and it only supports string and bytes types. In the example above, we converted it into a JSON string before submitting.
Now that you understand the required format and calling conventions for writing the script, i.e., how to submit hooked data to an external destination, you need to continue reading to learn how to configure the **data reporting destination**.
## Data Reporting Destinations
The data reporting destination indicates where the data you `emit` in your script should be sent. Supported destination types include HTTP endpoints, Redis queues, and RabbitMQ queues, with slight differences between them.
Generally, if you don't need to care about information like the data source (i.e., you don't need to match **data** with its **source machine**), we recommend using a Redis queue. Otherwise, you should use HTTP or MQTT (v5), because due to the characteristics of these two protocols, we can carry more metadata in the protocol, allowing for more precise device matching.
### Reported Metadata
For data reported to HTTP endpoints and RabbitMQ destinations, in addition to the original reported data, you can also obtain metadata about the device and script from the protocol layer. The metadata included in the protocol is shown in the table below.
| Field | Description |
|-------------|----------------------------------------------|
| application | The application's package name (e.g., `com.android.settings`) |
| device | The device ID (e.g., `67b2a3d7-5004-ea2a-0d44-194de6ede8de`) |
| encode | Data encoding (e.g., `none`) |
| name | Data name (e.g., `report_data`) |
| script | The script ID (e.g., `7c52530d`) |
| sequence | The reporting sequence number (e.g., `30`) |
| timestamp | The reporting timestamp (e.g., `1740023596914`) |
| user | The multi-instance app ID (e.g., `0`) |
```{attention}
Due to the nature of the Redis protocol, data reported to a Redis destination does not contain any of the metadata mentioned above.
```
`device` is the unique ID of the device, which you can find in the information panel of the remote desktop. This ID is usually unique and fixed. You can use it to tag devices and establish a correspondence. `encode` is the data encoding, which supports `none` and `zlib`. If the encoding is `zlib`, you will need to use zlib to decompress the data body. `name` is used to mark the type of this reported data; it is also the first parameter you use in the `emit` method. `sequence` represents the index of the reported data, starting from 0 and incrementing with each report. You can use this field to sort the data or check for any lost reports.
### Extra Parameters in the Reporting URL
When you construct the reporting URL, you can specify some dynamic ID parameters within the URL. You can insert them at specific parts of the URL using the variable placeholder format `${name}`. For example, you can use it like `http://192.168.1.2/report/${device_id}`. The supported variables are as follows.
| Name | Description |
|-----------------|----------------------------------------------|
| device_id | Unique device ID |
| device_id_short | Unique device ID (short device ID encoded in BASE62) |
| android_id | Android ID |
| serialno | ro.serialno |
### Reporting to HTTP
You need to write an HTTP service yourself to receive the reported data. The HTTP reporting endpoint must implement the POST method. FIRERPA will report data to the endpoint via POST and will also encode each field from the metadata as HTTP query parameters, which you can extract and process. The data body itself is carried in the body of the POST request. FIRERPA will automatically retry 3 times upon receiving 502, 503, or 504 status codes. If your backend correctly receives and processes the reported data, it should return the plain text `OK` or `SUCCESS` and set the status code to `200` to indicate successful processing.
```{attention}
HTTP requests are multi-threaded, so the messages received by the backend may not follow the reporting order (sequence).
```
```
Example reporting URL: http://192.168.1.2/report/${device_id}?serialno=${serialno}
For password authentication: http://user:password@192.168.1.2/report/${device_id}?serialno=${serialno}
```
### Reporting to MQTT
When reporting to MQTT, you should extract the metadata from `UserProperty`. TLS, username/password authentication, and one-way certificate validation (server certificate verification) are supported, but two-way validation is not.
```
Example reporting URL: mqtt://test.mosquitto.org:1883/script/${device_id}/report
For password authentication: mqtt://rw:readwrite@test.mosquitto.org:1884/script/${device_id}/report
For one-way validation: mqtts://test.mosquitto.org:8883/script/${device_id}/report?verify=true&ca=LS0tLS1CRUdJTiBDRVJUSUZJQ0FURS0tLS0tCk1JSUVBekNDQXV1Z0F3SUJBZ0lVQlkxaGxDR3ZkajROaEJYa1ovdUxVWk5JTEF3d0RRWUpLb1pJaHZjTkFRRUwKQlFBd2daQXhDekFKQmdOVkJBWVRBa2RDTVJjd0ZRWURWUVFJREE1VmJtbDBaV1FnUzJsdVoyUnZiVEVPTUF3RwpBMVVFQnd3RlJHVnlZbmt4RWpBUUJnTlZCQW9NQ1UxdmMzRjFhWFIwYnpFTE1Ba0dBMVVFQ3d3Q1EwRXhGakFVCkJnTlZCQU1NRFcxdmMzRjFhWFIwYnk1dmNtY3hIekFkQmdrcWhraUc5dzBCQ1FFV0VISnZaMlZ5UUdGMFkyaHYKYnk1dmNtY3dIaGNOTWpBd05qQTVNVEV3TmpNNVdoY05NekF3TmpBM01URXdOak01V2pDQmtERUxNQWtHQTFVRQpCaE1DUjBJeEZ6QVZCZ05WQkFnTURsVnVhWFJsWkNCTGFXNW5aRzl0TVE0d0RBWURWUVFIREFWRVpYSmllVEVTCk1CQUdBMVVFQ2d3SlRXOXpjWFZwZEhSdk1Rc3dDUVlEVlFRTERBSkRRVEVXTUJRR0ExVUVBd3dOYlc5emNYVnAKZEhSdkxtOXlaekVmTUIwR0NTcUdTSWIzRFFFSkFSWVFjbTluWlhKQVlYUmphRzl2TG05eVp6Q0NBU0l3RFFZSgpLb1pJaHZjTkFRRUJCUUFEZ2dFUEFEQ0NBUW9DZ2dFQkFNRTBIS21JemZUT3drS0xUM1RISGUrT2JkaXphbVBnClVabUQ2NFRmM3pKZE5lWUdZbjRDRVhieVA2ZnkzdFdjOFMyYm9XNmR6ckg4U2RGZjl1bzMyMEdKQTlCN1UxRlcKVGUzeGRhL0xtM0pGZmFIamtXdzdqQndjYXVRWmpwR0lOSGFwSFJscGlDWnNxdUF0aE9neFc5U2dEZ1lsR3pFQQpzMDZwa0VGaU13K3FEZkxvL3N4RktCNnZRbEZla01lQ3ltakxDYk53UEp5cXloRm1QV3dpby9QRE1ydUJUelBICjNjaW9CbnJKV0tYYzNPalhkTEdGSk9majdwUDBqL2RyMkxINzJlU3Z2M1BRUUZsOTBDWlBGaHJDVWNSSFNTeG8KRTZ5akdPZG56N2Y2UHZlTElCNTc0a1FPUnd0OGVQbjB5aWRyVEMxaWN0aWtFRDNuSFloTVVPVUNBd0VBQWFOVApNRkV3SFFZRFZSME9CQllFRlBWVjZ4QlVGUGlHS0R5bzVWMytIYmg0TjlZU01COEdBMVVkSXdRWU1CYUFGUFZWCjZ4QlVGUGlHS0R5bzVWMytIYmg0TjlZU01BOEdBMVVkRXdFQi93UUZNQU1CQWY4d0RRWUpLb1pJaHZjTkFRRUwKQlFBRGdnRUJBR2E5a1MyMU43MFRoTTYvSGo5RDdtYlZ4S0xCalZXZTJUUHNHZmJsM3JFRGZaK09LUloyajZBQwo2cjdqYjRUWk8zZHpGMnA2ZGdicmxVNzFZLzRLMFRkeklqUmozY1EzS1NtNDFKdlVRMGhaL2MwNGlHRGcveFdmCitwcDU4bmZQQVl3dWVycnVQTldtbFN0V0FYZjBVVHFSdGc0aFFEV0J1VUZESlR1V3V1QnZFWHVkejc0ZWgvd0sKc013ZnUxSEZ2ank1WjBpTURVOFBVRGVwalZvbE9DdWU5YXNobFM0RUI1SUVDZFNSMlRJdG5BSWlJd2lteDgzOQpMZFVkUnVkYWZNdTVUNVhtYTE4Mk9DMC91L3hSbEVtK3R2S0dHbWZGY04wcGlxVmw4T3JTUEJnSWxiKzFJS0pFCm0vWHJpV3IvQ3E0aC9KZkI3TlRzZXpWc2xna0Jhb1U9Ci0tLS0tRU5EIENFUlRJRklDQVRFLS0tLS0K
```
In the URL above, the relevant data will be sent to `script/${device_id}/report`. You can subscribe to these messages using a command like `mosquitto_sub -L mqtt://test.mosquitto.org:1883/script/+/report`.
### Reporting to Redis
Reporting to Redis is relatively simple. Since it doesn't carry any metadata, you cannot directly distinguish the data source. You might need to achieve this by dynamically modifying the injected script. For Redis reporting, FIRERPA will directly push the data body into a queue using `LPUSH`. For example, in the sample script above, the reported data will be pushed into the `report_data` queue.
```{attention}
Only standalone Redis services are supported; Redis Cluster is not.
```
```{attention}
Do not add variable placeholders in the Redis URL, except for the password field. The URL format is the one supported by standard Redis libraries; modifying other parts may lead to parsing errors.
```
```
Example reporting URL: redis://1.2.3.4/0
For password authentication: redis://:password@1.2.3.4/0
TLS + password
rediss://:password@1.2.3.4/0?ssl_ca_data=LS0tLS1CRUdJTiBDRVJUSUZJQ0FURS0tLS0tCk1JSURUVENDQWpXZ0F3SUJBZ0lVUFIvcmcxK0x2aU5tYzNsc0...
```
## Injecting the Reporting Script
Of course, getting the app instance is the first step. You can use the following call to get an `app` variable, which represents the instance of the application you want to inject into. You will then use it to proceed with the injection or detachment operations below.
```python
app = d.application("com.android.settings")
```
Use the following interface to inject the reporting script mentioned above into the application. When data is intercepted, it will be submitted to the `report_data` queue in Redis. In the example, your device needs to be able to directly access the relevant service on `192.168.1.10`, otherwise data reporting will fail.
```python
app.attach_script(script, emit="redis://192.168.1.10/0")
```
You can also set it up like this, so your data will be submitted to an HTTP endpoint instead of Redis (HTTPS is supported).
```python
app.attach_script(script, emit="http://192.168.1.10/dataReport")
```
When the data you are reporting is large, enabling compression can significantly improve network transmission throughput. You can use `encode` to enable the data compression feature. Of course, you will then need to decompress the reported data.
```python
app.attach_script(..., encode=DataEncode.DATA_ENCODE_ZLIB)
```
## Decompressing Reported Data
By default, reported data is not compressed. If you have enabled reporting compression, you will also need to use zlib encoding on the receiving end to decompress the reported data. You can conveniently decompress the data using the `decompress` method from Python's official zlib library.
```python
zlib.decompress(data)
```
## Removing the Reporting Script
Removing the reporting script is a simple process, the same as with persistent scripts.
```python
app.detach_script()
```
--- END OF frida-report.md ---
--- DOCUMENT: frida-usage.md ---
--- SOURCE: https://device-farm.com/docs/content/en/frida-usage.md ---
# Using the Built-in Frida
FIRERPA has the latest version of Frida built-in, so you don't need to start frida-server yourself. Our built-in Frida already includes various open-source anti-detection patches and our own additional hiding features, so you don't have to worry about Frida being detected. If our built-in Frida is detected, it means that almost all frida-server versions you can download will also be detected. So please use it with confidence; you don't need to worry about these miscellaneous details.
```{hint}
Starting from FIRERPA version 7.18, the built-in FRIDA requires a token parameter to connect. Of course, the client library has already handled everything for you. If you are using a version prior to 7.18, please refer to the [documentation for older versions](https://github.com/firerpa/lamda/tree/5.0#连接内置的-frida) for usage instructions.
```
```{attention}
Starting from version 9.0, our built-in Frida 17.x will require you to package `frida-java-bridge` into your scripts yourself. Otherwise, you will encounter errors like `Java not defined`. This is an official change from Frida. According to the official change notes, you need to create a new Node.js project and include the Java bridge. For details, please refer to https://github.com/oleavr/frida-agent-example or use our provided `tools/frida_script_generate.py` to re-package your original JS scripts.
```
## Using via Code
With the FIRERPA client API, you can simply use `d.frida` as shown below to get an instance connected to the frida-server, without needing to construct the connection yourself using the Frida library.
```python
conn = d.frida
conn.enumerate_processes()
```
Of course, if you want to understand the underlying implementation, you can refer to the following code.
```python
# Get the dynamic token
token = d._get_session_token()
manager = frida.get_device_manager()
conn = manager.add_remote_device("192.168.0.2:65000", token=token)
conn.enumerate_processes()
```
The rest is up to you. You have now successfully obtained the instance.
## Using via Command Line
Using it via the command line might be slightly more complex because we also need to ensure the security of your device. We also want to remind you not to be limited by the commands found in other articles.
You need to be aware that many articles show Frida commands with a `-U` parameter. We don't use it here, so if you can't connect, make sure your command strictly follows the examples.
Before we begin, we highly recommend using commands like `frida`, `frida-itrace`, `frida-trace`, and `frida-ps` through the remote desktop. In that environment, you don't need to do anything extra; you can just execute `frida` without providing any other connection parameters like `-U` or `-H`.
Since you're reading this far, it means you still want to use the command from your computer. Now, you need to gather some information based on your setup.
If your FIRERPA was started with a service certificate, you'll need to have that file ready. Additionally, you need the IP address of the device you want to connect to and the FIRERPA service port (default is 65000). Note that this is not Frida's 27042 port, but the FIRERPA service port. You only need to connect to FIRERPA.
First, you need to use the API to get the current token. This token is a fixed 16-character string, like `czvpyqg82dk0xrnj`. We understand this method might be a bit cumbersome and may make some usability improvements later. This is also why we recommended using Frida commands on the remote desktop earlier.
```python
token = d._get_session_token()
print (token)
```
Now that you have obtained a token from the API above, let's assume it is `czvpyqg82dk0xrnj`. We can now start writing the Frida command.
For all official Frida command-line tools, you just need to add the parameters `-H 192.168.0.2:65000` and `--token xxxxxxxxxxxxxxxx`. For example, like this: **Please pay very, very, very close attention** that there is no `-U` parameter here.
```bash
frida -H 192.168.0.2:65000 -f com.android.settings --token xxxxxxxxxxxxxxxx
```
If your FIRERPA server was started with a service certificate, you also need to add the `--certificate` parameter to the command.
```bash
frida -H 192.168.0.2:65000 -f com.android.settings --certificate /path/to/lamda.pem --token xxxxxxxxxxxxxxxx
```
You may have noticed there are three differences: `-U` is replaced with `-H` because we need to connect over the network instead of USB; the `--token` parameter is added; and if the server uses a service certificate, the `--certificate` parameter is also added. This is to ensure the security of your device and prevent unauthorized access.
## Using via Command Line (objection)
For other tools like objection, similar parameters are usually available. However, most non-standard tools do not fully implement these parameters. Currently, we have only patched objection. This patch does not affect its original usage. However, since objection has not been updated for a long time, we are not pushing the changes upstream. You can download our provided [objection-1.11.0-command-patch.diff](https://github.com/firerpa/lamda/blob/8.0/tools/objection-1.11.0-command-patch.diff) and apply this patch to your installed objection code directory (you can find the installation path with the `pip3 show objection` command).
After that, you can use it as follows. You'll see that only a `--token` parameter has been added.
```bash
objection -N -h 192.168.0.2 -p 65000 --token xxxxxxxxxxxxxxxx explore
```
Alternatively, if the server was started with a service certificate, you also need to add `--certificate` to the command.
```bash
objection -N -h 192.168.0.2 -p 65000 --certificate /path/to/lamda.pem --token xxxxxxxxxxxxxxxx explore
```
## Exposing Application Interfaces
This section has been moved to the `Using Frida to Export Interfaces` chapter.
--- END OF frida-usage.md ---
--- DOCUMENT: home.md ---
--- SOURCE: https://device-farm.com/docs/content/en/home.md ---
# Quick Start
This guide will walk you through the quickest way to get started. Before we begin, please ensure you have an Android phone with root access.

```{hint}
You should ensure that you are always using the latest version of the software. The documentation is structured progressively; you should read it sequentially starting from the first chapter.
```
Now, please click the link to download our auto-run application: [lamda-autorun.apk](https://lamda-assets.s3.bitiful.net/release/latest/lamda-autorun.apk). After installation, open the app and `grant root permissions`. Wait for the automatic installation to complete, then turn on the `Auto-start switch`, and reboot your device. (If your device has settings that restrict auto-start on boot, please add our app to the auto-start whitelist; otherwise, the service may not start correctly).
After rebooting the device, we recommend waiting for 1-2 minutes. Then, open your Wi-Fi settings and find the local IP address of this device in the WLAN settings, such as `192.168.1.8`. Now, open a browser on your computer and enter the URL `http://192.168.1.8:65000`. If everything is correct, you should be able to access the FIRERPA remote desktop as shown below. At this point, you have completed a major step.
```{tip}
If you still cannot connect after rebooting, you may need to check for network connectivity (e.g., emulator bridging). The Installation and Preparation chapter details the required settings for each platform. If all settings are correct, try running the command `adb shell su root sh /data/server/bin/launch.sh` to start the service manually, which can help rule out issues with the APK's auto-start functionality.
```
```{hint}
When in doubt, read the docs. If still clueless, ask in the group. You can find our contact information in the Service and Support chapter.
```
Of course, this only covers the basic installation and the remote desktop feature. We offer much more than just this. There are many more APIs and tools available for you to use. You can continue exploring the rest of the documentation to learn more!
--- END OF home.md ---
--- DOCUMENT: ida-debug.md ---
--- SOURCE: https://device-farm.com/docs/content/en/ida-debug.md ---
# Debugging Applications with IDA
This chapter will introduce you to how to quickly debug Android applications using FIRERPA and its related features and scripts. Our demonstration environment is Android 10, with a host system of Ubuntu 22.04, and tools such as IDA 7.5 (wine), ADB, jdb, and Python are already installed. It is recommended that your IDA version be 7.5 or higher, and that you have the latest version of the FIRERPA server installed.
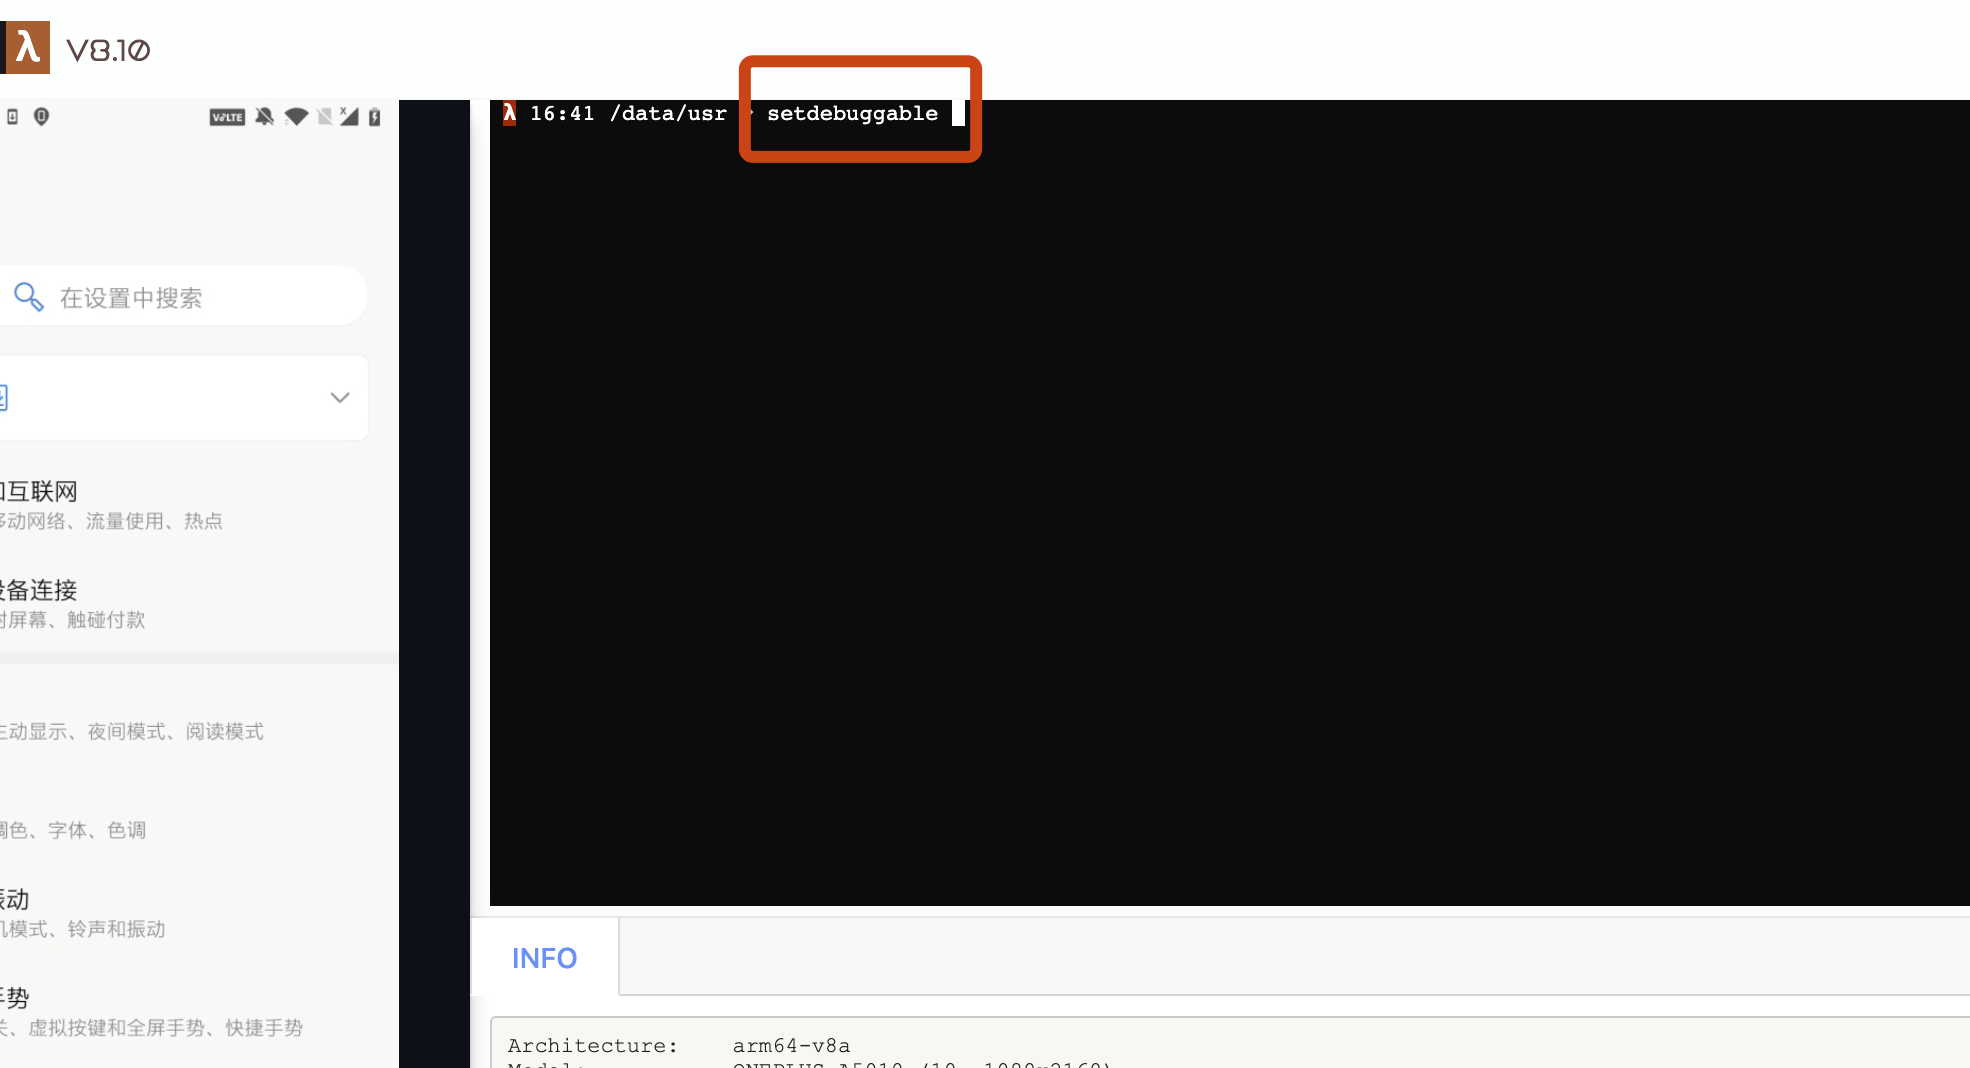
## Set to Debuggable Mode
Before proceeding, if your system is already in debug mode, you can skip this step. Otherwise, please open the FIRERPA remote desktop, enter `setdebuggable` in the terminal. After entering the command, your phone will perform a soft reboot. Don't worry, it will return to normal in about two minutes. At this point, your phone will be in debuggable mode.
## Install IDA Debugging Server
Before you continue debugging, you also need to upload the Android debugging server that comes with IDA to your device. You can find `android_server` and `android_server64` in the `dbgsrv` directory of your IDA installation. If the target application you are debugging uses 32-bit libraries, please use `android_server`; otherwise, use `android_server64`. Drag and drop the required file or use `adb push` to upload it to the Android device, and then grant it executable permissions.
```bash
chmod 755 android_server*
```
After granting executable permissions, you need to start the android_server service. You can run this executable via adb (requires root privileges) or the remote desktop terminal. For higher versions of the system (>=10), you need to set the `IDA_LIBC_PATH` environment variable beforehand.
```bash
IDA_LIBC_PATH=/apex/com.android.runtime/lib64/bionic/libc.so ./android_server64 -kk
```
```{note}
For debugging 32-bit applications, you need to change `IDA_LIBC_PATH` to `/apex/com.android.runtime/lib/bionic/libc.so` and use the 32-bit `android_server` debugging service.
```
## Forward IDA Debugging Service
For debugging scenarios that require high real-time performance, we recommend using a USB connection. Please ensure that your device is connected to the current computer and that adb authorization has been granted, then execute the following command.
```bash
adb forward tcp:23946 tcp:23946
```
```{note}
23946 is the default listening port for IDA's android_server. If you changed this port when starting android_server, please specify the new port.
```
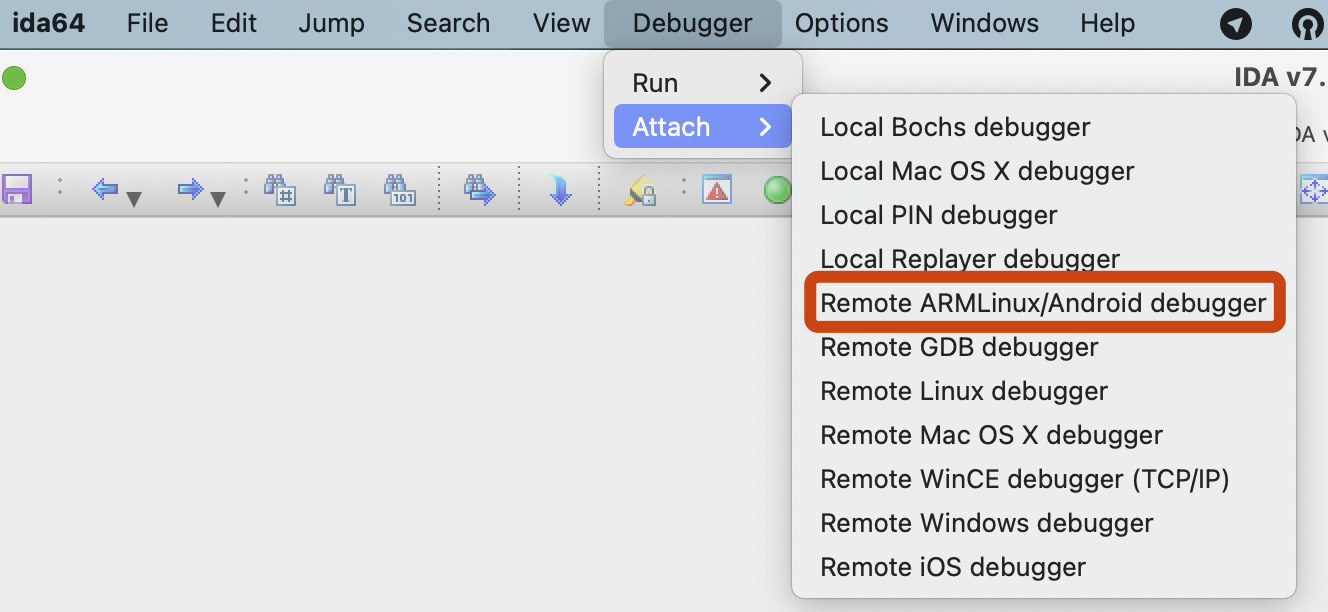
## Start Application Debugging
We haven't done much work, just encapsulated a script for you that can help automate most of the subsequent operations. Just follow the prompts from the script's output. You can find the `ida.py` script in the project's `tools` directory. Use the following command to run it.
```bash
python3 ida.py -d 192.168.0.2 -a com.android.settings
```
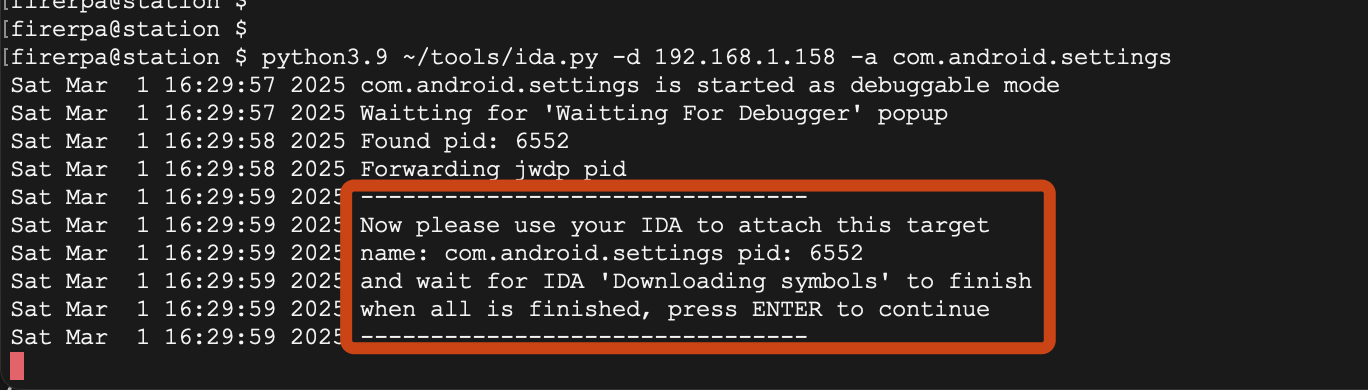
Here, the `-d` parameter is your device's IP, which is the IP of the device running the FIRERPA service, and the `-a` parameter is the application's package name. After executing the command, you will be prompted to attach your IDA software to the application process.
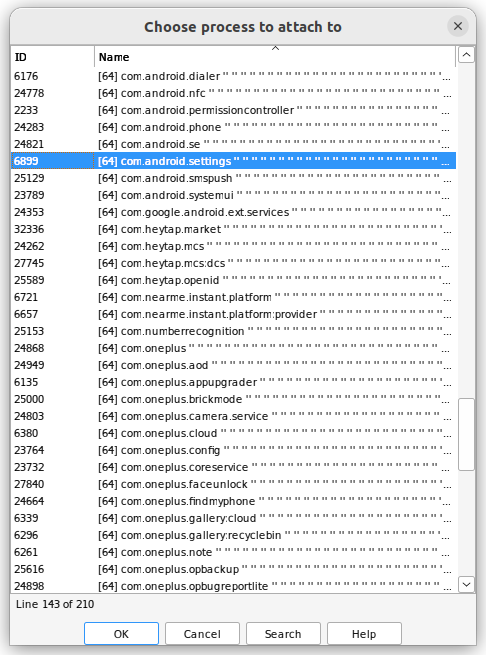
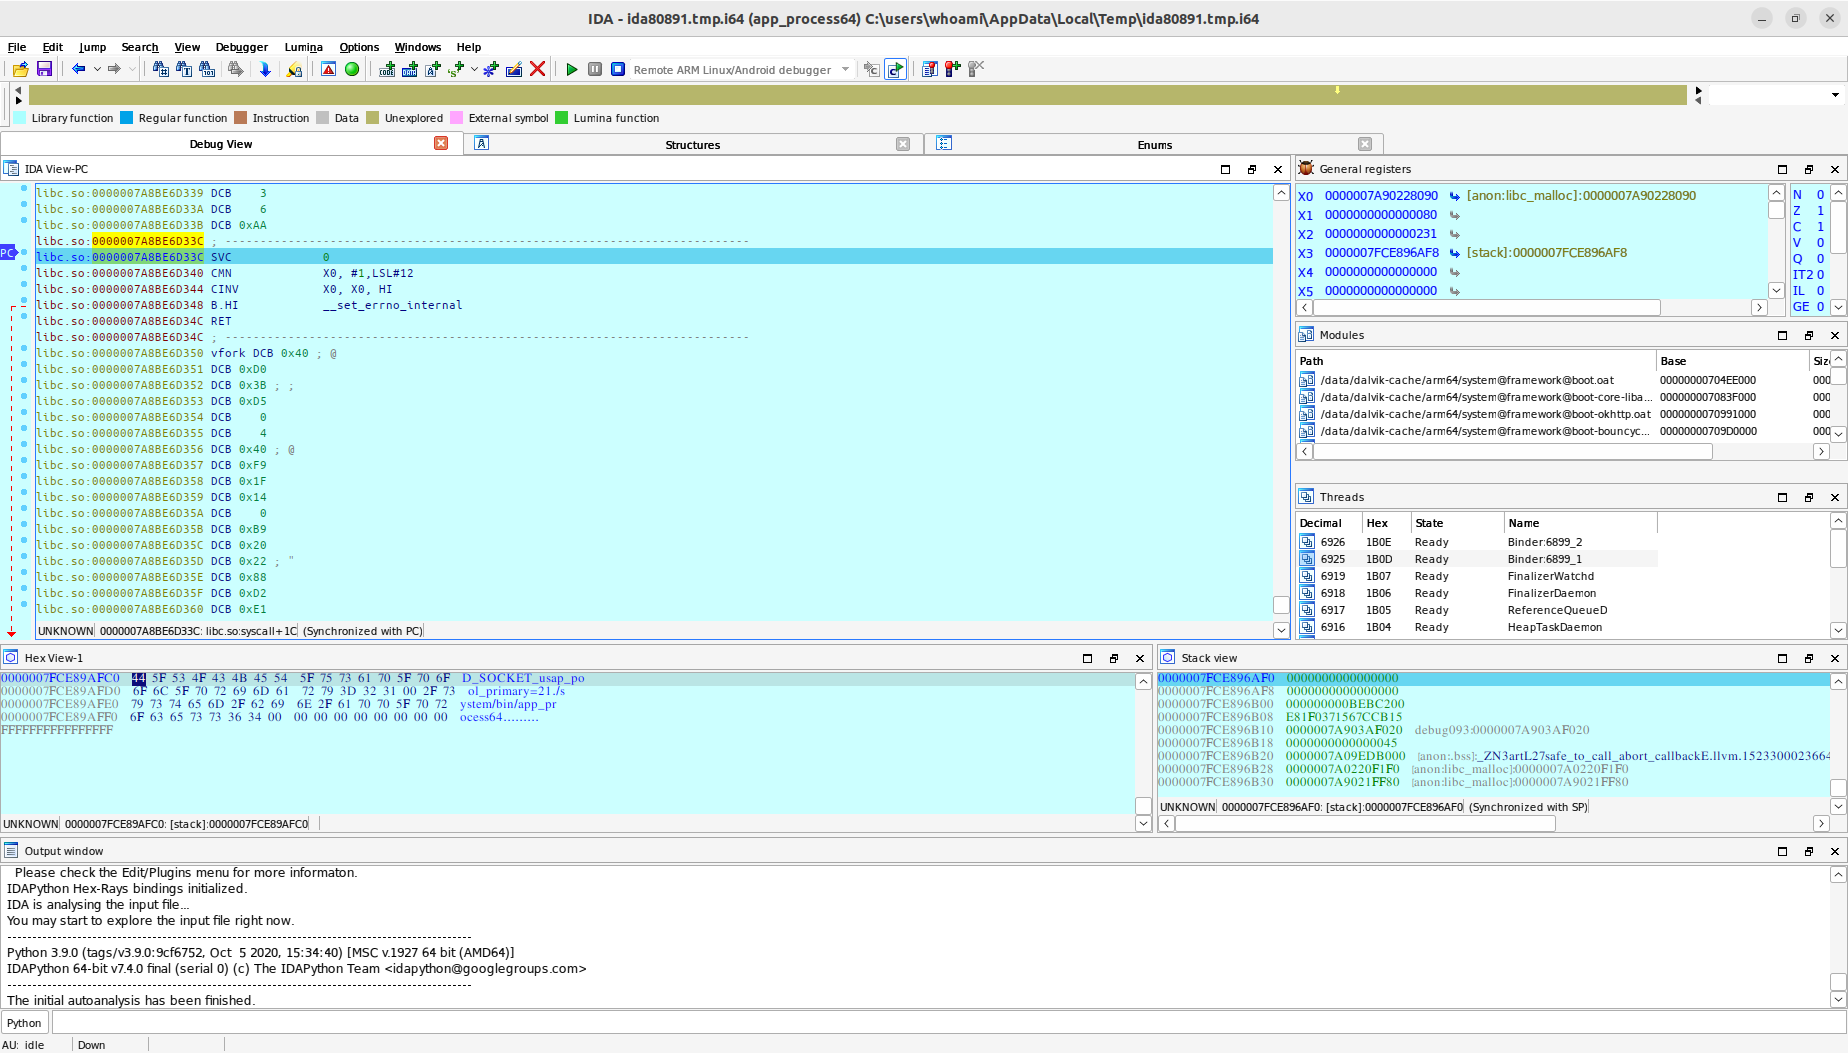
Alright, the entire process is complete. Please return to the `ida.py` command line and press the Enter key. You can now continue debugging.
--- END OF ida-debug.md ---
--- DOCUMENT: image-match.md ---
--- SOURCE: https://device-farm.com/docs/content/en/image-match.md ---
# Image Matching Operations
This chapter introduces how to use template matching to find and click elements. FIRERPA supports both template matching and feature point matching (SIFT). Before you begin, you need to understand the basics of image matching. Image matching is divided into template matching and feature point matching. Template matching is suitable for devices with the same resolution and is more efficient. Feature point matching is suitable for screens with different resolutions, but some thresholds may need to be fine-tuned according to the screen size of different devices.
```{hint}
All matching processes are performed on the FIRERPA server and do not consume local machine resources. However, due to performance limitations on mobile devices, the efficiency is relatively low. For performance-critical tasks, you can take screenshots and perform matching on your local machine.
```
## Matching API
The image matching API is a slightly complex interface, but in most cases, you only need to adjust the `threshold` and `distance` parameters. You can find the meaning of each parameter in the parameter descriptions below. The main form of the API is as follows. By default, it performs a full-screen match using the template matching method. This API is primarily designed to save your host's computing resources. If you have specific requirements for performance or recognition results, you can also use the screenshot API to perform matching yourself.
```python
d.find_similar_image(data, threshold=0.0, distance=250, scale=1.0, area=FindImageArea.FIA_WHOLE_SCREEN, method=FindImageMethod.FIM_TEMPLATE)
```
| Field | Description |
| ----------- | ----------- |
| data | Byte data of the image to be matched (template image) |
| threshold | Discard threshold (similarity) |
| distance | Maximum feature point distance (for feature matching only) |
| scale | Scale matching (improves performance, not applicable to template matching) |
| area | Matching area (restricting the area improves performance) |
| method | Matching method |
## Matching Methods
The matching methods support both template and feature point matching. Template matching is suitable for situations where the texture is distinct and the target shape is fixed, but it is not robust against rotation, scale changes, and lighting variations. Feature point matching works by detecting image feature points such as corners and edges, describing these features, and then matching them between two images. It is highly robust against rotation, scale changes, and lighting variations, making it suitable for complex matching tasks.
| Matching Method | Description |
| ----------- | ----------- |
| FindImageMethod.FIM_TEMPLATE | Template matching |
| FindImageMethod.FIM_FEATURE | Feature point matching |
## Matching Area
The matching area is mainly used to balance performance on mobile devices. In most cases, the item to be matched is in a fixed area of the screen. You can specify its area to reduce the image size, thereby decreasing the computational load during matching.
| Matching Area | Description |
| ----------- | ----------- |
| FindImageArea.FIA_WHOLE_SCREEN | Full-screen matching |
| FindImageArea.FIA_LEFT | Match the left half of the screen |
| FindImageArea.FIA_TOP_LEFT | Match the top-left corner of the screen |
| FindImageArea.FIA_TOP | Match the top half of the screen |
| FindImageArea.FIA_TOP_RIGHT | Match the top-right corner of the screen |
| FindImageArea.FIA_RIGHT | Match the right half of the screen |
| FindImageArea.FIA_BOTTOM_RIGHT | Match the bottom-right corner of the screen |
| FindImageArea.FIA_BOTTOM | Match the bottom half of the screen |
| FindImageArea.FIA_BOTTOM_LEFT | Match the bottom-left corner of the screen |
--- END OF image-match.md ---
--- DOCUMENT: install-mitm-cert.md ---
--- SOURCE: https://device-farm.com/docs/content/en/install-mitm-cert.md ---
# Install System Root Certificate
This API is used to install a system-level root certificate within your Android system and is compatible with all Android versions.
You might be confused about the difference between the root certificate mentioned here and FIRERPA's service certificate. The FIRERPA service certificate is used to encrypt the communication traffic between FIRERPA and you, while the root certificate referred to here is a root certificate for the Android system. This certificate is used for the encryption and decryption of traffic such as HTTPS within the system. If you are familiar with packet sniffing, the root certificate here is the certificate used for that purpose. You can implement man-in-the-middle (MITM) packet sniffing by using the API in this chapter combined with the set proxy API. Of course, you can also choose to use our pre-packaged `startmitm.py` script. We are only introducing the implementation of this basic feature here.
## Prerequisites
Please ensure you have the certificate provided by Fiddler or mitmproxy ready. For mitmproxy, the certificate you should use is `mitmproxy-ca-cert.pem`. For Fiddler, it might be in CRT format. You should be able to export this file from Fiddler. Simply provide the file path as an argument; you don't need to worry about any filename conversion issues. To avoid wasting unnecessary time, we recommend using `mitmproxy`. If you are using tools like `Charles`, we cannot guarantee that you can complete the setup in one go, because the configuration for such applications is more complex, and you may need to understand various proxy types to correctly configure an HTTPS MITM proxy. If you must use it, we recommend using Charles's SOCKS5 as the proxy protocol.
## Install Root Certificate
Once you have the path to your prepared certificate file, you can directly use the following API to install the mitmproxy root certificate. Once installed, it will persist permanently and does not need to be reinstalled.
```python
d.install_ca_certificate(cert_path)
```
## Uninstall Root Certificate
You can call the following code to remove the custom root certificate installed on the device. We do not recommend frequent installation and uninstallation. If it's not necessary, you don't need to call this API.
```python
d.uninstall_ca_certificate(cert_path)
```
The complete code is as follows (we will not repeat the instantiation of the `d` device instance):
```python
import os
# Construct the path to the mitmproxy-ca-cert.pem file
HOME = os.path.expanduser("~")
cert_path = os.path.join(HOME, ".mitmproxy", "mitmproxy-ca-cert.pem")
# Taking mitmproxy as an example, use the following code to install the MITM certificate
d.install_ca_certificate(cert_path)
# Use the following code to uninstall the certificate
d.uninstall_ca_certificate(cert_path)
```
This certificate installation/uninstallation API is generic. You can use it to install any certificate that an application requires you to install. You can also use it to install the certificates required by Fiddler/Charles; just provide the file path. If you intend to sniff packets, you can then refer to the `Set Proxy` chapter and set the proxy to the address monitored by the MITM application.
--- END OF install-mitm-cert.md ---
--- DOCUMENT: install-prepare.md ---
--- SOURCE: https://device-farm.com/docs/content/en/install-prepare.md ---
# Installation Preparation
This installation preparation document describes the things you should prepare before installation. FIRERPA supports a wide range of device types and architectures. Here, we list the preparatory operations required for various common devices. You can decide which method to use based on your actual situation. FIRERPA is divided into a client and a server. The client mainly consists of Python-related libraries and interfaces, while the server is a service that runs on the target mobile phone. You can choose to install the Python library on your computer to control the phone. Similarly, if you need to control the device via Python, you must install and run the Android server on the phone; this is mandatory.
## Basic Requirements
The ideal running environment for FIRERPA is a freshly rooted device (e.g., a new emulator, a ROM with built-in root permissions, or a device just rooted with Magisk). Please ensure you have a rooted Android device or emulator with more than 2GB of RAM and more than 1GB of available storage space. We recommend using the latest versions of NoxPlayer, LDPlayer, or AVD emulators. Before starting, **be sure to check** the following items:
- [X] Disable Magisk Hide
- [x] Stop frida-server
- [X] After confirming, restart the device
```{important}
If you do not perform the above operations as required, existing compatibility issues may prevent you from using FIRERPA interfaces or the remote desktop properly.
```
## System Settings
Usually, your phone also needs the following settings. These are not mandatory, but to ensure a successful first attempt, it is recommended that you complete the following settings if you have time.
### Check Time Zone and Time
Open System Settings, find Date & Time, and check if **China Standard Time** or your local time zone is set automatically. Check if the time is correct or within an acceptable margin of error. If not, please disable **Use network-provided time zone** and **Use network-provided time**, and manually set the time zone and time to your current local ones.
### Disable Accessibility Services
Open System Settings, find Accessibility (in System or More settings), and disable or uninstall all applications that use accessibility services (e.g., TalkBack, Auto.js, etc.).
```{note}
Accessibility services may cause functional conflicts. Check this only if you are unable to use the FIRERPA remote desktop or related interfaces properly.
```
## Network Settings
The network conditions for physical devices, cloud phones, and emulators vary. You need to configure the settings according to your specific situation; otherwise, you will not be able to access the service properly after installation.
For physical devices, just ensure that the computer and the phone are on the same network. For emulators, the default created emulator is usually not on the same network as your host machine. If you are using Android-x86 (an Android virtual machine based on VMware), try setting the network mode to Bridged Mode in the virtual machine settings. For emulators like LDPlayer and NoxPlayer, you need to install the driver and enable Bridged Mode in their settings as prompted, then restart the emulator. For Android Studio's Virtual Device, there are no related settings. If you need to connect to an AVD, first execute `adb forward tcp:65000 tcp:65000` and connect using `localhost`.
```{note}
For service ports that are forwarded or originally bound to the loopback address, we recommend using `localhost` instead of `127.0.0.1`. This is because some of our related tools, such as man-in-the-middle packet sniffers, use `localhost` to determine if the connection is USB-based.
```
## Other Settings
### WSA (Windows Subsystem for Android)
If you are using WSA (Windows Subsystem for Android), ensure that the WSA version is not lower than 2210.40000 and that it is rooted. Then, open WSA Settings -> Subsystem Resources -> select Continuous, and turn off Advanced Networking. Select Developer, enable Developer mode and expand the tab, turn on "Support single machine UI automation", and then restart the WSA subsystem.
### AVD (Android Studio Virtual Device)
If you are using AVD (Android Studio Virtual Device), first increase the default storage space and memory size.
In Android Studio, click on the Virtual Device Manager, create a new virtual device, then find the corresponding device and click the edit button (a pencil icon) next to it. Click Show Advanced Settings, find Storage -> Internal Storage and set it to at least 2GB, and set the RAM size to at least 4GB.
### Redroid (android in docker)
```{attention}
The following method may not be applicable to other Linux distributions.
```
If you are using Redroid (android in docker), taking the officially recommended `Ubuntu 20.04` as an example, first install the relevant linux-modules-extra modules.
```bash
apt install linux-modules-extra-`uname -r`
```
Edit the `/etc/modules` file, copy the following names and insert them at the bottom of the file, then restart the host machine.
```bash
# redroid modules
mac80211_hwsim
binder_linux
ashmem_linux
```
Finally, use the following command to start. Please modify `redroid_gpu_mode` and other related parameters according to your actual situation.
```{attention}
Note that the following command is different from the one provided in the official documentation. Please be sure to use the command as shown below.
```
```bash
docker run -itd --rm --privileged --pull always -v /lib/modules:/lib/modules:ro -v ~/redroid:/data -p 127.0.0.1:5555:5555 -p 127.0.0.1:65001:65000 redroid/redroid:12.0.0-latest androidboot.redroid_gpu_mode=guest
```
In the command above, the container's port 65000 is mapped to the host's port 65001 because some tools need to temporarily bind to port 65000 on the host. To avoid conflicts, we use port 65001.
```{note}
The Android container started with the above command needs to be accessed on the host machine via `http://127.0.0.1:65001`.
```
--- END OF install-prepare.md ---
--- DOCUMENT: install-server.md ---
--- SOURCE: https://device-farm.com/docs/content/en/install-server.md ---
# Installing the Server
This chapter explains how to install the FIRERPA server, which is the most crucial component and the fundamental underlying service. You can choose to install it via the AUTORUN APP (supports auto-start on boot), as a Magisk module (supports auto-start on boot), or manually. The installation difficulty corresponds to the order in which they are listed.
```{important}
By default, FIRERPA is installed without any authentication enabled, allowing anyone to access any content on the device. Please refer to the section on enabling service certificates to selectively enable them. If you do not enable them, be sure to use FIRERPA only on a trusted network.
```
```{attention}
For security reasons, we do not recommend placing any related files, such as the server or configuration files, in the `/data/local` directory.
```
## Installation via APP
We will introduce the simplest method first. This installation method is the easiest and doesn't require any extra steps. You just need to install our automatic installation and auto-start APK. However, you still need to ensure that your phone has root permissions (su). On some phone models, the default auto-start behavior for APKs may be disabled. In this case, you may need to find the relevant settings and allow our APK to auto-start.
Click to download our FIRERPA auto-start application [lamda-autorun.apk](https://lamda-assets.s3.bitiful.net/release/latest/lamda-autorun.apk). After installation, open the app, grant root permissions, enable the auto-start switch, wait for the installation to complete, and then restart your device. If you have completed this successfully, you do not need to continue with the rest of this chapter.
## Get Device Architecture
Because FIRERPA supports multiple CPU architectures, downloading the wrong server version will prevent it from running correctly. Therefore, before installation, you need to get your device's architecture. You can execute the following command to get it.
```bash
getprop ro.product.cpu.abi
```
Typically, for modern physical phones, this command outputs `arm64-v8a`. For emulators like LDPlayer, you choose a 32-bit or 64-bit version of Android when creating a new instance.
A 32-bit emulator system corresponds to `x86`, and a 64-bit one corresponds to `x86_64`. Some older Xiaomi models are `armeabi-v7a`. Please remember this output value for now.
## Startup Configuration File
Please refer to the `properties.local Configuration` chapter for information on how to write the startup configuration. This will also be covered in the sections for various features.
## Installation via Magisk
If your device uses Magisk, you can complete the installation using the simplest method, and FIRERPA can **auto-start on boot**. Ensure your Magisk version is >= 20.4 and that you install it only through the **Magisk App**.
Now, download `lamda-magisk-module.zip` from the [lamda/releases](https://github.com/firerpa/lamda/releases) page, push it to `/sdcard`, open the Magisk App, tap Modules -> Install from storage, select `lamda-magisk-module.zip`, and wait for a moment.
```{tip}
If you encounter any ERROR during the process and the installation fails, it might be because our module zip file is too large. Use an archive manager to open the zip file and delete the server files for the architectures you don't need from the `server` directory, then try installing again. Do not extract and re-compress; perform the operation directly within the archive manager.
```
After flashing successfully, please restart your device. After rebooting, FIRERPA should start automatically on boot. However, to avoid potential crashes, lamda will start after a 30-second delay instead of immediately, giving you enough time to disable the FIRERPA module if needed (please wait 2 minutes after booting before connecting to FIRERPA).
You can also use a custom configuration. For example, if you want all FIRERPA instances installed with this Magisk module to have API service certificates enabled, or if you want these devices to automatically connect to a proxy on startup, you just need to write a `properties.local` file or generate a PEM certificate and rename it to `lamda.pem` (please see the usage instructions for the tools in `tools/`). Then, use an **archive manager** to open `lamda-magisk-module.zip` and drag your configuration files (`lamda.pem` or `properties.local`) into the `common` folder. This will apply the configuration automatically on startup.
```{attention}
Do not extract and re-compress. Perform the drag-and-drop operation directly in the archive manager, otherwise the module will not function correctly.
```
After the installation is complete, you can skip the following section on manual installation.
## Manual Installation
Since some older devices may not be able to extract `.tar.gz` files using the system's `tar` command, we provide `busybox` as a supplement. You may need to download the provided busybox as well. Assuming the device architecture is known to be `arm64-v8a`, connect the device to your computer and ensure that ADB is authorized and you can switch to root.
From the [lamda/releases](https://github.com/firerpa/lamda/releases) page, download `lamda-server-arm64-v8a.tar.gz` and `busybox-arm64-v8a`, and push the files to the temporary directory `/data/local/tmp`.
```{tip}
This section only covers how to manually unpack and install the server. The startup process is described in another chapter.
```
```bash
adb push lamda-server-arm64-v8a.tar.gz /data/local/tmp
adb push busybox-arm64-v8a /data/local/tmp
```
Once done, enter `adb shell`, run `su` to switch to the root user, and then execute the following commands:
```bash
chmod 755 /data/local/tmp/busybox-arm64-v8a
/data/local/tmp/busybox-arm64-v8a tar -C /data -xzf /data/local/tmp/lamda-server-arm64-v8a.tar.gz
rm /data/local/tmp/lamda-server-arm64-v8a.tar.gz
rm /data/local/tmp/busybox-arm64-v8a
```
After all commands have been executed correctly, the installation is complete. Please proceed to the `Starting the Server` chapter to learn how to start the service.
--- END OF install-server.md ---
--- DOCUMENT: kv-store.md ---
--- SOURCE: https://device-farm.com/docs/content/en/kv-store.md ---
# Storage Configuration
The Storage configuration is a built-in, persistent key-value store in FIRERPA. Even if FIRERPA or the device restarts, you can still read these variables on the next startup. This Storage allows you to persistently store information on the device for different client processes to read, which can be used to share device configurations such as login accounts or other independent information. You can even store encrypted configurations on the machine.
```{attention}
The total capacity of the built-in Storage is 128MB. Please do not use it to store large amounts of data. It does not support listing the container names or key names that exist in the storage. You must know the complete container name and key name to read a value from the container; otherwise, it will be impossible to retrieve.
```
## Get Storage
You can get a Storage object using the following code to perform subsequent operations.
```python
storage = d.stub("Storage")
```
## Clear Storage
You can use the following code to clear all information in the Storage, including all containers. You can think of this as formatting the Storage.
```python
storage.clear()
```
## Get Container
You can get a key-value storage container object using the following code. The Storage is the main store, and a container is like a bucket within it. All subsequent read and write operations are performed on this bucket.
```python
container = storage.use("container_name")
```
## Get Encrypted Container
If you need to store values securely, for example, when the device might be used by others and you don't want your stored configurations to be read by them, you can use an encrypted container. Unlike a simple container, an encrypted container will encrypt the key-value pairs you set. Others will need a password or other verification to read them correctly.
Our library comes with a built-in `FernetCryptor` for encryption and decryption. You can also implement your own unique encryption algorithm following the `FernetCryptor` pattern. You only need to implement the `encrypt` and `decrypt` methods.
```python
from lamda.client import FernetCryptor
container = storage.use("container_name", cryptor=FernetCryptor,
key="this_is_password")
```
## Delete Container
You can use the following code to clear all key-value pairs stored in the container named `container_name`. This operation is equivalent to deleting the bucket.
```python
storage.remove("container_name")
```
## Write Key-Value to Container
You can use the following example calls to set the value of `key_name`. The value can be any variable that is serializable by msgpack.
```python
container.set("key_name", [1, 2, 3])
container.set("key_name", {"john": "due"})
container.set("key_name", b"value")
container.set("key_name", "value")
```
## Read Key-Value from Container
You can use the following method to get the value of `key_name`. If it does not exist, `None` is returned.
```python
container.get("key_name")
```
## Get Time to Live (TTL)
You can use the following call to get the time to live (TTL) of `key_name`. A return value of -2 means the key does not exist, -1 means it never expires, and any other positive integer represents the remaining lifetime of the key in seconds.
```python
container.ttl("key_name")
```
## Set Time to Live (TTL)
You can use the following call to set the time to live for a key-value pair. For example, the following call will set the key-value pair and cause it to be automatically deleted after 10 seconds.
```python
container.setex("key_name", "value", 10)
```
Alternatively, if you have already set a key and now want to set its expiration time, you can use the following method. `key_name` will be automatically deleted after 60 seconds.
```python
container.expire("key_name", 60)
```
## Conditional Write
You can use the following call to set the key-value pair only if `key_name` does not already exist. If it exists, no action is taken.
```python
container.setnx("key_name", "value")
```
## Check for Existence
You can use the following call to check if `key_name` exists in the container.
```python
container.exists("key_name")
```
## Delete Key-Value from Container
You can use the following call to delete `key_name` and its value from the container.
```python
container.delete("key_name")
```
--- END OF kv-store.md ---
--- DOCUMENT: mobile-agent.md ---
--- SOURCE: https://device-farm.com/docs/content/en/mobile-agent.md ---
# Mobile Proxy Service
The term "Mobile Proxy Service" might not be immediately clear. To put it simply, FIRERPA has a built-in HTTP proxy server. You can use this HTTP network proxy to access other sites through the mobile device's network.
For instance, you might want to perform network tests or troubleshoot issues from the same network IP as the device. FIRERPA's proxy feature allows you to use the device running FIRERPA as an HTTP network proxy server. This means you can use this feature to turn the mobile device into a proxy server, routing communication traffic through this device's network exit point. Alternatively, if you are capturing packets but don't want the traffic to originate from your local computer, you can set this proxy service as an upstream proxy for mitmproxy. This way, you can capture the packets while all communication traffic is still sent from the original device. Another use case is utilizing the idle networks of a large number of devices for IP proxy services.
## Using the Proxy
You can configure the proxy in Firefox by going to Settings -> Manual proxy configuration, setting the proxy to `192.168.0.2` with port `65000`, and checking `Also use this proxy for HTTPS`. This will give your Firefox the same outbound IP as the device.
You can also quickly try it out with the following curl command:
```bash
curl -x http://192.168.0.2:65000 https://httpbin.org/ip
```
You can also use it with Python requests:
```python
requests.get("https://httpbin.org/ip", proxies={"http":"http://192.168.0.2:65000", "https": "http://192.168.0.2:65000"})
```
By default, this proxy requires no authentication. However, when you start it with `--certificate` (using a service certificate), the login username is `lamda`, and the password is the same as the remote desktop login token (note: this is the password from the service certificate file, not a custom password for the remote desktop). You can also set this password yourself by customizing `tunnel2.password` in `properties.local`.
For the case of using a service certificate as described above, use it as follows:
```bash
curl -x http://lamda:certificate_password@192.168.0.2:65000 https://httpbin.org/ip
```
Similarly, for Python requests, the format is as follows:
```python
requests.get("https://httpbin.org/ip", proxies={"http":"http://lamda:certificate_password@192.168.0.2:65000", "https": "http://lamda:certificate_password@192.168.0.2:65000"})
```
## Configuring the Proxy
You can configure the mobile proxy feature by writing the following configuration in `properties.local`. You can set up password authentication or make it send requests through the `rmnet` (4G/5G mobile network) interface instead of the default outbound network interface.
```ini
tunnel2.login=lamda
tunnel2.password=your_new_password
```
The outbound interface `iface` configuration is used to set the exit network for the mobile proxy. It has two configurable values: `wlan` and `rmnet`. When the `iface` value is `wlan`, it will automatically detect available wlan interfaces and select one to send requests.
When `iface` is `rmnet`, it will attempt to enable mobile data (4G/5G, even if Wi-Fi is on) and send requests from the mobile network interface. If configured as `rmnet` or `wlan` but the corresponding interface has no network connectivity, the proxy will be unavailable.
If this setting is not configured, requests will be sent using the default network.
```ini
tunnel2.iface=rmnet
```
--- END OF mobile-agent.md ---
--- DOCUMENT: model-extension.md ---
--- SOURCE: https://device-farm.com/docs/content/en/model-extension.md ---
# Model Integration (MCP/Agent)
This article explains how to connect FIRERPA with large language models (based on MCP or commands). FIRERPA has implemented the MCP server protocol and native OpenAI tool-calling functionality at its core, allowing you to write your own MCP plugins and serve them through the standard port 65000, or inherit the Agent class to achieve fully automated tool calls.
## Built-in Agent Command
The built-in `agent` command allows you to quickly complete tasks using natural language through a large language model. It supports any service provider compatible with the OpenAI API + tool-calling, or self-hosted services. Combined with the built-in crontab, you can schedule natural language tasks to run at specific times.
```{hint}
The `agent` command must be used within the built-in terminal, and you need to provide a valid API endpoint and key. The performance of different large language models may vary, so please choose the one that best suits your needs. We recommend models like Gemini, OpenAI, DeepSeek, GLM, etc.
```
| Parameter Name | Type | Required | Default | Description |
| :--- | :--- | :--- | :--- | :--- |
| `--api` | String (str) | Yes | - | API endpoint |
| `--model` | String (str) | Yes | - | Model name |
| `--temperature` | Float (float) | No | `0.2` | Model sampling temperature |
| `--key` | String (str) | Yes | - | API key for authentication |
| `--vision` | Boolean (bool) | No | `False` | Whether to enable vision mode |
| `--imsize` | Integer (int) | No | `1000` | Image size in vision mode |
| `--prompt` | String (str) | Yes | - | Instructions for the Agent to execute |
| `--max-tokens` | Integer (int) | No | `16384` | Maximum number of tokens to generate |
| `--step-delay` | Float (float) | No | `0.0` | Delay time between steps |
```{attention}
Note that the API parameter should be the full URL, not just the base_url. Typically, you need to append `/chat/completions` to the base_url to form the complete API address.
```
Once you have the required information, you can have the AI automatically operate your device by entering the following command in the remote desktop terminal.
```bash
agent --api https://generativelanguage.googleapis.com/v1beta/openai/chat/completions --key YOUR_API_KEY --model gemini-2.5-flash --prompt "Help me open the Settings app, package name com.android.settings, find network settings, and turn on airplane mode"
```
If your task prompt is too long, you can also provide the model prompt from a file.
```bash
agent --api https://generativelanguage.googleapis.com/v1beta/openai/chat/completions --key YOUR_API_KEY --model gemini-2.5-flash --prompt /path/to/prompt.txt
```
## Claude & Cursor Integration (MCP)
This section explains how to integrate FIRERPA's MCP functionality with your large language model client. We provide examples for Claude and Cursor, but you can use it with any other client that supports the MCP protocol.
```{note}
FIRERPA's built-in MCP service supports tool-calling, resource-reading, prompts, progress notifications, and logging.
```
```{attention}
Please note that the communication protocol for the 8.0 server is different from the 9.0 server. Version 9.x uses streamable-http, while 8.x uses SSE (Server-Sent Events).
```
### Install the Official Extension
We provide an official MCP service. You can download this extension module from extensions/firerpa.py. You can also refer to its implementation to write or extend your own plugin features. After downloading the extension script, upload it to the `/data/usr/modules/extension` directory on your device via remote desktop or a manual push, then restart the device or the FIRERPA service.
```{attention}
The extension scripts for version 8.0 and 9.0 are not compatible. Please strictly confirm your server version and pull the corresponding script from the correct GitHub branch.
```
### Using the Official Extension
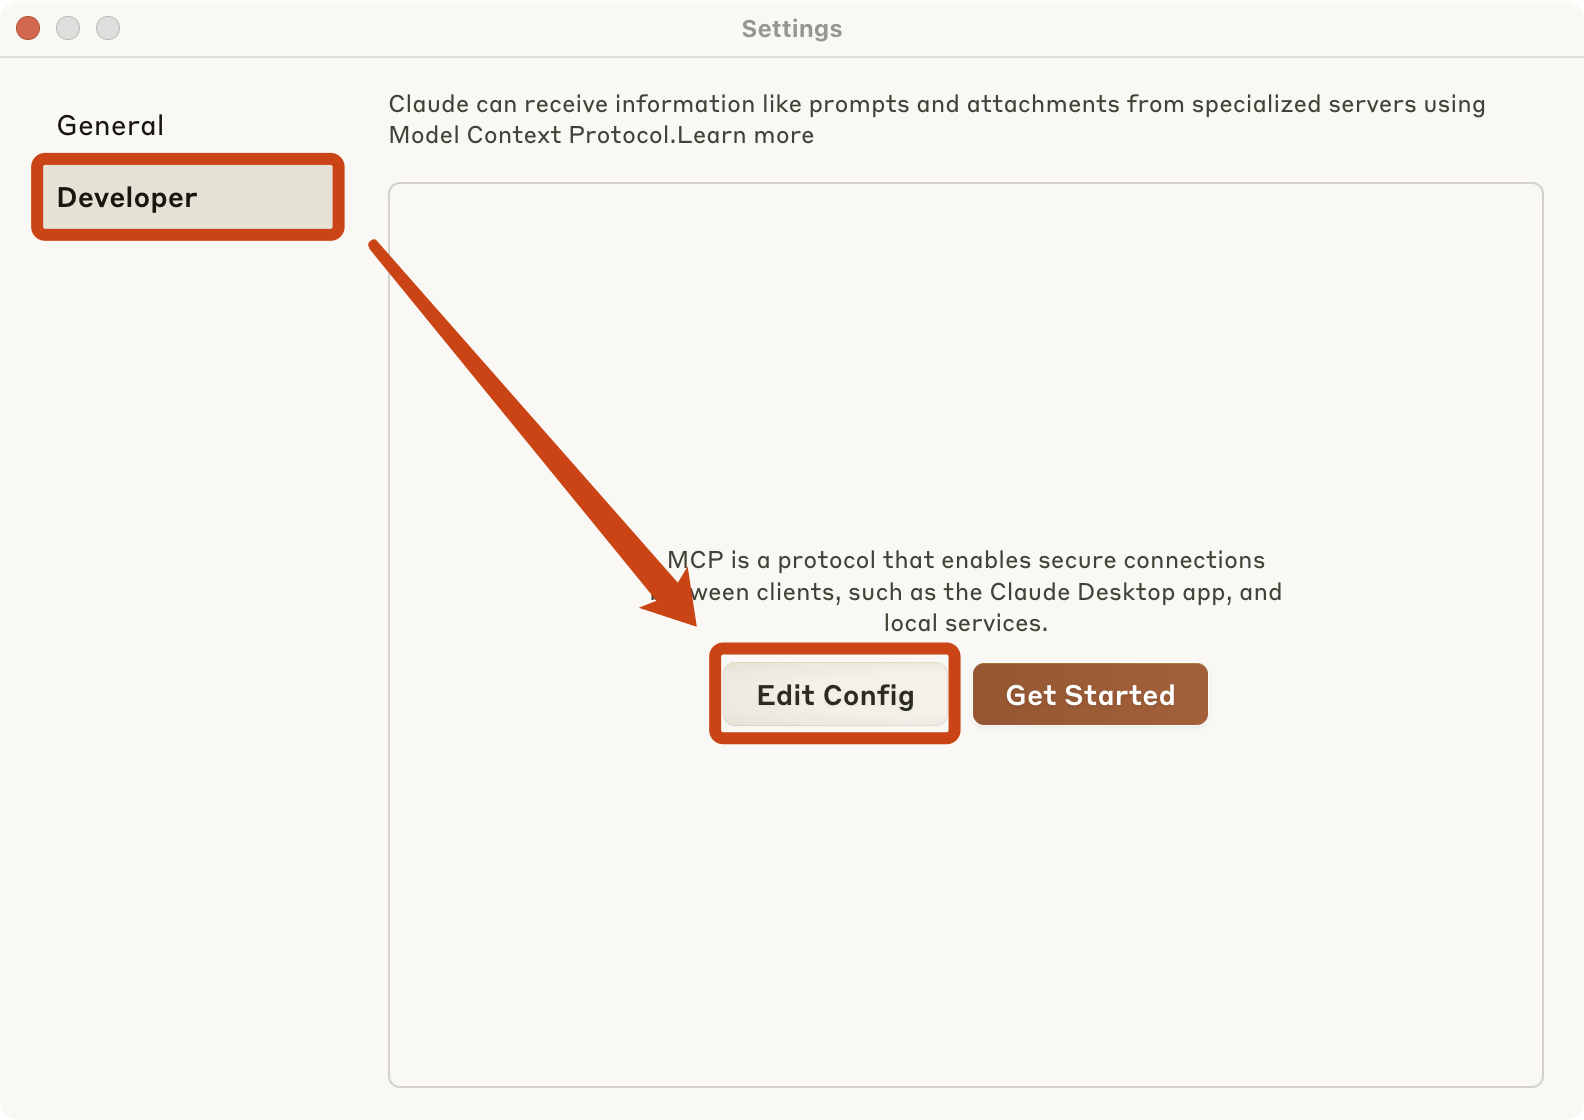
For **Claude**, you first need to go to the Claude settings page and follow the steps shown in the image below. Then, as prompted, edit Claude's `claude_desktop_config.json` configuration file and add the following MCP JSON service configuration.
```json
{"mcpServers": {"firerpa": {"command": "npx", "args": ["-y", "supergateway", "--streamableHttp", "http://192.168.0.2:65000/firerpa/mcp/"]}}}
```
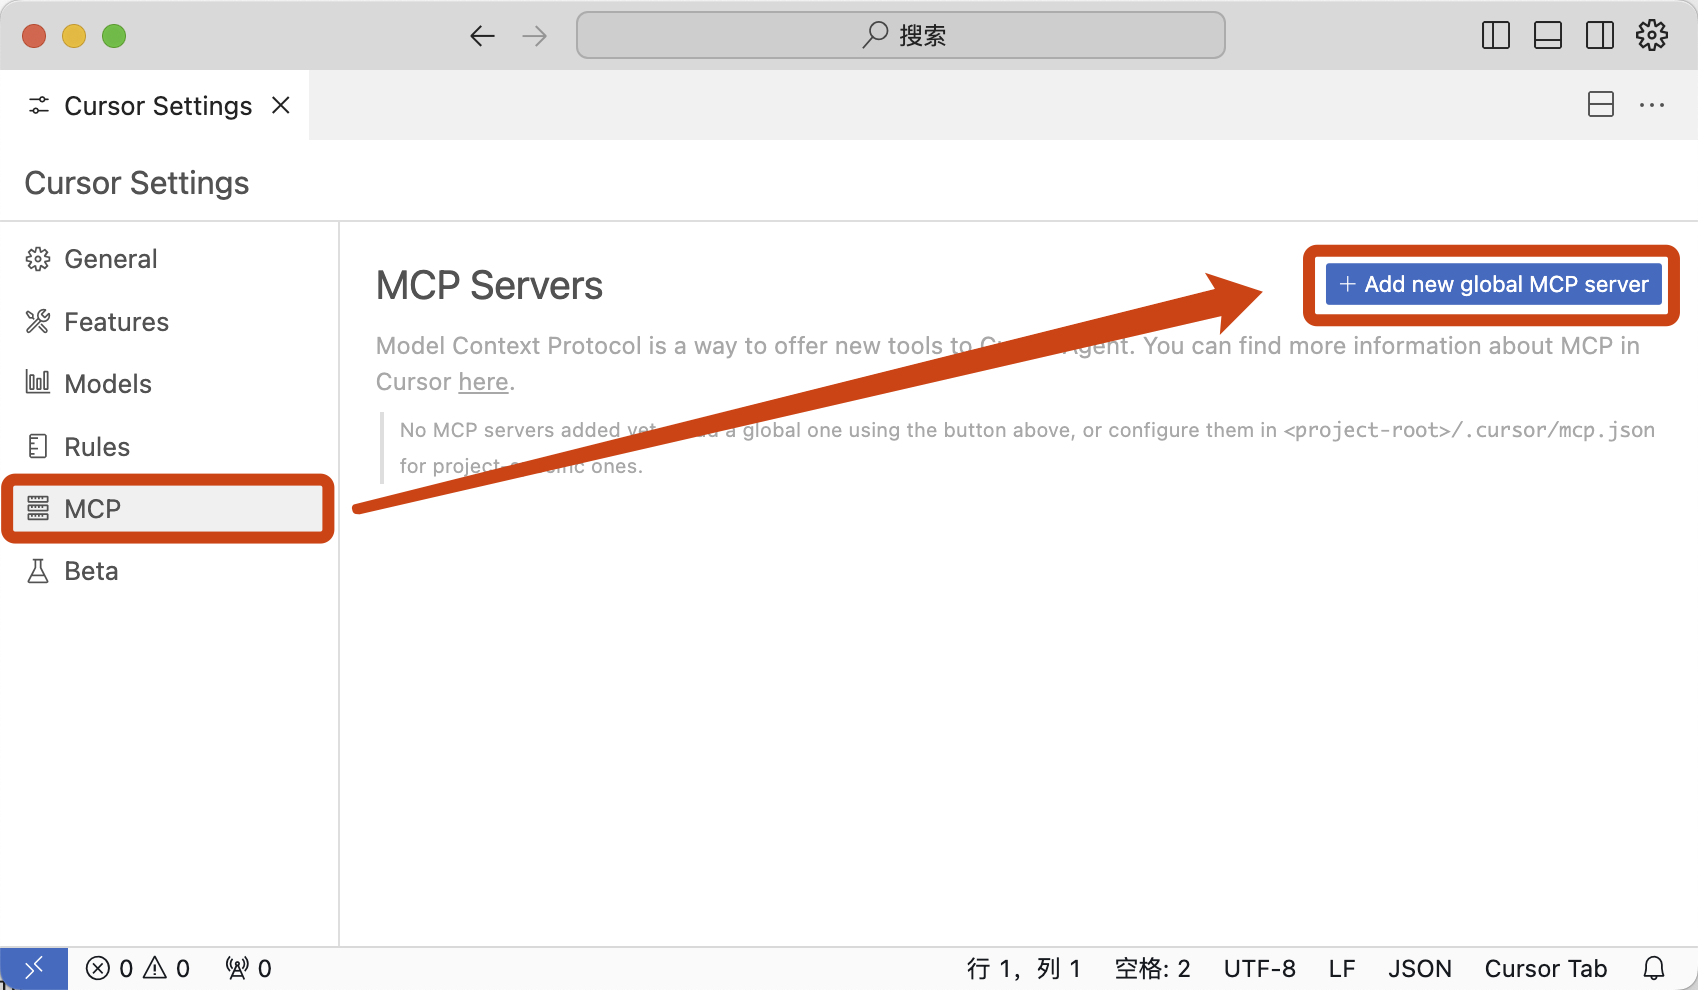
For **Cursor**, you need to open Cursor Settings, follow the steps shown in the image, and enter the following configuration.
```json
{"mcpServers": {"firerpa": {"url": "http://192.168.0.2:65000/firerpa/mcp/"}}}
```
```{attention}
Please make sure to replace the URL in the configuration with your own device's IP address.
```
### Writing an MCP Extension
```{hint}
Documentation coming soon. Stay tuned.
```
--- END OF model-extension.md ---
--- DOCUMENT: ocr.md ---
--- SOURCE: https://device-farm.com/docs/content/en/ocr.md ---
# OCR Operations
This chapter introduces how to use OCR to assist with UI operations. In situations like gaming applications, conventional UI selectors may not be usable. In such cases, you can opt for OCR-based methods. The OCR recognition method only supports operations such as checking if an element exists, clicking, and taking screenshots. The OCR backend library supports paddleocr, easyocr, and custom HTTP backend interfaces.
## Setting Up the OCR Backend
Before using OCR recognition, you need to set up the OCR backend first. You will need to **install the required dependency libraries in advance** yourself.
```{attention}
If you are running a cluster, meaning you need to control multiple devices on the same computer, it is crucial to wrap the OCR functionality into an HTTP service yourself. Using paddleocr or easyocr directly will consume a large amount of local memory or computing resources because each process will load them repeatedly.
```
Use paddleocr as the backend, with a screenshot quality of 80 for recognition, and enable GPU acceleration.
```python
d.setup_ocr_backend("paddleocr", quality=80, use_gpu=True, drop_score=0.85, use_space_char=True)
```
Use easyocr as the backend, with a screenshot quality of 80, to recognize Simplified Chinese and English.
```python
d.setup_ocr_backend("easyocr", ["ch_sim", "en"], quality=80)
```
The additional arguments in `setup_ocr_backend` should be the parameters for initializing the instance. If you are not sure how to construct the arguments above, please refer to the official instantiation parameters below and compare them.
```python
paddleocr.PaddleOCR(use_gpu=True, drop_score=0.85, use_space_char=True)
easyocr.Reader(["ch_sim", "en"])
```
A custom OCR backend is mainly used for controlling a large number of devices or when there is no GPU acceleration on the local machine. You can deploy your recognition code as an HTTP service and make requests for remote recognition within the custom backend. You need to inherit and write your own `MyCustomOcrBackend` and format the recognition results according to the required format. You can also find the definition of the response format in the `paddle_ocr_http_backend.py` we provide, and you can deploy this service directly with minor modifications.
```python
class HttpOcrBackend(CustomOcrBackend):
def __init__(self, url, auth):
self.auth = auth
self.url = url
def ocr(self, image: bytes):
r = requests.post(url, headers={"X-Auth": self.auth},
data=image)
return r.json()
```
Then, simply set the OCR recognition backend to your custom service class.
```python
d.setup_ocr_backend(HttpOcrBackend, "http://server/ocr", "Secret")
```
## OCR Selectors
Currently, OCR recognition only supports the following types of selectors.
### text
Matches the complete text.
```python
element = d.ocr(text="我的")
```
### textContains
Matches if the text contains the given string.
```python
element = d.ocr(textContains="我的")
```
### textMatches
Matches the text using a regular expression.
```python
element = d.ocr(textMatches=".*?我的")
```
## OCR Actions
Currently, OCR selectors only support the following related actions.
### click
Clicks the selected element.
```python
element.click()
```
### click_exists
Clicks the selected element if it exists.
```python
element.click_exists()
```
### exists
Checks if the element exists.
```python
element = d.ocr(textMatches=".*?我的")
```
### screenshot
Takes a screenshot of the matched element.
```python
element.screenshot(100, ).save("element.png")
```
### info
Gets the information of the matched OCR result.
```python
element.info()
```
```{tip}
If OCR still cannot solve your problem, you can also try using the image feature matching interface for image matching.
```
--- END OF ocr.md ---
--- DOCUMENT: one-click-capture.md ---
--- SOURCE: https://device-farm.com/docs/content/en/one-click-capture.md ---
# One-Click Packet Capturing
The one-click man-in-the-middle (MITM) packet capturing feature can automatically enable a global MITM proxy on the device. The **difference between this tool and other commonly used tools** is that you don't need to worry about issues like **certificate installation** and **proxy settings**. You also don't have to worry about different packet capturing methods for different system versions. It works seamlessly on Android 6.0 - 14. We have handled everything for you, so you only need to focus on your specific tasks.
It also supports real-time packet modification and interception. Compared to common GUI applications, it is more suitable for practical business use rather than just "capturing some packets to take a look."
Furthermore, we can guarantee that **no packets will be missed** (except for cases of certificate pinning), and the success rate of packet capturing is also higher than with conventional software methods. You can intercept the HTTP/S traffic of applications. It can automatically apply and revoke the MITM proxy. After exiting the script, the device and network will be restored to their original state. You don't need to perform any other setup. The script also supports **international** MITM packet capturing (achieved through an upstream proxy), allowing you to easily capture traffic from foreign software.
```{attention}
Regardless of your operating system, to ensure a successful one-time setup, please temporarily and completely disable your **network firewall** before starting packet capturing.
```
## Prerequisites
First, ensure that your computer and the device are on the same network segment, or connected via USB. We will assume `192.168.0.2` is the IP address of the mobile device running FIRERPA. Second, make sure you have successfully cloned the project's tool code and installed the necessary dependencies. Verify that mitmproxy is installed correctly by running `mitmdump` in the command line.
If you don't have Python and are not familiar with cloning repositories and installing dependencies, you can download `startmitm.exe` from our release page. It is a packaged version of `startmitm.py` that allows you to perform packet capturing without installing Python. It is a console application, and its command-line arguments are the same as `startmitm.py`'s. (This file may be flagged by antivirus software; please use it at your own discretion).
## Basic Packet Capturing
```{hint}
The application you are trying to capture packets from may use SSL PINNING (certificate pinning) or the QUIC protocol, both of which can affect the capturing results. We automatically force a QUIC downgrade, but due to potential fallback times, the application might experience very slow network performance. Please wait a moment. Applications with certificate pinning cannot be captured directly. You will need to use reverse engineering and write a Frida script to bypass the SSL PINNING logic.
```
You can quickly start capturing packets with the following command. This is the simplest way to use it.
```bash
python3 -u startmitm.py 192.168.0.2
```
```{important}
**It is crucial to remember that after executing the startmitm command, you must completely close and reopen the app you want to capture packets from. Closing the app from the taskbar is not a reliable method. Please use an API to close it or use the `kill -9` command to terminate all PIDs related to the app; otherwise, capturing will not work correctly.**
```
Press `CONTROL` + `C` once to exit packet capturing. Please do not press it multiple times in a row.
## Shared Packet Capturing
If you want to analyze packets with your colleagues on the same local network, execute the following command. Then, have your colleagues open `http://your_ip_address:7890` in their browsers to see the same capture page as you, allowing you to analyze together.
```bash
python3 -u startmitm.py 192.168.0.2 --web-port 7890 --web-host 0.0.0.0
```
## Specific Applications
If you need to intercept traffic from a specific application instead of the entire system's traffic, you can append `:package_name` to the IP address. The following example will only capture traffic from `com.some.package`.
```bash
python3 -u startmitm.py 192.168.0.2:com.some.package
```
## Real-time Modification
You can modify the application's request and response data in real-time. This feature is based on mitmproxy's event hooks. You need to write a hook script yourself based on the mitmproxy API. For information on how to write hook scripts, please refer to the official mitmproxy documentation at [docs.mitmproxy.org/stable/addons-examples](https://docs.mitmproxy.org/stable/addons-examples/) and the example code at [mitmproxy/examples/contrib](https://github.com/mitmproxy/mitmproxy/tree/9.0.0/examples/contrib).
Assuming you have written a hook script named `http_flow_hook.py`, use the following command to apply it.
```bash
python3 -u startmitm.py 192.168.0.2 -s http_flow_hook.py
```
## Different Networks
If your mobile phone and computer are not on the same network, but you have physical access to the device, you can also capture packets via USB ADB. Ensure that the device is connected to the computer via USB ADB and has been properly authorized.
If only one ADB device is connected to the computer, use the following command to capture packets. `localhost` represents the ADB device.
```bash
python3 -u startmitm.py localhost
```
If multiple ADB devices are connected, you need to specify the ADB serial number, which can be found in the output of the `adb devices` command.
```bash
python3 -u startmitm.py localhost --serial bfde362
```
If your environment is more restrictive, for example, if the phone and the computer are not on the same network and you cannot physically access the device, you can still perform MITM as long as you can access the FIRERPA port. This scenario typically occurs when you use the built-in frp service to forward FIRERPA to a remote server, or you have forwarded FIRERPA's port 65000 to another location yourself. In this case, you and FIRERPA can only communicate directly through this single port, and other ports are not mutually accessible. In this situation, the phone cannot access any ports on your local machine, and your local machine can only access the FIRERPA port on the phone (or the phone has a public IP, but your machine is on a private network). You need to proceed as follows. (A network interconnected via OpenVPN does not fall into this category).
In this case, you need to use the following combination of steps. First, use `adb_pubkey.py` or call the API yourself to install your ADB public key on the device. After installation, proceed with the following steps, where `x.x.x.x` is the IP address that can connect to port 65000 (or `127.0.0.1`), modify it according to your actual situation.
```bash
adb connect x.x.x.x:65000
```
Finally, proceed with the USB packet capturing method as described above.
```bash
python3 -u startmitm.py localhost
```
Alternatively, you can do it this way. Here, the serial is the `adb connect` address, not the hexadecimal serial number.
```bash
python3 -u startmitm.py localhost --serial x.x.x.x:65000
```
## Upstream Proxy / International Packet Capturing
startmitm itself starts mitmproxy as a proxy service. By default, all traffic is sent from the local machine's network interface by mitmproxy. If you need the traffic to be sent through an upstream proxy instead of directly from your machine, you can specify an upstream proxy as follows. Only **HTTP** proxies are supported as upstream proxies. You also need to specify an upstream DNS server that supports TCP queries to avoid DNS pollution.
```{tip}
The upstream proxy mode requires mitmproxy version >= 9.0.0 (and Python >= 3.9).
```
```bash
python3 -u startmitm.py 192.168.0.2 --upstream http://127.0.0.1:7890 --proxy-dns 8.8.8.8
```
If the upstream HTTP proxy requires authentication, use the following command and replace `USER:PASSWORD`.
```bash
python3 -u startmitm.py 192.168.0.2 --upstream http://USER:PASSWORD@x.x.x.x:8080 --proxy-dns 8.8.8.8
```
All the commands above will route the device's traffic through the upstream proxy and send all local DNS queries through the proxy to 8.8.8.8.
--- END OF one-click-capture.md ---
--- DOCUMENT: privacy.md ---
--- SOURCE: https://device-farm.com/docs/content/en/privacy.md ---
# Privacy and Data Statement
We understand the importance of your privacy and are committed to strictly adhering to and protecting the security of your information. The purpose of this statement is to transparently explain that, to ensure the normal operation of our service, we collect a limited amount of non-personally identifiable device information based on the principle of minimization. **We do not collect any of your personal private information, such as contacts, text messages, geographic location, photo album content, or any other irrelevant data.** All related information is communicated through our domains device-farm.com|net, lamda.run, and their subdomains. We will not use any other domains or establish any data connections unrelated to the purposes described below.
The information we collect is used solely for the technical purposes explicitly listed below, and this information cannot be used to directly or indirectly identify you.
## Information Collection and Use
The information we collect is limited to the data required for service authorization and maintenance. All fields and their purposes are listed below.
### 1. Authorization Verification
This process is executed every time the service starts to verify the legitimacy of the commercial license, which is a necessary prerequisite for the service to run.
| Field Collected | Field Description | Purpose |
| :--- | :--- | :--- |
| `device_id` | Internal device identifier | To bind the license to a specific device |
| `license` | License information | To verify the status and validity of the license |
| `abi` | System architecture (e.g., arm64-v8a) | To ensure service compatibility with the device architecture |
| `device` | Device brand/model | For issue diagnosis and compatibility analysis |
| `platform` | Device platform (e.g., Android) | To identify the base environment |
| `android_id` | System Android ID | Auxiliary device identifier for license binding and statistics |
| `serialno` | Device serial number | Auxiliary device identifier for precise license binding |
| `sdk` | Android system version (API Level) | To ensure service compatibility with the system version |
| `version` | Current service version number | For authorization logic and version matching |
### 2. Version Check
This feature is disabled by default and must be manually enabled in the configuration. Once enabled, it checks for new versions every 48 hours.
| Field Collected | Field Description | Purpose |
| :--- | :--- | :--- |
| `device_id` | Internal device identifier | To gather statistics on user distribution across different versions |
| `commit` | Service version Commit ID | To accurately compare the current version with the latest version |
| `channel` | Update channel (e.g., stable/beta) | To provide update packages for the corresponding channel |
| `date` | Service version release date | To determine if the version is outdated |
| `abi` | System architecture | To provide update packages for the corresponding architecture |
| `device` | Device brand/model | For compatibility analysis and issue diagnosis |
| `platform` | Device platform | To identify the base environment |
| `android_id` | System Android ID | To assist in tracking update coverage statistics |
| `sdk` | Android system version | To ensure the update package is compatible with the system |
| `version` | Current service version number | For version comparison |
| `up` | Service startup time | To calculate runtime duration for auxiliary analysis |
### 3. System Notifications
Used to receive remote notification information from other platforms (e.g., for display on a remote desktop), synchronized every 24 hours.
| Field Collected | Field Description | Purpose |
| :--- | :--- | :--- |
| `device_id` | Internal device identifier | To identify the target device for receiving notifications |
| `version` | Service version number | To ensure notification format compatibility |
| `abi` | System architecture | Auxiliary field |
| `sdk` | Android system version | Auxiliary field |
## Data Storage and Security
1. **Network Transmission**: All data sent and received is transmitted using strong encryption to prevent interception or tampering during transit.
2. **Service Processing**: The data we receive is used for real-time logical processing (such as license verification, version comparison, and notification checks).
3. **Data Retention**: We store information such as your device model and system version. This information is stored anonymously.
## Information Sharing and Disclosure
We will **never** sell, trade, or otherwise transfer any of your information (including the device information mentioned above) to any third party. We may disclose information only in the following rare circumstances:
* **Legal Compliance**: When required by law, regulation, subpoena, or court order.
* **Protection of Rights**: When necessary to enforce our terms of service or to protect our rights, property, or safety, or that of our users or the public.
## Your Rights and Control
If you do not wish for us to collect this device information, we respect your right to choose:
* **Offline Licensing**: Using an offline license will not send any of the above information to our servers.
* **Discontinuation of Use**: If you do not want us to collect any of the information mentioned above and you decline to use an offline license, the only option is to stop using this service. The service cannot run without the information necessary for authorization.
## Contact Us
If you have any questions, comments, or concerns about this Privacy Statement, please [contact us](/docs/zh/tech-support).
--- END OF privacy.md ---
--- DOCUMENT: properties-local.md ---
--- SOURCE: https://device-farm.com/docs/content/en/properties-local.md ---
# properties.local Configuration
The `properties.local` file is the system configuration file for the FIRERPA service, typically stored on the device. It contains strings in the `key=value` format. By editing this file, you can configure FIRERPA to automatically connect to OpenVPN, a proxy, or port forwarding on startup, as well as set a login password or certificate, and other system configurations. When FIRERPA starts, it looks for and loads this file from `/data/usr`. You can find configurable items in the project's [properties.local.example](https://github.com/firerpa/lamda/blob/HEAD/properties.local.example) and select them as needed. However, please do not copy this file directly; only include the parts you require.
```{attention}
The `/data/usr` directory is FIRERPA's user data directory and does not exist before the first startup. If you need to pre-configure `properties.local`, you must create this directory manually.
```
Instructions on how to write the `properties.local` startup configuration are also provided in the documentation for each feature. You can also refer to `properties.local.example`.
## Configuration Parameter List
### Core Basic Configuration
Configures the basic operating environment for the LAMDA service, including listening port, authentication, login credentials, and cross-origin policy settings.
| Parameter Name | Default Value | Example Value | Introduced | Removed | Description |
| :--- | :--- | :--- | :--- | :--- | :--- |
| `port` | `65000` | `65000` | - | - | The default listening port for the LAMDA service. |
| `brandname` | `FIRERPA` | `LAMDA-DEV` | - | - | Device name displayed on the remote desktop (up to 10 characters). |
| `cert` | None | `TEFNREEg...` | - | - | Base64 encoded certificate for TLS encryption and authentication. |
| `ssl-web-credential` | None | `pwd123` | - | - | Backup password for remote desktop login (6-32 characters). |
| `allow_origin` | None | `https://a.com` | - | - | Sets the CORS header to allow WebUI embedding. |
| `logfile` | None | `/data/log.txt` | - | - | Path to store the log file (the directory must be created in advance). |
### System Optimization and Compatibility
Controls underlying business logic and stealth strategies to enhance automation operations or to make fallback adjustments when compatibility issues arise on the device.
| Parameter Name | Default Value | Example Value | Introduced | Removed | Description |
| :--- | :--- | :--- | :--- | :--- | :--- |
| `disable-client-api` | `false` | `true` | - | - | Disables the Python client API. Set to `true` if the device crashes. |
| `enhanced-stealth-mode` | `false` | `true` | 7.65 | - | Enhanced stealth mode to prevent components from being detected. |
| `enhanced-automation` | `false` | `true` | - | - | Enables enhanced automation support. |
| `touch.backend` | `native` | `system` | - | - | Touch backend: `system` (fixes offset) or `native` (default). |
| `intercept-intent` | `false` | `true` | 8.20 | - | Enables the Intent interception feature (get_last_activities). |
### OpenVPN Service
Built-in OpenVPN client configuration that enables the device to communicate through a VPN tunnel, supporting global traffic forwarding and user authentication.
| Parameter Name | Default Value | Example Value | Introduced | Removed | Description |
| :--- | :--- | :--- | :--- | :--- | :--- |
| `openvpn.enable` | `false` | `true` | - | - | Enables the built-in OpenVPN service. |
| `openvpn.global` | `false` | `false` | - | - | Enables global VPN traffic forwarding. |
| `openvpn.proto` | `udp` | `udp` | - | - | VPN communication protocol. |
| `openvpn.cipher` | `AES-256-GCM` | `AES-256-GCM` | - | - | Encryption algorithm. |
| `openvpn.host` | None | `123.123.123.123` | - | - | OpenVPN server address. |
| `openvpn.port` | None | `1190` | - | - | OpenVPN server port. |
| `openvpn.ca` | None | `LS0t...` | - | - | Base64 encoded CA certificate. |
| `openvpn.cert` | None | `LS0t...` | - | - | Base64 encoded client certificate. |
| `openvpn.key` | None | `LS0t...` | - | - | Base64 encoded client key. |
### Global Proxy Service
Configures LAMDA to automatically connect to an HTTP or SOCKS5 proxy on startup, allowing device traffic to be automatically relayed through a specified intermediate server.
| Parameter Name | Default Value | Example Value | Introduced | Removed | Description |
| :--- | :--- | :--- | :--- | :--- | :--- |
| `gproxy.enable` | `false` | `true` | - | - | Automatically connects to the proxy on startup. |
| `gproxy.type` | None | `http-connect` | - | - | Proxy type: `http-connect` or `socks5`. |
| `gproxy.host` | None | `172.1.1.1` | - | - | Proxy server address. |
| `gproxy.port` | None | `8080` | - | - | Proxy server port. |
| `gproxy.login` | None | `admin` | - | - | Proxy login username. |
| `gproxy.password` | None | `pwd123` | - | - | Proxy login password. |
### FRP Port Forwarding Service
Based on FRP for NAT traversal, this service maps the device's service port to a public server, solving remote access issues in environments without a public IP address.
| Parameter Name | Default Value | Example Value | Introduced | Removed | Description |
| :--- | :--- | :--- | :--- | :--- | :--- |
| `fwd.enable` | `false` | `true` | - | - | Enables the FRP forwarding service. |
| `fwd.host` | None | `123.123.123.123` | - | - | FRP server address. |
| `fwd.port` | None | `9911` | - | - | FRP server control port. |
| `fwd.protocol` | `tcp` | `tcp` | - | - | Forwarding protocol type. |
| `fwd.token` | None | `abc123` | - | - | FRP login authentication token. |
| `fwd.rport` | `0` | `10086` | - | - | Remote forwarding port (0 for random). |
### Development and Management Services
Provides toggles for common system management tools, including the ADB service, SSH for remote shell access, and scheduled task management.
| Parameter Name | Default Value | Example Value | Introduced | Removed | Description |
| :--- | :--- | :--- | :--- | :--- | :--- |
| `adb.enable` | `true` | `true` | - | - | Enables the built-in ADB service. |
| `adb.directory` | `/data/local/tmp` | `/data/local/tmp` | - | - | ADB working directory. |
| `adb.privileged` | `false` | `true` | - | - | Enables Root privileges (otherwise, shell privileges). |
| `sshd.enable` | `true` | `true` | - | - | Enables the SSH service. |
| `cron.enable` | `true` | `true` | - | - | Enables the scheduled task service. |
### Bridge Proxy Service
An advanced network proxy mode that allows traffic bridging through a specific network interface (e.g., mobile data network). It enables internet access via the device's network as a proxy and supports user authentication.
| Parameter Name | Default Value | Example Value | Introduced | Removed | Description |
| :--- | :--- | :--- | :--- | :--- | :--- |
| `tunnel2.enable` | `false` | `true` | - | - | Enables the bridge proxy service. |
| `tunnel2.login` | None | `lamda` | - | - | Bridge proxy username. |
| `tunnel2.password` | None | `1234` | - | - | Bridge proxy password. |
| `tunnel2.iface` | None | `rmnet` | - | - | Outgoing network interface: `rmnet` (mobile data) or `wlan` (WiFi). |
### Broadcast Discovery Service
An automatic device discovery service based on the mDNS protocol. When enabled, it allows for quick location and identification of LAMDA devices on the local network via domain names or metadata.
| Parameter Name | Default Value | Example Value | Introduced | Removed | Description |
| :--- | :--- | :--- | :--- | :--- | :--- |
| `mdns.enable` | `false` | `false` | - | - | Enables mDNS broadcast discovery. |
| `mdns.meta` | `false` | `true` | - | - | Broadcasts device metadata (model, ID, etc.). |
| `mdns.name` | None | `LAMDA.local` | - | - | Custom local broadcast name. |
| `mdns.service` | `lamda` | `lamda` | - | - | The name of the broadcast service. |
--- END OF properties-local.md ---
--- DOCUMENT: quick-start.md ---
--- SOURCE: https://device-farm.com/docs/content/en/quick-start.md ---
# Quick Start
This guide will walk you through the quickest way to get started. Before we begin, please ensure you have an Android phone with root permissions.
```{hint}
You should ensure that you are always using the latest version of the software. The documentation is structured progressively, so you should read it sequentially starting from the first chapter.
```
Now, please click the link to download our auto-start application [lamda-autorun.apk](https://lamda-assets.s3.bitiful.net/release/latest/lamda-autorun.apk). After installation, open the app and `grant root permissions`. Wait for the automatic installation to complete, then turn on the `auto-start switch` and reboot your device. (If your device has settings that prevent apps from auto-starting on boot, please add our app to the auto-start whitelist; otherwise, the service may not start correctly).
After rebooting the device, we recommend waiting for 1-2 minutes. Then, open your Wi-Fi settings and find the local IP address of this device in the WLAN settings, such as `192.168.1.8`. Now, open a browser on your computer and enter the URL `http://192.168.1.8:65000`. If everything is correct, you should be able to access the FIRERPA remote desktop as shown below. At this point, you have completed a major step.
```{tip}
If you still cannot connect after rebooting, you may need to check for network connectivity, such as emulator bridging. The Preparation chapter details the required settings for various platforms. If all settings are correct, try running the command `adb shell su root sh /data/server/bin/launch.sh` to manually start the service and rule out the possibility that the APK did not auto-start correctly.
```
```{hint}
When in doubt, read the documentation first. If you're still stuck, ask in the community group. You can find our contact information in the Service and Support chapter.
```
Of course, this only covers the basic installation and remote desktop functionality. We offer much more than that, including a variety of APIs and tools for you to use. You can continue exploring the rest of the documentation to learn more!
--- END OF quick-start.md ---
--- DOCUMENT: remote-desktop.md ---
--- SOURCE: https://device-farm.com/docs/content/en/remote-desktop.md ---
# Remote Desktop
The FIRERPA Remote Desktop feature provides you with access to devices within the same network or across different networks. You can view and operate the phone's screen in real-time, just as if the device were right next to you. The Remote Desktop feature is designed exclusively for Chrome 95+ and does not support simultaneous operation by multiple users. It is recommended to use the latest version of the Chrome browser for access.
## Opening the Remote Desktop
You can directly open the link `http://192.168.0.2:65000` in your browser to access the Remote Desktop. Here, you can operate the device and execute commands through the root simulated terminal on the interface.
```{attention}
Remote Desktop does not support simultaneous access by multiple users. Only the first user to access can control the device screen; subsequent users will be prompted with VIEW ONLY.
```
If you specified a service certificate with `--certificate` when starting the server, you will need to enter a password to access the Remote Desktop. You will also need to change `http://` in the link to `https://` to access it via HTTPS. Similarly, you will need to enter the password again after opening the page. You can find this default login password on the first line of the service certificate file by opening it with a text editor. Alternatively, you can set a custom login password by defining `ssl-web-credential=12345` in the `properties.local` file.
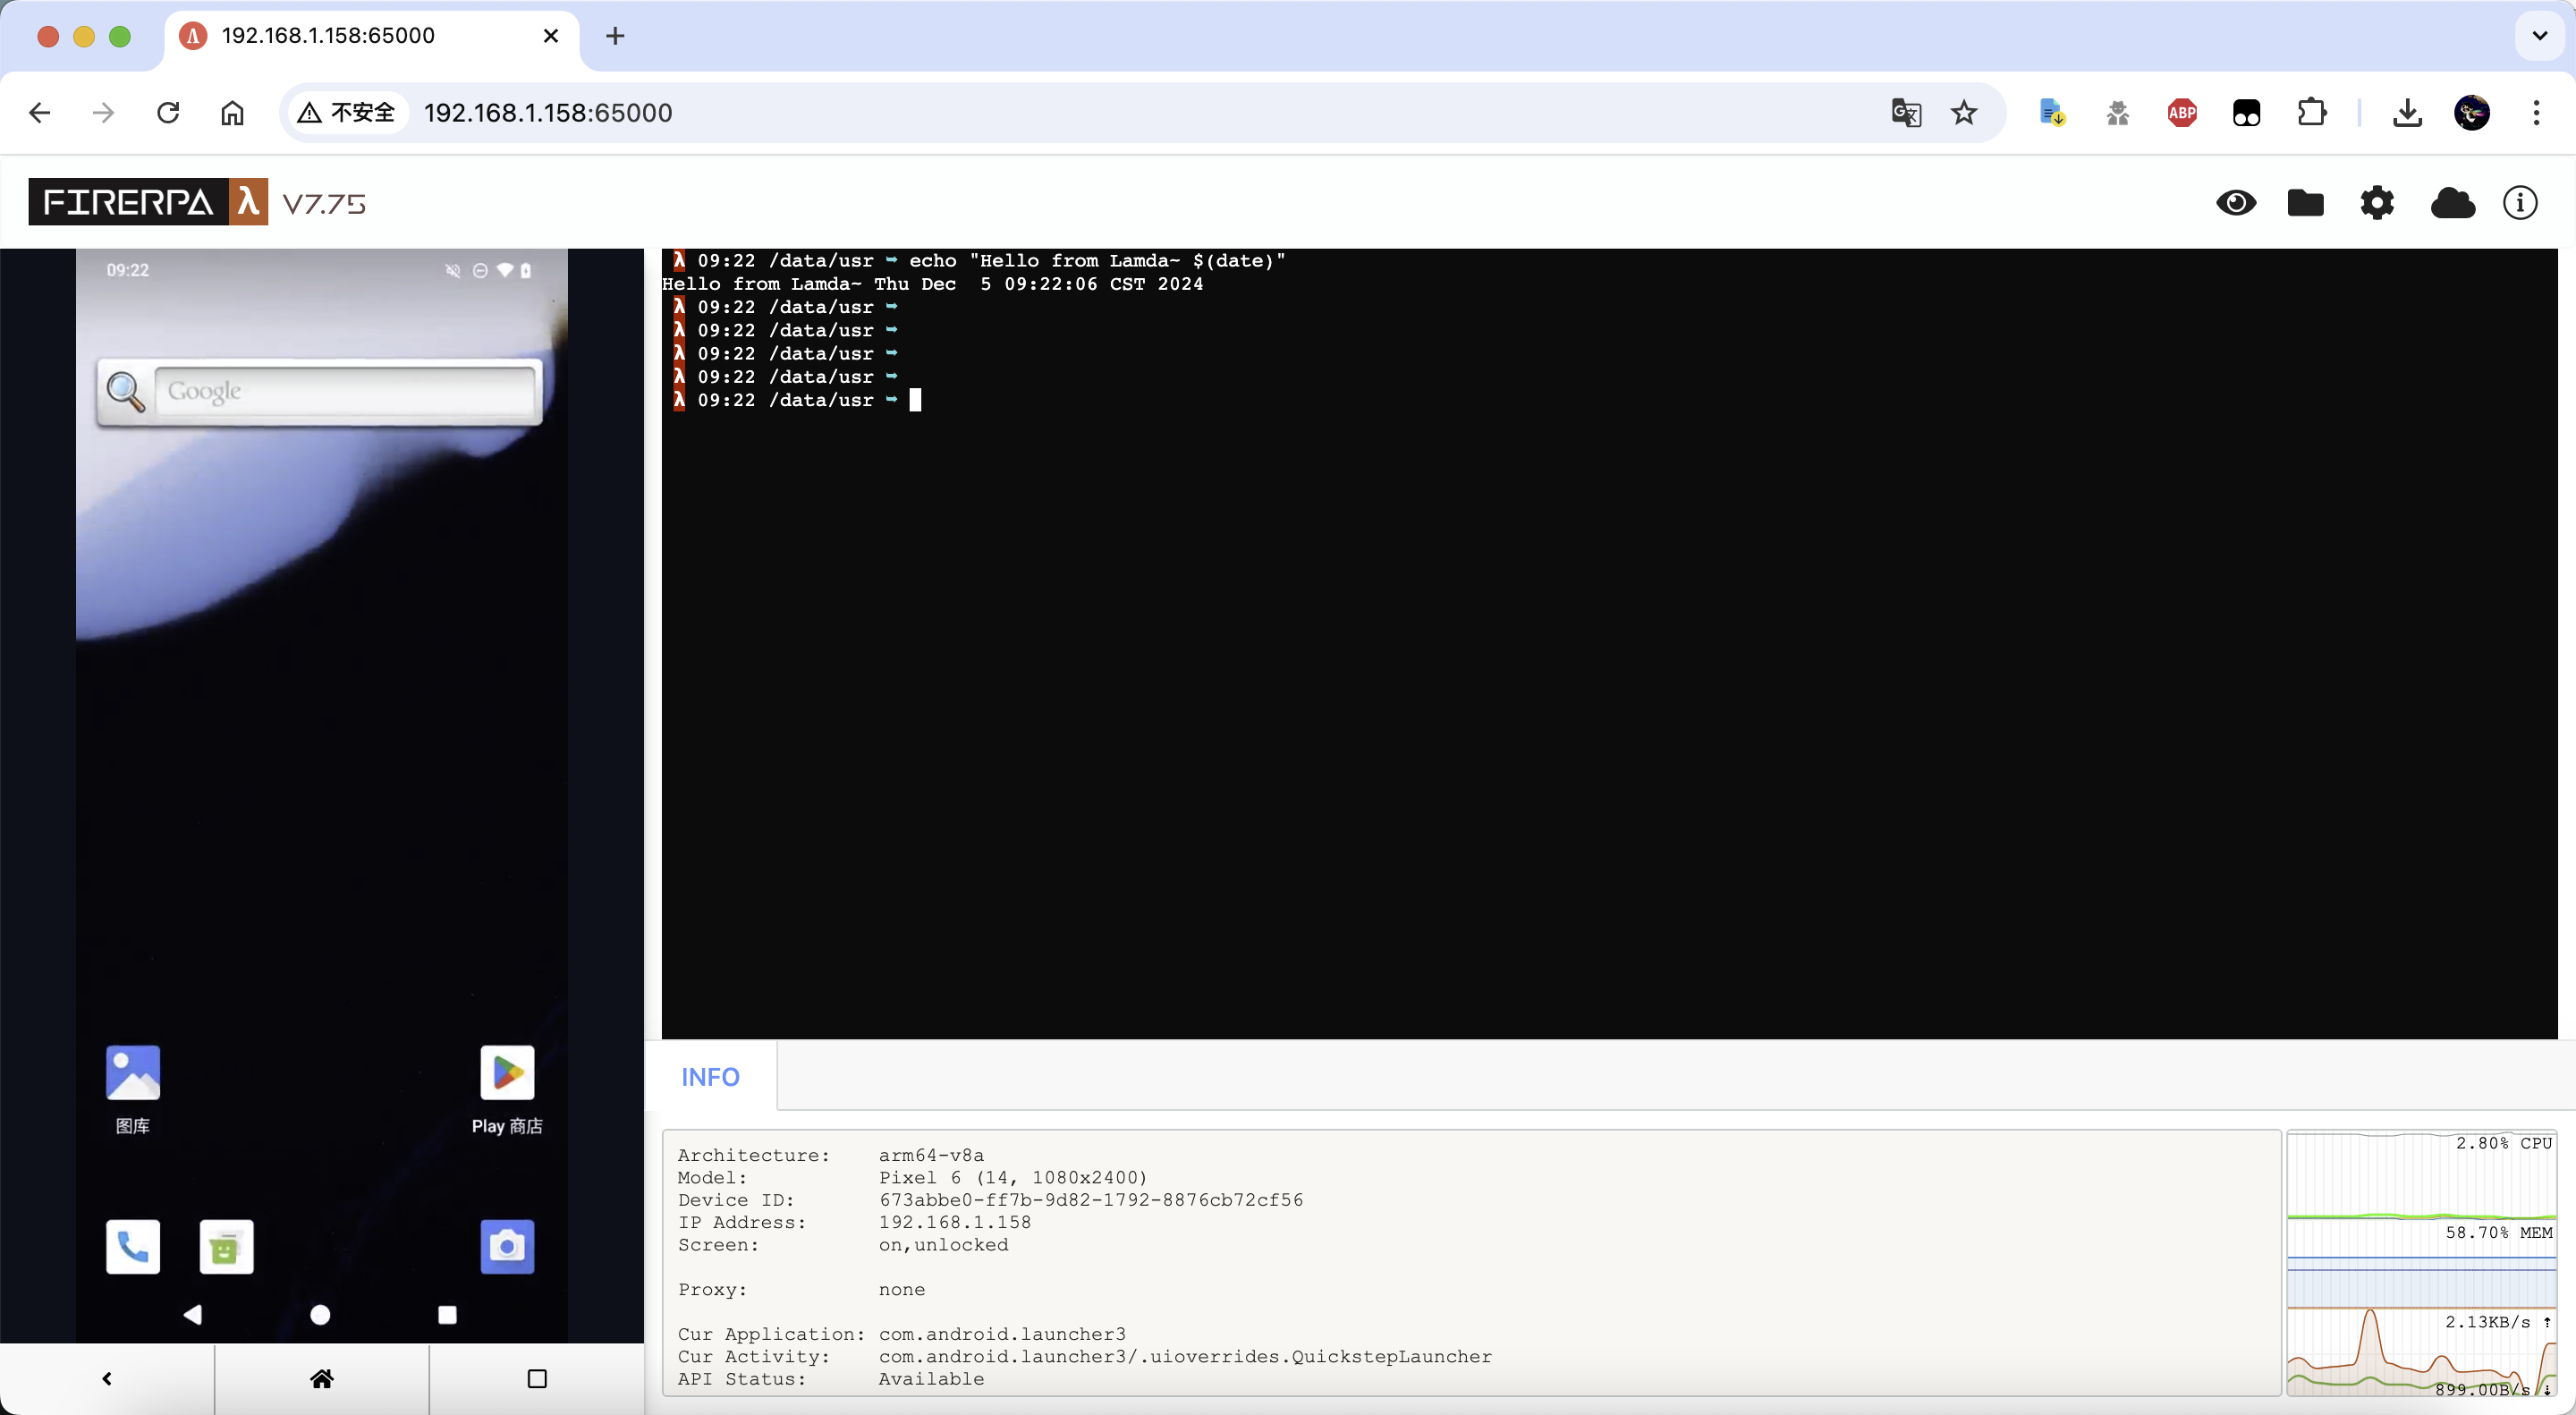
## File Upload
You can upload local files directly from the Remote Desktop. To upload files or folders, simply **drag and drop the files or directories** onto the **black terminal on the right side** of the page to upload them to the device. It supports uploading multiple files or folders simultaneously. The maximum size for a single file is 256MB, and a maximum of 2,000 files can be uploaded at once. Any file uploaded to the device will have permissions set to 644. Files will always be stored in the `/data/usr/uploads` directory (or another directory you specify in the settings).
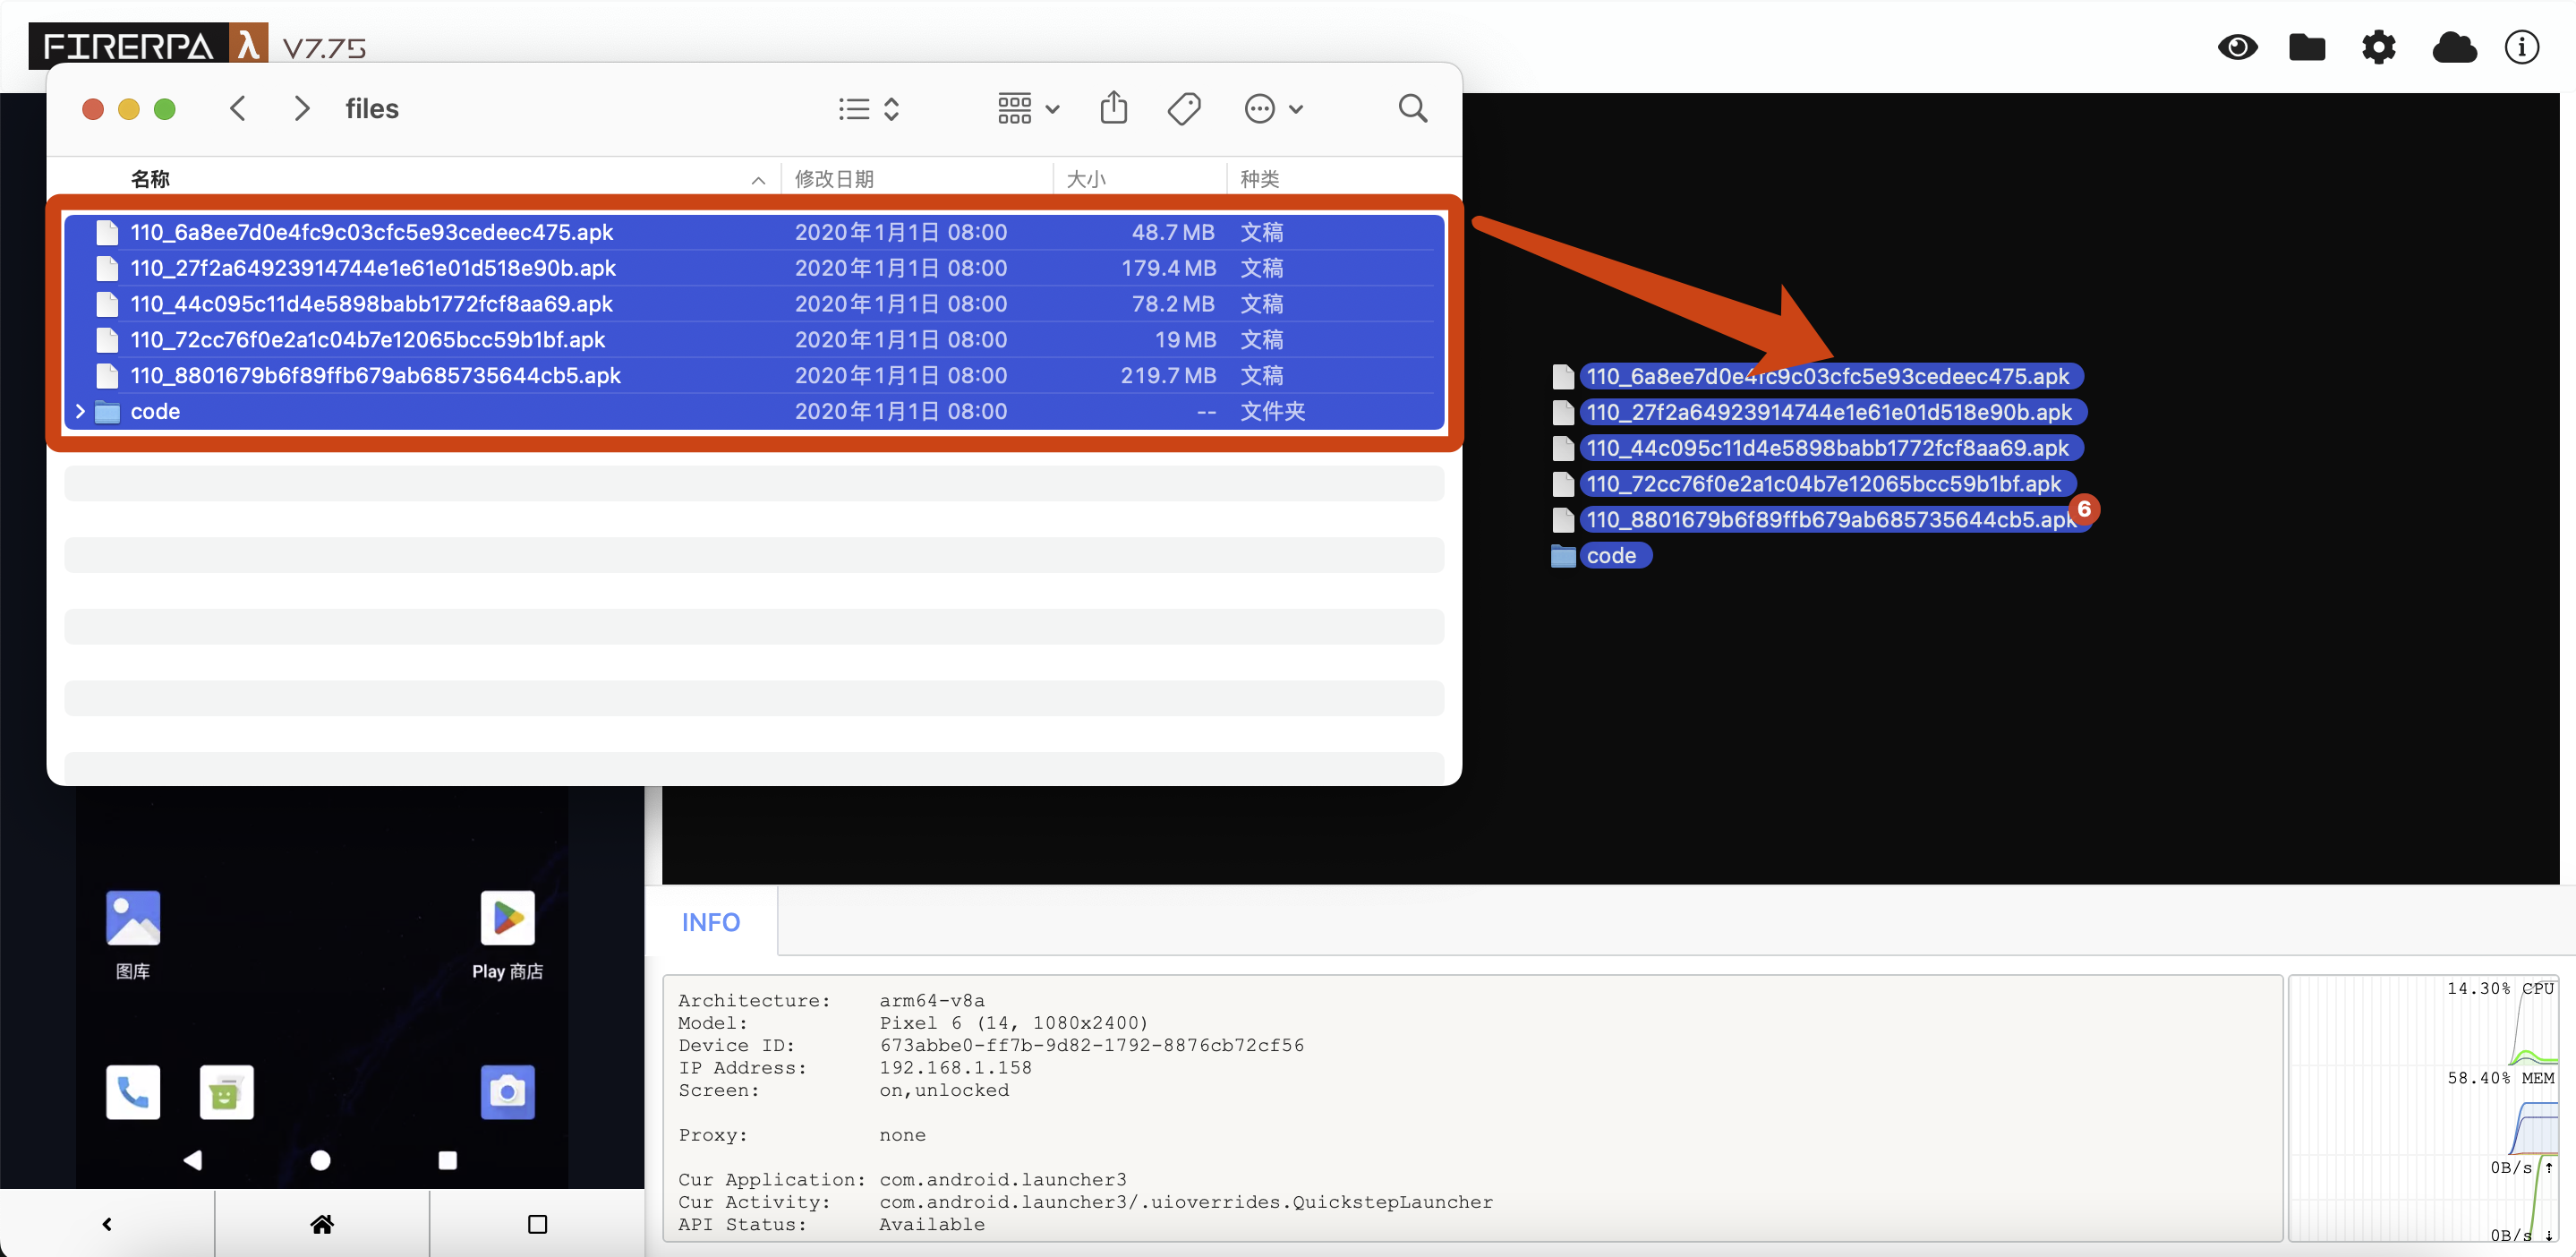
## File Download
You can directly open `http://192.168.0.2:65000/fs/` in your browser (note that the trailing `/` is required). This will display the files and folders on the device as a page index, where you can browse directories or select files to download. Alternatively, you can click the folder icon in the top-right corner of the Remote Desktop, select the desired file, and click to download.
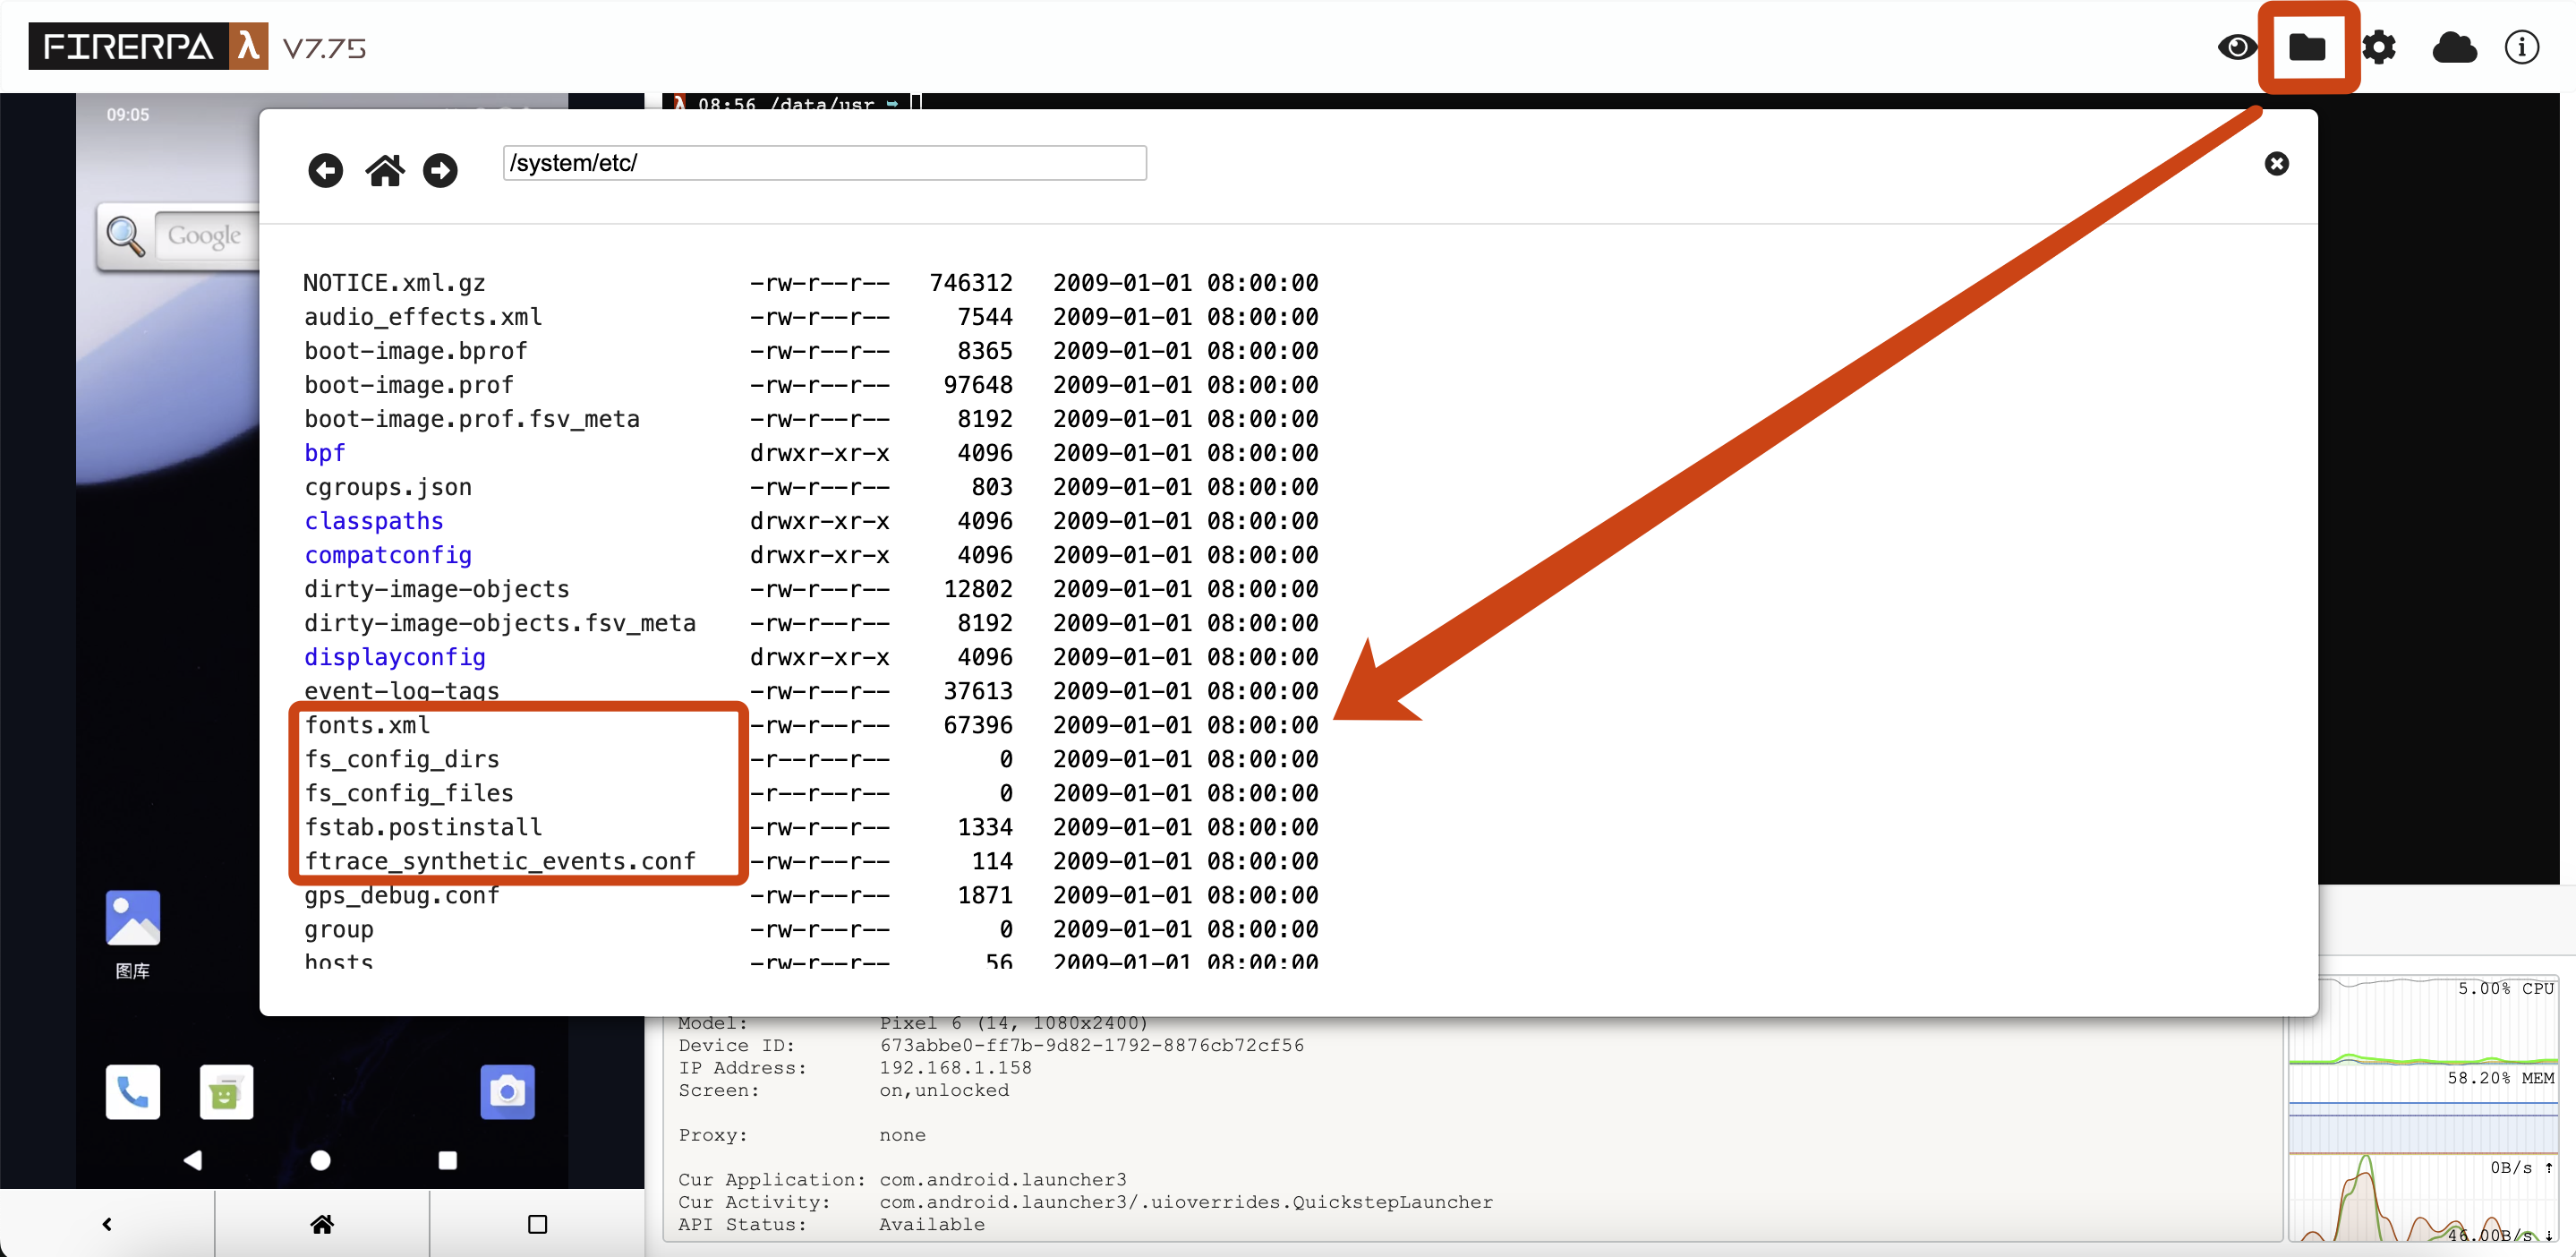
## Remote Desktop Settings
You can customize the Remote Desktop's default file upload path, video frame rate, resolution scaling ratio, image quality, clipboard sharing, and more. H.264 encoding is supported (which may use less bandwidth and provide a smoother experience in some cases, but is only supported on the latest browsers). You can make adjustments by clicking the small gear icon in the top-right corner of the Remote Desktop. Under normal circumstances, you can enable `video_h264` to improve network transmission smoothness. However, if your device's own computing performance is not powerful enough, we do not recommend enabling it. It is not recommended to adjust `video_scale` unless your device's native resolution is too low (<720p); this parameter represents the scaling ratio of the original screen. `video_backend` is used to select the video backend; we provide two options: `Default` (software encoding) and `System` (hardware encoding). `video_quality` represents the video quality; the lower the quality, the lower the bitrate, resulting in a smoother experience. `video_fps` is the video's frame rate. You can also enable bidirectional clipboard sharing by turning on the `share_clipboard` switch. Please note that adjusting the above parameters may not necessarily produce positive results; please adjust them based on your actual situation and performance needs.
```{hint}
Due to browser restrictions, the clipboard sharing feature requires HTTPS to be enabled or access via localhost to function correctly.
```
After logging into the Remote Desktop, you can find the settings icon (gear) in the top-right corner of the page to modify the settings mentioned above.
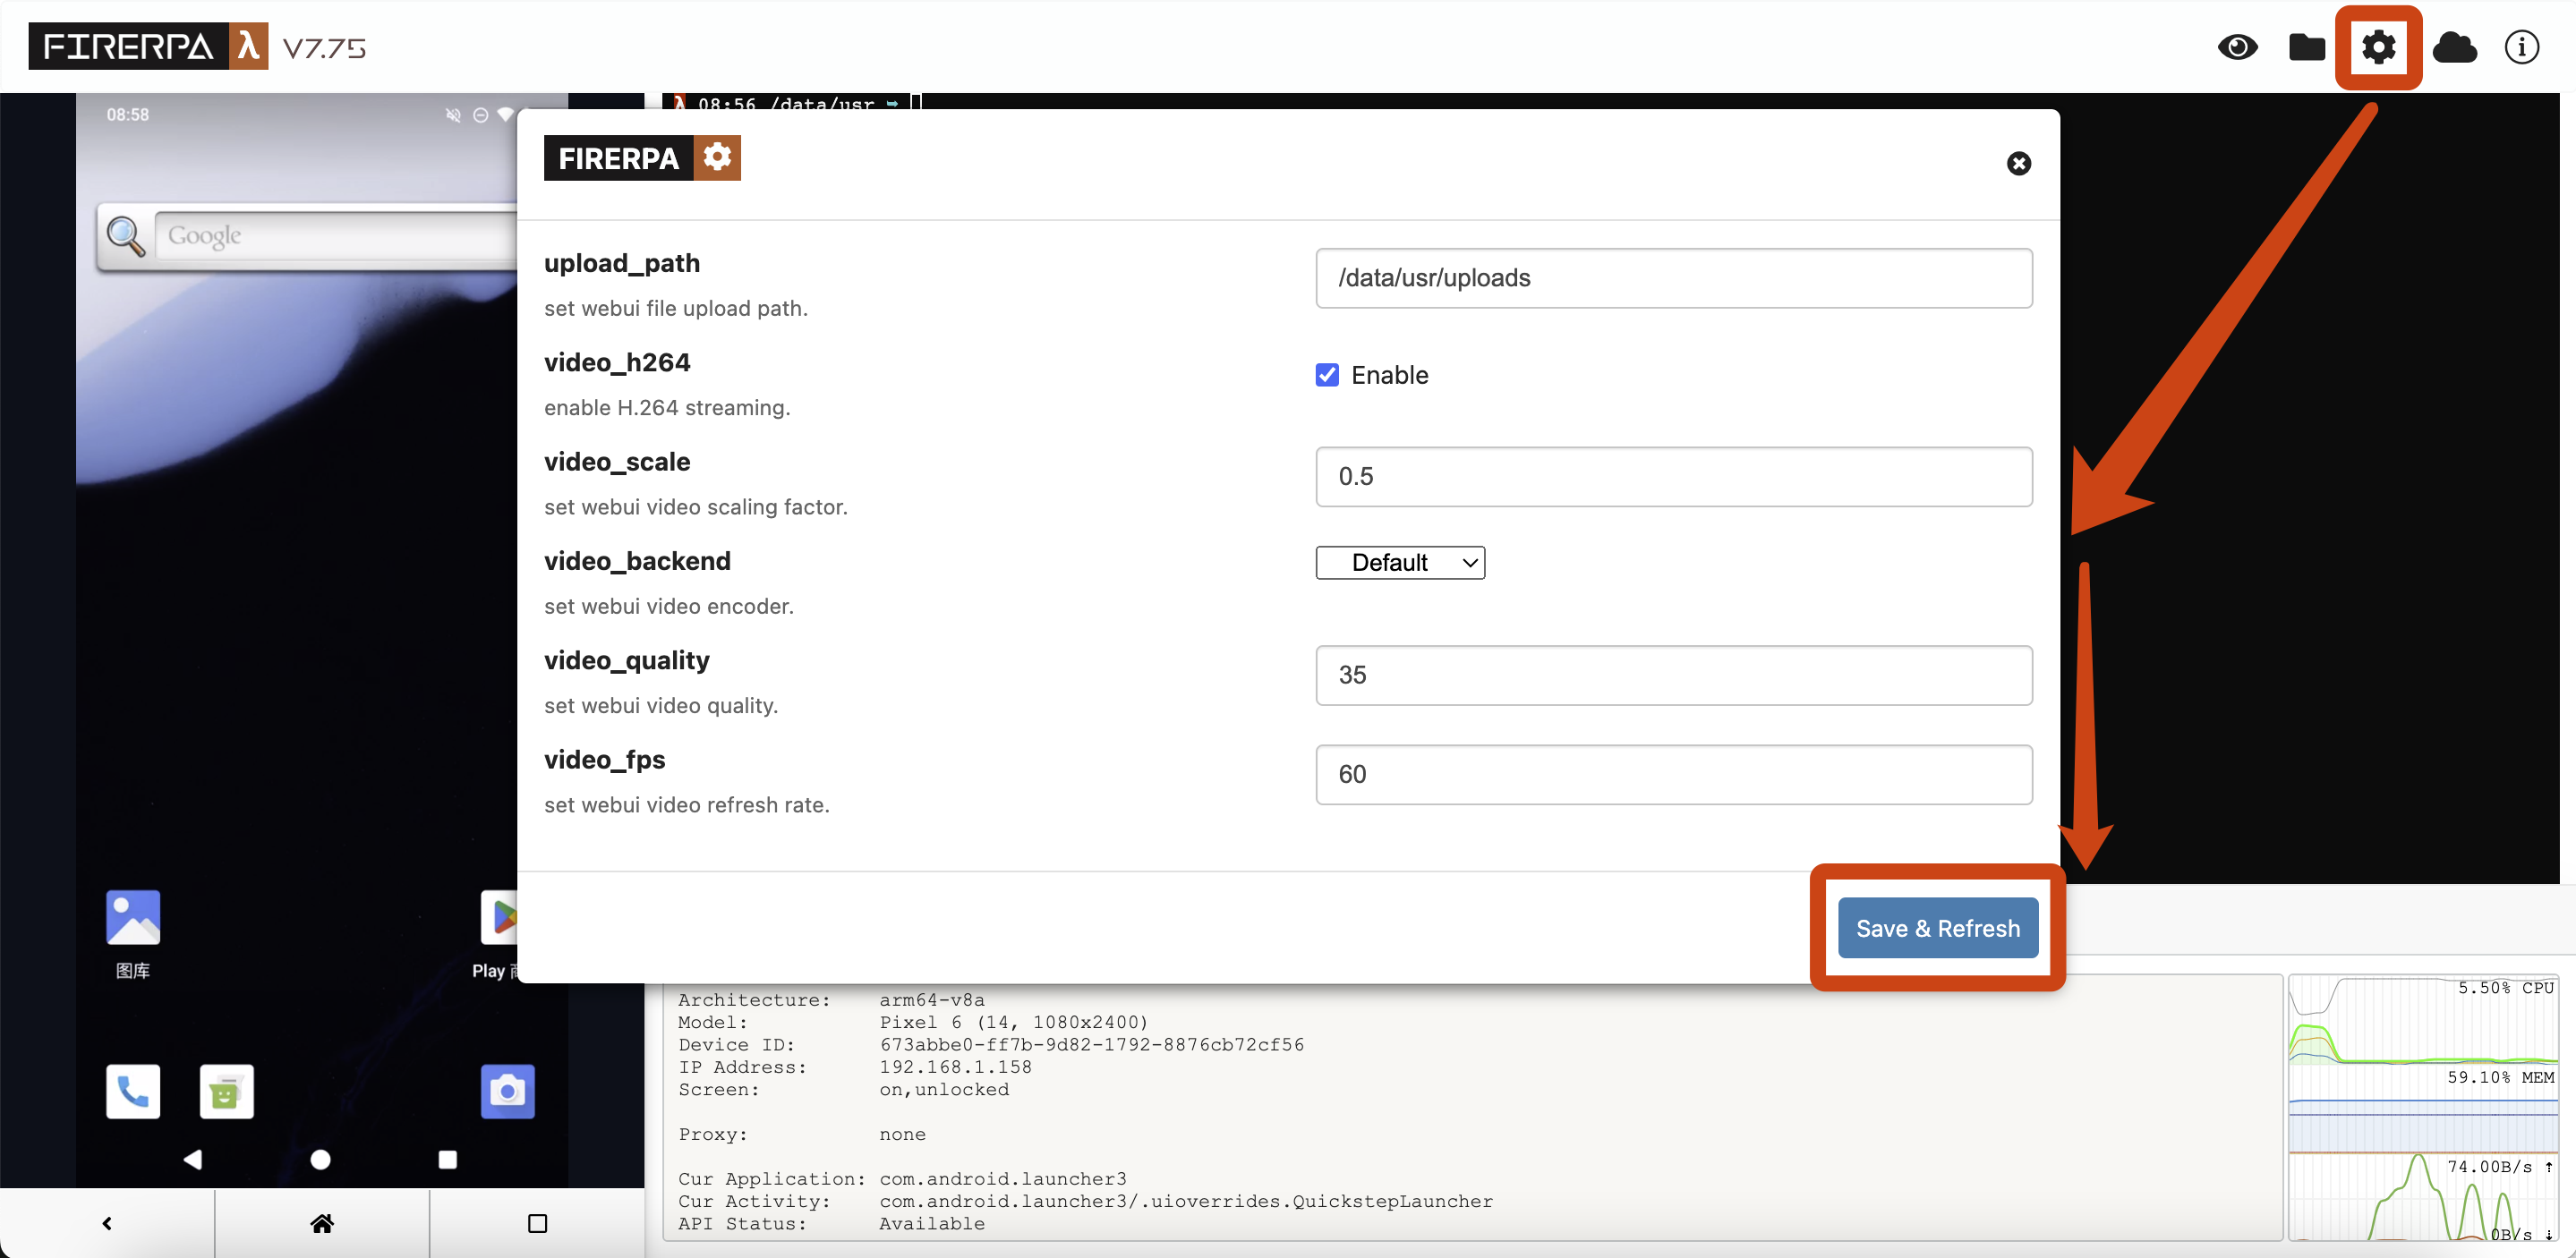
Remote Desktop does not support Chinese input; you can input standard English characters. If you need a more user-friendly operating experience, such as keyboard input, please first read the following section `Connecting to the Built-in ADB`. After completing `adb connect` to FIRERPA, you can install other relevant screen mirroring software like [Genymobile/scrcpy](https://github.com/Genymobile/scrcpy). For specific usage instructions, please refer to its documentation.
--- END OF remote-desktop.md ---
--- DOCUMENT: scp.md ---
--- SOURCE: https://device-farm.com/docs/content/en/scp.md ---
# Copying Files via SCP
Copy the `/sdcard/DCIM` directory from 192.168.1.2 to the current directory.
```bash
bash scp.sh 192.168.1.2:/sdcard/DCIM .
```
Copy the local directory `test/` to `/sdcard/` on the device 192.168.1.2.
```bash
bash scp.sh test/ 192.168.1.2:/sdcard
```
--- END OF scp.md ---
--- DOCUMENT: script-encrypt.md ---
--- SOURCE: https://device-farm.com/docs/content/en/script-encrypt.md ---
# Script Encryption
In this chapter, you will learn how to encrypt the FIRERPA modules or scripts you have developed. This chapter does not cover script encryption on the PC side, but rather scripts or modules that run in FIRERPA's built-in Python environment. For example, modules in `/data/usr/module/task` and `/data/usr/module/extension`, or scripts executed using the built-in Python command. We provide relevant tools to help you do this quickly. Through this chapter, you will learn how to protect the scripts you have developed.
Script encryption is performed by converting Python code to C using Cython and then compiling it into a `.so` file. This process will not significantly impact your performance. However, we recommend that you only encrypt your core logic, not all script files. Additionally, do not use this method to encrypt third-party library files, as this is futile. You should always follow the principle of "only encrypt your own logic."
## Building the Tool Image
We heavily rely on Docker, so please ensure Docker is ready before you proceed. Now, please clone `https://github.com/firerpa/compiler` and build the image according to the documentation or by using the following command.
```bash
docker build -t compiler .
```
## Encrypting Script Code
Use the following command to map the source code into the image and compile it. Supported architectures include `arm`, `arm64`, `x86`, and `x86_64`, corresponding to different architectures of the FIRERPA server. Different architectures are not compatible with each other.
```bash
docker run -it --rm -v /source/dir:/data compiler:latest compile.sh --arch arm64 /data/my_important_script.py
```
Normally, after running the command, you will get a `my_important_script.cpython-39.so` file in the same directory as your script. Do not rename this file. If you need to use a different name, you should rename the original script file directly. Now, in your published script package, you can delete the corresponding `.py` source file and include the `.so` file instead.
```{attention}
If your code is not a FIRERPA module (extension, task) and consists of only a single file, Python cannot directly execute a `.so` file. You will need to write an entry `.py` script to import and run the encrypted `.so` file. If it is a module, you can simply place it in the relevant directory and restart the service.
```
--- END OF script-encrypt.md ---
--- DOCUMENT: selinux.md ---
--- SOURCE: https://device-farm.com/docs/content/en/selinux.md ---
# Reading and Writing SELinux Rules
This interface allows you to perform basic read and conventional write operations on the system's SELinux rules, enabling you to set or bypass some system restrictions. The related interfaces may affect system functionality, so please use them with caution. You need to have your own understanding of SELinux.
## Getting an Operation Instance
Before you begin, you need to get an SELinux instance.
```python
selinux = d.stub("SelinuxPolicy")
```
## Getting SELinux Status
Use the following interface call to check if SELinux rules are enabled.
```python
selinux.enabled()
```
```python
>>> selinux.is_enabled( )
True
```
Use the following interface call to check if the current state is enforcing.
```python
selinux.get_enforce()
```
```python
>>> selinux.get_enforce()
1
```
## Setting SELinux Status
Use the following interface call to set SELinux to enforcing or permissive mode.
```python
selinux.set_enforce(enable)
```
Use the following interface call to set it to enforcing mode.
```python
>>> selinux.set_enforce(True)
1
```
Use the following interface call to set it to permissive mode.
```python
>>> selinux.set_enforce( False)
0
```
## Creating a New Domain
Use the following interface call to create a new domain in SELinux.
```python
selinux.create_domain(domain_name)
```
```python
>>> selinux.create_domain("hello_selinux")
True
```
## Setting a Domain to Permissive
Use the following interface call to set an SELinux domain to permissive mode.
```python
selinux.permissive(domain_name)
```
```python
>>> selinux.permissive("untrusted_app")
True
```
## Setting a Domain to Enforcing
Use the following interface call to set an SELinux domain to enforcing mode.
```python
selinux.enforce(domain_name)
```
```python
>>> selinux.enforce("untrusted_app")
True
```
## Fine-grained Control Rules
Use the following interface calls to write more fine-grained `allow` and `disallow` rules.
```python
selinux.disallow(source, target, tclass, action)
```
```python
selinux.allow(source, target, tclass, action)
```
Here, `source` and `target` represent the source and target contexts, `tclass` represents the target class, and `action` represents the specific operation. The `action` parameter only supports `*` (representing all) or a specific action. None of the parameters support multiple contexts or actions, such as the standard rule syntax `{binder system_app}`. Here, you can only provide a single name. Below is an example operation.
```python
>>> selinux.allow("hal_camera_default", "camera_vendor_data_file", "dir", "*")
```
The rule above means to grant `hal_camera_default` all operation permissions on the `camera_vendor_data_file` directory (`dir`). Similarly, changing the method to `disallow` would deny these permissions.
```python
>>> selinux.allow("hal_camera_default", "camera_vendor_data_file", "dir", "search")
```
You can also provide a fine-grained action like `search` as shown above.
--- END OF selinux.md ---
--- DOCUMENT: server-certifiacte.md ---
--- SOURCE: https://device-farm.com/docs/content/en/server-certifiacte.md ---
# Generating Service Certificate
This chapter describes how to generate a service certificate for FIRERPA. It is important to note that this certificate is different from the one used for man-in-the-middle packet sniffing. This certificate is used to encrypt the communication traffic between you and the FIRERPA service, preventing unauthorized access to the FIRERPA service and Remote Desktop on your device, thus avoiding security risks like information leakage.
You can find the certificate generation script, named `cert.py`, in the project's `tools` directory. You need to have the environment and dependencies installed beforehand. We recommend keeping them updated to avoid compatibility issues. You can generate a simple service certificate with the following command, which will create a certificate file named `mydevice.local.pem`.
```bash
python3 cert.py mydevice.local
```
`root.crt` and `root.key` will also be generated in the current directory. These are the root certificates; while not typically used directly, please store them securely.
```text
LAMDA SSL CERTIFICATE (CN=mydevice.local,PASSWD=e908d358...)
-----BEGIN RSA PRIVATE KEY-----
MIIEpQIBAAKCAQEA33YUKkfUkLeWtsCe7A1yzIZsqOTd1a8XWr9+Vh0ombOdtnqK...
-----END RSA PRIVATE KEY-----
-----BEGIN CERTIFICATE-----
MIIC1DCCAbygAwIBAgIQBKjY0w1FbPJooD5mJ1CWwDANBgkqhkiG9w0BAQsFADAz...
-----END CERTIFICATE-----
-----BEGIN CERTIFICATE-----
MIIDAzCCAeugAwIBAgIQR9OCJbQGGQT5Pgp7PmLrDTANBgkqhkiG9w0BAQsFADAz...
-----END CERTIFICATE-----
```
The format of the generated certificate is shown above. Please do not edit this file yourself. The certificate contains the default Remote Desktop login password. Once you apply this service certificate to the FIRERPA service, you will need to use `https` to access the Remote Desktop, and you will need to use the `PASSWD` from the certificate for authorization. SSH will also require this certificate to complete the login.
--- END OF server-certifiacte.md ---
--- DOCUMENT: service-logs.md ---
--- SOURCE: https://device-farm.com/docs/content/en/service-logs.md ---
# Viewing Logs
By default, FIRERPA does not write any logs. If you need to view runtime logs, you can configure the service to write logs to a file in two ways. In most cases, you might have installed it via a Magisk module or an auto-start app. In these scenarios, you cannot set the log file by directly adding command-line arguments; you need to configure logging through `properties.local`. You can manually edit the `properties.local` configuration file or use the following command to write the log configuration.
```bash
echo logfile=/data/local/tmp/server.log >>~/properties.local
```
For users who start the service manually, since you run `launch.sh` directly (either manually or through other methods), you can also achieve this by adding the `--logfile=/data/local/tmp/server.log` argument to the command. This has the same effect as the method described above.
```bash
sh /path/to/server/bin/launch.sh --logfile=/data/local/tmp/server.log
```
```{attention}
After updating the `properties.local` configuration file, you need to restart the device or the FIRERPA service for the changes to take effect.
```
Generally, we do not recommend enabling logging. This is because service logs are written in append mode, which, in extreme cases, might fill up your device's storage. Therefore, you may need to write additional script logic to automatically clean up logs to prevent such issues.
--- END OF service-logs.md ---
--- DOCUMENT: set-proxy.md ---
--- SOURCE: https://device-farm.com/docs/content/en/set-proxy.md ---
# Set System Proxy (IP Switching)
In this chapter, you will learn how to set up an IP proxy for the current mobile phone. FIRERPA supports setting up HTTP and SOCKS5 proxies for your phone, which will route all of its communication traffic through the configured proxy. This feature does not currently support IPv6.
## Connecting to a Proxy
This interface has many parameters. Assuming the proxy you obtained from your service provider is `http://1.x.x.x:8080`, you only need a few lines of code to route the device's traffic through this proxy. You can continue to the `Full Parameters` section below to learn about all available parameters.
```python
profile = GproxyProfile()
profile.type = GproxyType.HTTP_CONNECT
profile.drop_udp = True
profile.host = "1.x.x.x"
profile.port = 8080
d.start_gproxy(profile)
```
It is important to note that after setting up the proxy, currently running applications will not immediately use it. This is because these applications have already established their TCP connections before the proxy was set. Therefore, you need to manually close and reopen the target application for it to establish a connection through the proxy.
## Proxy Types
| Proxy Type | Description |
|---|---|
| GproxyType.HTTP_CONNECT | HTTP |
| GproxyType.HTTPS_CONNECT | HTTPS (HTTP+TLS) |
| GproxyType.SOCKS5 | Socks5 |
| GproxyType.SHADOWSOCKS | Shadowsocks |
| GproxyType.HTTP_RELAY | Deprecated |
### Shadowsocks Encryption Parameters
The following list shows the supported Shadowsocks encryption types. Only the encryption methods listed are supported; obfuscation parameters are not.
| Encryption Type | Name |
|---|---|
| AES | aes-128-cfb |
| AES | aes-192-cfb |
| AES | aes-256-cfb |
| AES | aes-128-ctr |
| AES | aes-192-ctr |
| AES | aes-256-ctr |
| CAMELLIA | camellia-128-cfb |
| CAMELLIA | camellia-192-cfb |
| CAMELLIA | camellia-256-cfb |
| DES | des-cfb |
| AES-AEAD | aes-128-gcm |
| AES-AEAD | aes-192-gcm |
| AES-AEAD | aes-256-gcm |
| AEAD | chacha20-ietf-poly1305 |
For Shadowsocks, use the following method to set the encryption method and password.
```python
profile.login = "chacha20-ietf-poly1305"
profile.password = "your_password"
```
## Disconnecting the Proxy
You can use the following to disconnect the proxy set by FIRERPA on the system. This interface is very simple and does not require any additional parameters.
```python
d.stop_gproxy()
```
## Full Parameters
Below is the complete parameter configuration information for the proxy interface. You can decide whether to use each parameter based on its description.
You can configure the type of proxy service with the following parameter. For a SOCKS5 proxy, it would be `GproxyType.SOCKS5`.
```python
profile.type = GproxyType.HTTP_CONNECT
```
If you need to redirect DNS queries, this parameter will cause all DNS queries from the system to be forwarded to this address. If coexisting with OpenVPN, do not set this to OpenVPN's internal network DNS, as it may cause a complete network disconnection. When this configuration is not used, the system's default DNS is used.
```{attention}
If the `dns_proxy` parameter is set to proxy DNS queries, the DNS server you use must support TCP queries. Most common DNS servers support TCP queries.
```
```python
profile.nameserver = "114.114.114.114"
```
Configuration for the proxy server's IP address and its port number.
```python
profile.host = proxy_server_address
profile.port = proxy_server_port
```
If your proxy server requires login authentication, you can provide it using the following parameters. This depends on your proxy provider. For the Shadowsocks type, `login` is the encryption method.
```python
profile.login = "proxy_server_login_username"
profile.password = "proxy_server_login_password"
```
Used to block UDP traffic in the system. Why block UDP traffic? Because most public proxy services today do not support proxying UDP traffic from the system. Of course, some SOCKS5 servers do support UDP proxying, such as our self-hosted solution, and Shadowsocks also typically supports UDP. Therefore, disabling system UDP traffic is a good option. This option is disabled by default.
```python
profile.drop_udp = False
```
Used to configure whether to bypass the local network. If set to `True`, traffic to router subnets like 192.168.x.x and 10.x.x.x will not go through the proxy. It defaults to `False`. Note that if `udp_proxy` is enabled, this option has no effect on UDP traffic.
```python
profile.bypass_local_subnet = True
```
Used to configure whether to proxy UDP traffic. Your proxy must meet some prerequisites: it must be a `GproxyType.SOCKS5` or `GproxyType.SHADOWSOCKS` proxy, and your proxy server must have UDP proxy support enabled. You can install a SOCKS5 UDP-supported proxy server or build your own SS server using the documentation we provide. It defaults to `False`. This option will be ignored if you are using an HTTP proxy or if the `drop_udp` option is `True`.
```python
profile.udp_proxy = False
```
Used to set whether you need to forward all DNS traffic through the proxy. When this option is enabled, all DNS traffic on the device will be sent through the proxy, which can prevent DNS pollution. When using this option, you must also specify the `nameserver` parameter. It should not be used in packet capturing scenarios, as packet capturing software may not handle DNS packets correctly, leading to a pseudo network disconnection.
```python
profile.dns_proxy = False
```
You can use the following configuration to set a proxy for only a specific application in the system. Traffic from other applications will not go through the proxy.
```python
# Please choose one of the following three ways to select the target application.
app = d.application("com.android.browser")
app = d.get_application_by_name("Browser")
app = d.application("com.android.browser", user=999) # Cloned application
profile.application.set(app)
```
## Auto-applying the Proxy
You can make FIRERPA automatically connect to a preset proxy server on startup, ensuring that your phone's traffic always goes through the proxy. Copy the following configuration, modify it with your proxy information, write it to the `properties.local` file, and then restart FIRERPA. Some fields not described here have the same names as those described in the `Full Parameters` section.
```ini
gproxy.enable=true
gproxy.type=http-connect
gproxy.host=1.x.x.x
gproxy.port=8080
gproxy.password=
gproxy.login=
```
## Setting up a Proxy Server
FIRERPA provides an out-of-the-box SOCKS5 proxy service Docker container in the `tools` directory that also supports UDP. You can learn how to deploy your own proxy server in the relevant sections of this documentation on deploying a proxy service.
--- END OF set-proxy.md ---
--- DOCUMENT: shutdown-reboot.md ---
--- SOURCE: https://device-farm.com/docs/content/en/shutdown-reboot.md ---
# Shutdown and Reboot
This interface is used to control the device's shutdown and reboot, or to exit the FIRERPA service itself.
## Shut Down the System
This operation will shut down the current device.
```python
d.shutdown()
```
## Reboot the System
This operation will reboot the current device.
```python
d.reboot()
```
## Exit the Service
This operation will cause the FIRERPA service itself to exit.
```python
d.exit()
```
--- END OF shutdown-reboot.md ---
--- DOCUMENT: ssh.md ---
--- SOURCE: https://device-farm.com/docs/content/en/ssh.md ---
# Connect to Built-in SSH
Connect to the shell terminal on the phone.
```bash
bash ssh.sh 192.168.1.2
```
--- END OF ssh.md ---
--- DOCUMENT: start-service.md ---
--- SOURCE: https://device-farm.com/docs/content/en/start-service.md ---
# Starting the Server
FIRERPA installed via Magisk or the auto-start APP will start automatically on boot. You only need to restart your device after the initial installation and can skip this chapter. If you installed it manually, you need to continue with this chapter to start the server manually.
```{hint}
On the first start, the remote desktop may get stuck on loading. If this happens, please first try restarting the device and then restarting the FIRERPA service. If it still doesn't work after waiting for a long time, please report this issue to us.
```
## Executing the Start Command
Now, enter the adb shell again and switch to the `su` root user. Execute the following command. After execution, please wait for the process to exit. The output `llllaamDaa started` indicates that the service has started successfully and entered background mode. You can then exit the adb shell. Otherwise, please troubleshoot according to the error messages below.
```bash
sh /data/server/bin/launch.sh
```
## Troubleshooting Error Messages
The following error messages may appear while starting FIRERPA. You can troubleshoot based on these messages. Under normal circumstances, `llllaamDaa started` will be output to the screen upon successful startup. At this point, the service has successfully entered background mode and has not exited. You can close the terminal and proceed with other operations. However, if any of the following errors appear, the startup has failed. You can troubleshoot the issue based on the error messages below.
| Error Output | Description |
|------------------|--------------------------------------------------|
| already running | The service is already running. |
| invalid TZ area | System timezone is not set or is incorrect. |
| not run as root | Please run as the root user. |
| unsupported sdk | This Android system version is not supported. |
| abi not match | The tar.gz package for the wrong architecture was used. |
| file broken | File is corrupted, please reinstall. |
--- END OF start-service.md ---
--- DOCUMENT: system-props.md ---
--- SOURCE: https://device-farm.com/docs/content/en/system-props.md ---
# Read and Write System Properties (prop)
This API is used to read or modify system properties, similar to the functionality of the `getprop` and `setprop` commands. You might ask, "Why not just use the commands? What's special about this?"
Indeed, but you should know that this API can directly set `ro.` Android properties, which the system's built-in commands cannot do.
## Get Property
You can use the following API to get the value of `ro.secure`. Of course, this is not limited to just this one property; all system properties can be read using this API. This is just an example.
```python
d.getprop("ro.secure")
```
## Set Property
You can also use the following API to set the value of `ro.secure` to "0". Of course, you can set any property with this API, including the values of read-only (`ro.`) properties, which is the main advantage of this interface.
```python
d.setprop("ro.secure", "0")
```
--- END OF system-props.md ---
--- DOCUMENT: system-settings.md ---
--- SOURCE: https://device-farm.com/docs/content/en/system-settings.md ---
# Reading and Writing System Settings (settings)
You can use FIRERPA's Settings-related interfaces to configure some Android system parameters or read system settings. This feature can accomplish many specific tasks, for example, setting screen brightness, toggling developer mode, or even adjusting ringtone volume. Here, we will only provide some simple examples.
## Calling Interfaces
If you are still confused, don't worry; we will explain everything in detail later. Before you start, you need to get a `Settings` instance. You can call it like this:
```python
settings = d.stub("Settings")
```
Then, you can execute the following code to set the system screen brightness to manual mode. This way, your device's screen brightness will not change with the ambient light, allowing you to set a fixed brightness level.
```python
settings.put_system("screen_brightness_mode", "0")
```
You can use the following two interfaces to get the current screen brightness and then set the screen brightness to 5.
```python
settings.get_system("screen_brightness")
settings.put_system("screen_brightness", "5")
```
You can also use the following two interfaces to check if developer mode is enabled, and then disable it.
```python
settings.get_global("development_settings_enabled")
settings.put_global("development_settings_enabled", "0")
```
You can also use the following two interfaces to check if the screensaver is enabled, and then disable it.
```
settings.get_secure("screensaver_enabled")
settings.put_secure("screensaver_enabled", "0)
```
Alright, that concludes the introduction. The examples above are just to guide you on how to use these features. You can continue reading to unlock their full potential.
## Available Parameters
If you are wondering about strings like `screen_brightness`, this section is for you. The available parameters for this interface depend entirely on what the system supports. You should be aware that some constants may not be compatible across different Android versions, and some manufacturers may have custom variables. You can find the relevant available parameters in the official Android documentation linked below. You can use the fields from these documents with the interfaces described above to configure system settings.
https://developer.android.com/reference/android/provider/Settings.System
https://developer.android.com/reference/android/provider/Settings.Secure
https://developer.android.com/reference/android/provider/Settings.Global
--- END OF system-settings.md ---
--- DOCUMENT: tech-support.md ---
--- SOURCE: https://device-farm.com/docs/content/en/tech-support.md ---
# Service and Support
```{attention}
Before contacting support, please ensure you have read the relevant documentation completely and in order. **We typically answer all reasonable questions**. However, if your question is about steps you haven't followed or notices you've ignored in the documentation, we will disregard it. Thank you for your understanding.
```
```{note}
The FAQ section includes solutions and troubleshooting methods for common problems. Please check this section first to see if your issue is listed.
```
## Usage Help
If you have any questions during use, you can reach us through the following contact methods: [Telegram t.me](https://t.me/lamda_dev) or [QQ Group](https://qm.qq.com/q/zDaX2a594I). You can click the link to join directly or search for QQ group 909327183.
## Other Support
If you require other types of support, including but not limited to private deployment, technical implementation solutions, consulting, or other enterprise-level technical support such as source code, you can also contact us through any of the methods mentioned above.
## Issues and Suggestions
You can submit issues or suggestions on the project's [issues](https://github.com/firerpa/lamda/issues/new) page. For non-public suggestions, you can send them to our [email](mailto:lamda.devel@gmail.com). Your feedback is what drives our improvement, and we look forward to your suggestions.
--- END OF tech-support.md ---
--- DOCUMENT: tools-prepare.md ---
--- SOURCE: https://device-farm.com/docs/content/en/tools-prepare.md ---
# Preparing Additional Tools
These tools are designed to work on Linux/macOS systems. They are wrappers for commonly used personal functions and have not been specifically tested for Windows compatibility, although this does not mean FIRERPA itself is unsupported on Windows. If you are using Windows, scripts ending in `.sh` will likely not function correctly. Before you begin, please ensure the FIRERPA server is running on your device. Some command documentation may become outdated due to updates. To avoid version conflicts, please install the latest version of FIRERPA, its Python library, and dependencies on your mobile device before proceeding. Some features require adb, so please make sure you have the latest version of adb installed.
## Cloning the Tool's Code
First, you need to execute the following command to download the scripts and code for the related tools. We assume you have git installed.
```bash
git clone https://github.com/firerpa/lamda.git
```
```{tip}
If you don't have git installed, download and unzip this file: https://github.com/firerpa/lamda/archive/refs/heads/master.zip
```
## Installing Dependencies
Navigate to the `tools` directory within the tool's source code and install the required Python dependencies.
```bash
pip3 install -r requirements.txt
```
```{attention}
Our dependency files may not always be up-to-date. If you receive a message about a missing dependency, please install it manually.
```
## Environment Setup
Before using the tools, you need to modify environment variables based on the server's startup parameters. Otherwise, the tools will not be able to automatically match your modified settings, such as port or certificate information. If you have enabled a service certificate on the server, you need to set the path to your certificate before use.
```bash
# For Linux / macOS
export CERTIFICATE=/path/to/lamda.pem
# For Windows (the path cannot contain spaces)
set CERTIFICATE=C:\Users\path\to\lamda.pem
```
Alternatively, if you have changed the default port for the FIRERPA service from 65000, you also need to set the port environment variable before use.
```bash
# For Linux / macOS
export PORT=8123
# For Windows (the path cannot contain spaces)
set PORT=8123
```
--- END OF tools-prepare.md ---
--- DOCUMENT: ui-advanced.md ---
--- SOURCE: https://device-farm.com/docs/content/en/ui-advanced.md ---
# Advanced UI Operations
This chapter introduces more in-depth automation APIs that you can use to perform various detailed operations. This chapter contains a lot of content. If this is your first time, we recommend that you patiently read through each section.
```{tip}
When writing automation code, you can directly enter the command `lamda` in the terminal on the right side of the remote desktop. There, you can execute the following test code or perform your own element selection and click tests. This can speed up your development and verification process.
```
## Get Element
You may already have some understanding of this from the basic knowledge or previous sections. You need to find the relevant element through a selector before you can operate on it. You should also have seen where to get the selector parameters. The following introductions will revolve around this element. You can see the relevant information for the "同意" (Agree) element on the right side of this image.
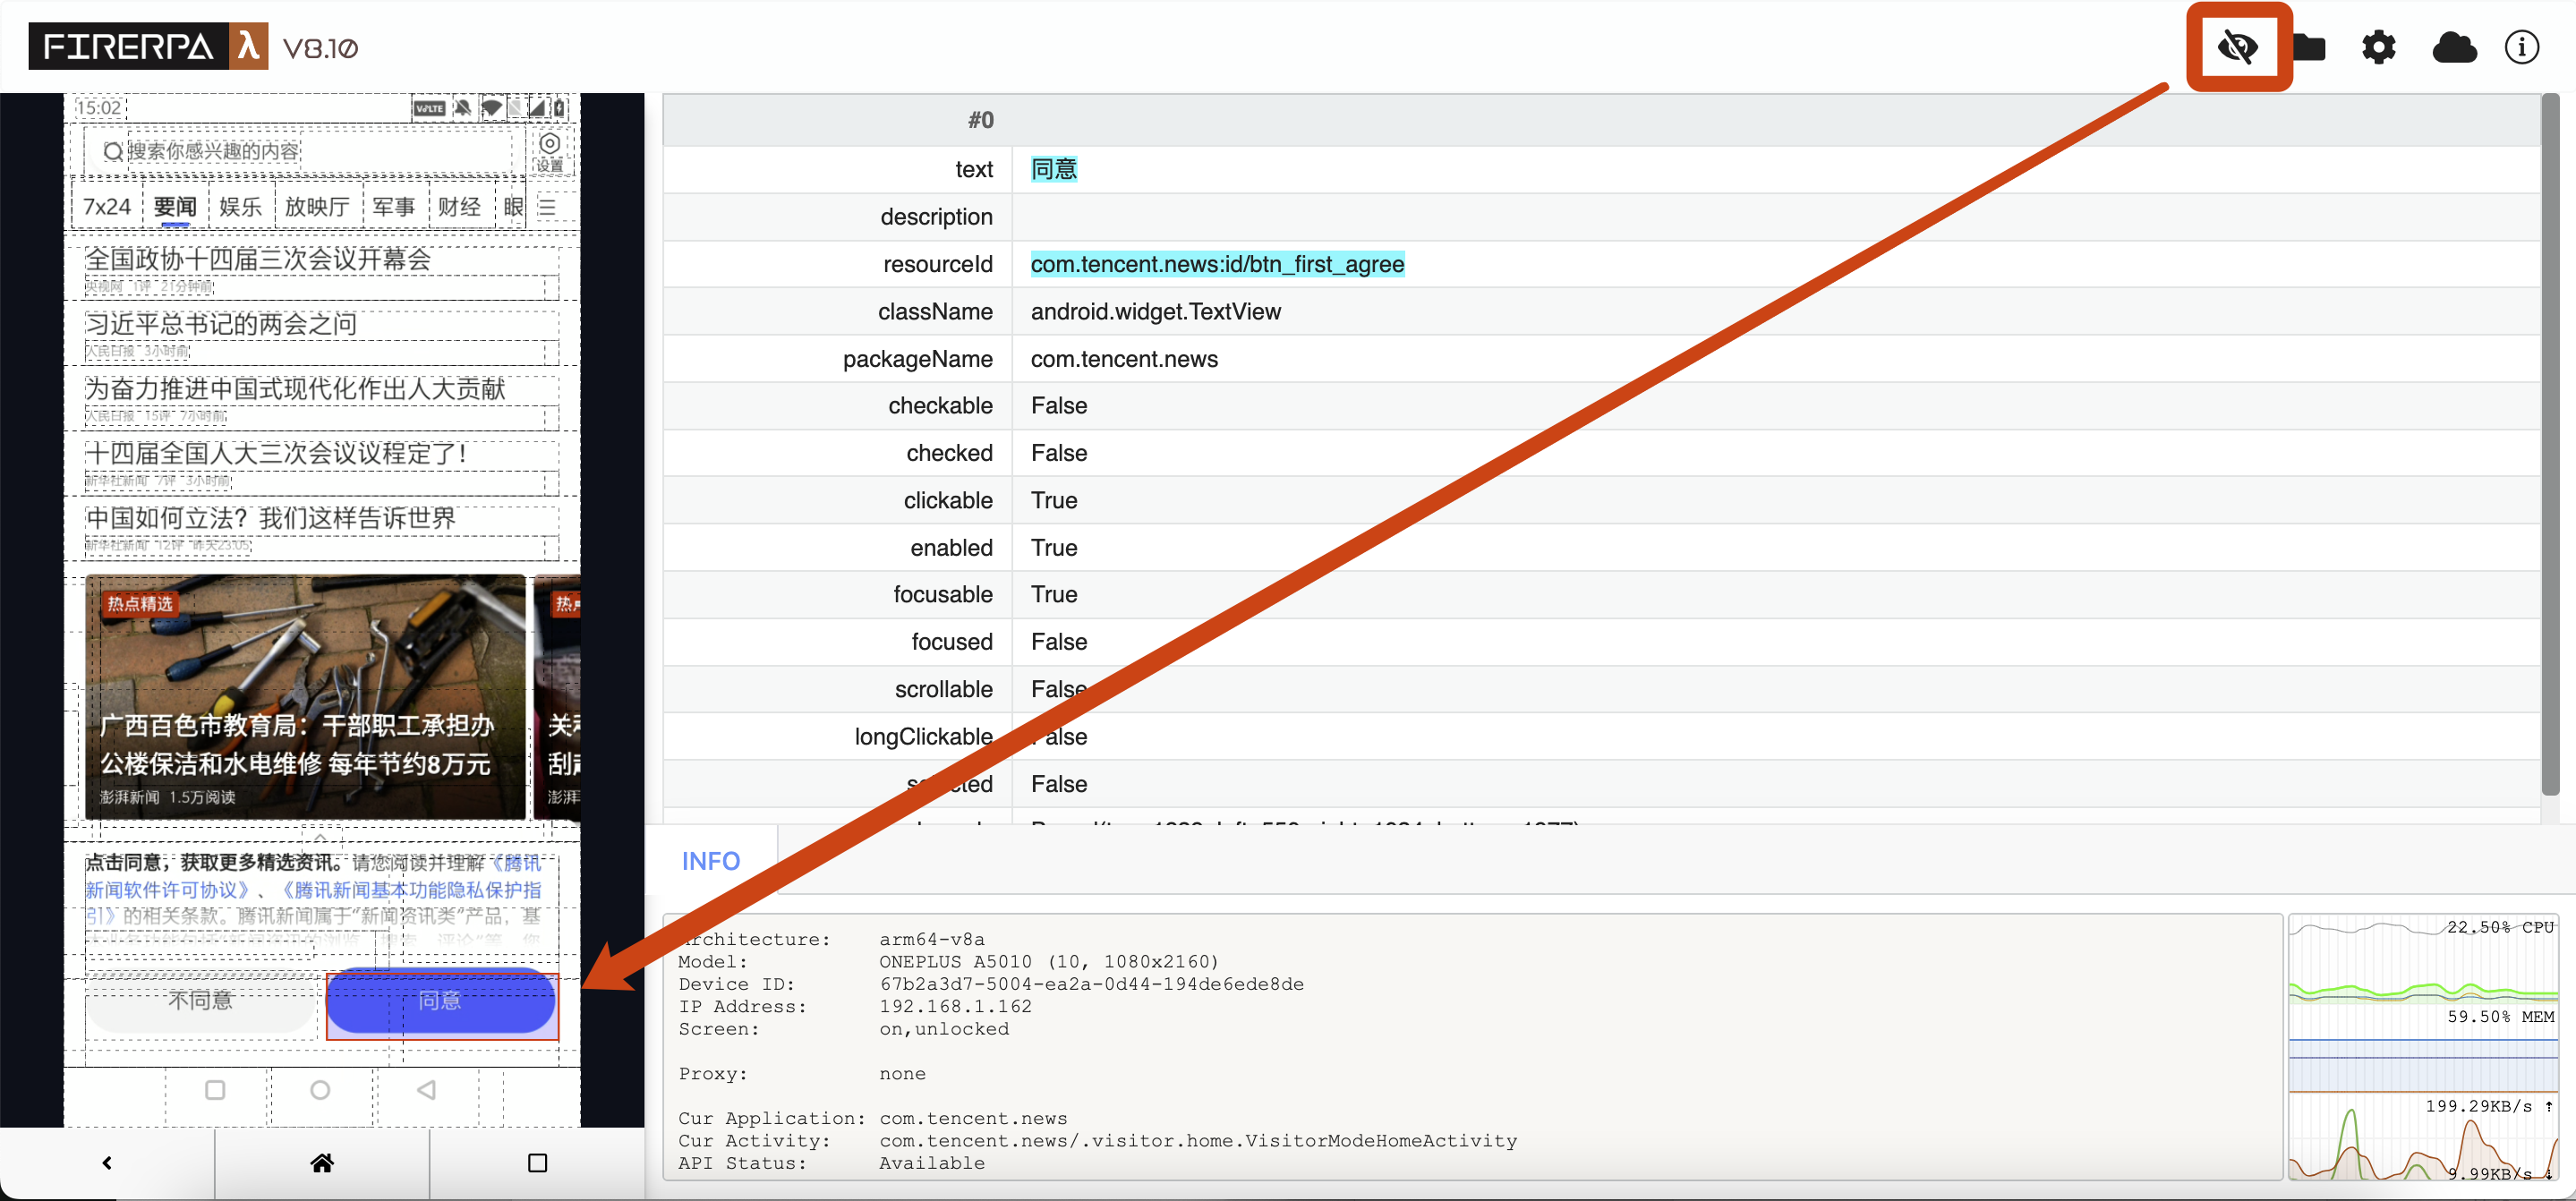
```{attention}
The element you click directly on the left interface may not be the actual element, as it might overlap with other elements in size and position. Typically, when multiple elements overlap in size and position, we will also display them in the information bar on the right. You can scroll up and down to see which one is truly needed. You can also manually iterate through all elements by pressing the TAB key on the left selection interface.
```
For the element above, we generally get it by `text`. The condition for using `text` is that there is no other element on the current interface with the text "同意". This is the simplest method. Alternatively, you can use `resourceId`, but you need to be aware that `resourceId` here does not represent a unique ID; it represents a resource ID, and an interface may contain many elements with the same resource ID. Others like `packageName`, `checkable`, etc., are generally not commonly used, but if `text`, `resourceId`, `description`, etc., are not available, you can try using these fields. We can get this element in the following ways.
```python
element = d(text="同意")
element = d(text="同意", resourceId="com.tencent.news:id/btm_first_agree")
element = d(resourceId="com.tencent.news:id/btm_first_agree")
```
## Element Click
Call the following API to perform a normal element click operation. The context will demonstrate the effect of manually clicking "Agree".
```python
element.click()
```
If you need to specify the position to click on the element, you can specify `corner`. `Corner.COR_CENTER` means clicking the center point of the element. You can also click its top-left or bottom-right corner (`COR_BOTTOMRIGHT`).
```python
element.click_exists(corner=Corner.COR_TOPLEFT)
```
Performs a long-press operation on the element. Throws an exception if it does not exist. This API also supports `corner`, but the long-press duration cannot be specified.
```python
element.long_click()
```
Clicks the element if it exists. If the element does not exist, calling this API will not raise an exception. This API also supports `corner`.
```python
element.click_exists()
```
```python
>>> element.click_exists()
True
```
## Check Existence
In many cases, you need to check for the existence of an element before proceeding with further operations. Otherwise, subsequent processes may encounter exceptions or perform incorrect actions on the wrong interface. You may need to use the following API for existence checks in certain situations.
```python
element.exists()
```
## Element Information
In some cases, you might want to get partial information about an element, such as its coordinates, area, or string information like the text or description it contains. You can use the following API to read element information.
```python
element.info()
```
For our test element mentioned above, the output information is as follows:
```python
>>> info = element.info()
>>> print (info)
bounds { ... }
className: "android.widget.TextView"
clickable: true
enabled: true
focusable: true
packageName: "com.tencent.news"
resourceName: "com.tencent.news:id/btn_first_agree"
text: "\345\220\214\346\204\217"
visibleBounds { ... }
```
```{hint}
You may notice that some fields, like `description`, are missing from the printed information above. This usually means that the field has an empty value or is `false`. You can still access the relevant fields through their properties to get their values.
```
As you can see, this information is relatively complex. This is the default print format for protobuf. You can directly access the corresponding properties to print their actual values. For example, to read the `text` value of an element, you can use it as shown below.
```python
>>> info = element.info()
>>> print (info.text)
同意
```
Of course, there is also information related to the element's area and coordinates, which you can also access. For example, if you want to get the area information of the element, you can use it as shown below to print the area information. You can also assign it to a variable for subsequent operations.
```python
>>> info = element.info()
>>> print (info.bounds)
```
The output or returned value is area information (Bound). You will later find that this is a parameter also used by a certain screenshot API. Yes, you can pass this parameter to the screenshot API to take a screenshot of this element alone, but we have already encapsulated this for you.
You might also want to get the width and height of the element to calculate certain offsets, such as the offset of other relative elements. You can do this:
```python
>>> info = element.info()
>>> print (info.bounds.width, info.bounds.height)
484 138
```
Or, get the center point of the element, or corner points like the top-left and bottom-right. Of course, the following APIs usually return `Point` information, and you can get the corresponding X and Y axis screen coordinates from the `Point` object.
```python
>>> info = element.info()
>>> print (info.bounds.center())
x: 792
y: 1908
>>> print (info.bounds.center().x)
792
```
The following call is used to get the coordinates of the element's corners. The example gets the coordinates of the top-left corner. It also supports getting the coordinates of all four corners, such as `bottom-right`, `top-right`, and `bottom-left`.
```python
>>> info = element.info()
>>> print (info.bounds.corner("top-left"))
x: 550
y: 1839
>>> print (info.bounds.corner("top-left").x)
550
```
## Iterate Elements
You can also iterate through all elements selected by the selector. Normally, there might be only one element in the context, so if you are testing, please choose another selector for testing. You can iterate directly on the selector using a for loop or other methods.
```python
for i in element: print (i)
```
Or, if you know that there are multiple matching elements and you want to get the Nth matching element, you can use the following API.
```python
element_3rd = element.get(3)
```
## Count Elements
You will not usually use this API directly. The following call can get the number of elements matched by your current selector.
```python
>>> element.count()
1
```
## Element Screenshot
We support element-level screenshots, allowing you to capture the image of an element individually without taking a full-screen screenshot and then cropping it.
```python
element.screenshot(quality=60)
```
After taking a screenshot, you can directly use `getvalue` to get the binary data of the screenshot, or pass it directly to a PIL Image.
```python
>>> element.screenshot(quality=60).getvalue()
b'\xff\xd8\xff\xe0\x00\x10JFIF\x00\x01\x01\x00\x00\x01\x00\x01\x00\x00\xff\xe2\x02(ICC_PROFILE\x00\x01\x01\x00\x00\x02\x18\x00\x00\x00\x00\x02\x10\x00\x00mntrRGB XYZ \x00\x00...
```
Alternatively, if you don't need to process it further, you can choose to save the screenshot directly to a local file.
```python
>>> element.screenshot(quality=60).save("image.png")
```
## Wait for Element
In some cases, you may need to determine if the current page has finished loading. Usually, you can determine if the page has loaded by checking if a relevant element is displayed. The following example will wait for the "同意" (Agree) element to appear, with a maximum wait time of 10 seconds.
```{hint}
The wait duration here is in milliseconds, so 10 seconds needs to be multiplied by 1000. 10 seconds = 10000 milliseconds.
```
```python
element.wait_for_exists(10*1000)
```
```python
>>> element.wait_for_exists(10*1000)
True
```
Of course, we not only support waiting for an element to appear but also support waiting for an element to disappear, that is, until the element is gone from the interface.
```python
element.wait_until_gone(10*1000)
```
```python
>>> element.wait_until_gone(10*1000)
False
```
## Text Input
Text input is a relatively important area to pay attention to. We cannot input text into an "Agree" button because it is a button. Now, let's take an input box element as an example. The basic information of this element is as follows.
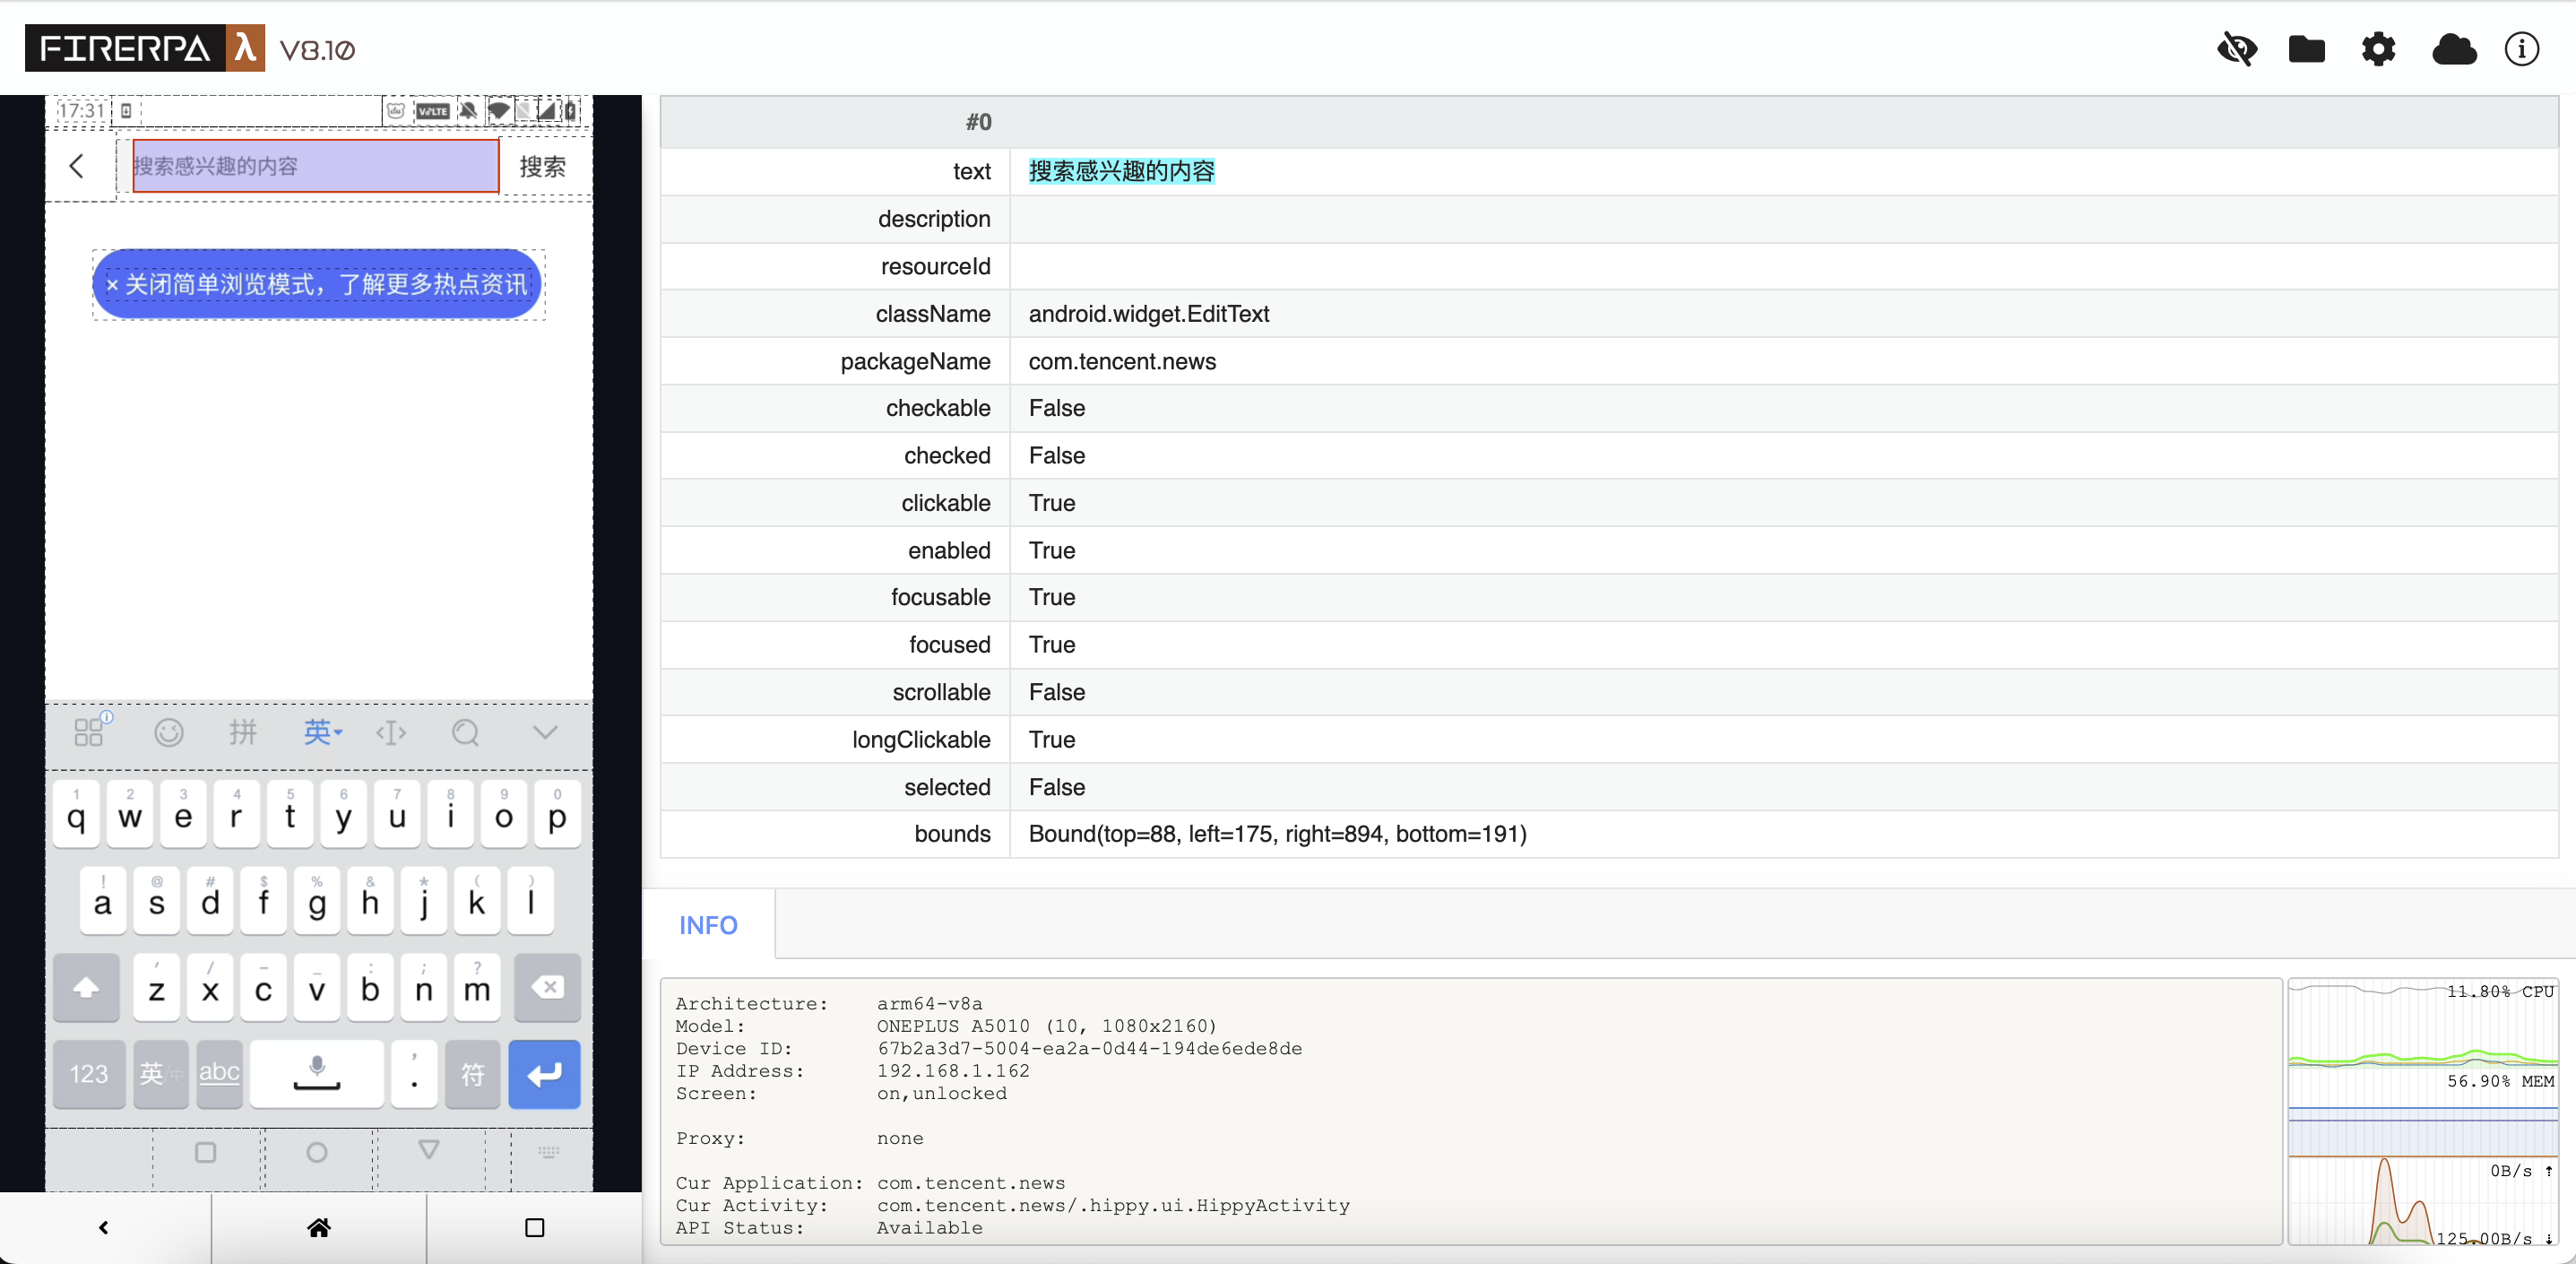
```{attention}
There are some things to be aware of when getting an input box element. Please be sure to note that when getting an input box element, your input method must be in the **popped-up state** before finding the relevant element, and it is recommended to search carefully. Otherwise, you may not be getting the real input box.
```
```{hint}
In the flow of automation code, you can make the input method pop up simply by writing code to first click the parent input box that is displayed.
```
For the input box above, we can call the following API to input the string "你好世界" (Hello World) into it. It also supports inputting English or other Unicode strings. You just need to use it as shown below to input text into the box.
```python
>>> element = d(text="搜索感兴趣的内容")
>>> element.set_text("你好世界")
True
```
Or, if you suddenly want to get the text currently displayed in this input box, you can call it like this.
```{attention}
You can see that we have changed the selector here. Our initial selector was based on `text`, but after we input text, the content changed, so that element no longer exists. Therefore, we switched to another selector. Using the right selector is very important, but since we've already written it, let's just go with it.
```
```python
>>> element = d(className="android.widget.EditText")
>>> element.get_text()
'你好世界'
```
Or, to clear the currently entered content. Usually, entering text will automatically clear the previous text, but you can also clear it manually.
```{hint}
In fact, you can achieve a similar effect by repeatedly pressing the BACKSPACE key using the key press API in a loop.
```
```python
>>> element = d(className="android.widget.EditText")
>>> element.clear_text_field( )
True
```
```{note}
In extreme cases, this API may not work correctly for text input in some places. We are working on supporting it.
```
## Normal Swipe
Use the following API to perform swipe operations on the interface, such as swiping up and down to scroll through a list. The following call implements an upward swipe. Adjust `step` as needed; a larger value will result in a slower swipe speed, which is more suitable for swipes requiring high precision.
```{attention}
For convenience, you can omit the selector parameter for this operation. However, if you encounter a situation where it cannot swipe, please set the selector condition to a suitable element, such as an element with `scrollable` or the top-level container of a list.
```
```python
d().swipe(direction=Direction.DIR_UP, step=32)
```
```python
>>> element = d(resourceId="com.tencent.news:id/important_list_content")
>>> element.swipe(direction=Direction.DIR_UP, step=32)
True
```
| Direction Indicator | Description |
|------------|----------|
| Direction.DIR_UP | Swipe up |
| Direction.DIR_LEFT | Swipe left |
| Direction.DIR_DOWN | Swipe down |
| Direction.DIR_RIGHT | Swipe right |
## Fling (Fast Swipe)
A fling is similar to a person quickly swiping the screen. This operation will swipe the screen quickly, suitable for simulating operations like fast browsing. The following example flings the screen from top to bottom. The selector is empty in the example; you still need to decide whether to fill in the selector based on the actual situation.
```python
d().fling_from_top_to_bottom()
```
Fling from bottom to top.
```python
d().fling_from_bottom_to_top()
```
Fling from left to right.
```python
d().fling_from_left_to_right()
```
Fling from right to left.
```python
d().fling_from_right_to_left()
```
```{attention}
For convenience, you can omit the selector parameter for this operation. However, if you encounter a situation where it cannot swipe, please set the selector condition to a suitable element, such as an element with `scrollable` or the top-level container of a list.
```
```python
>>> element = d(resourceId="com.tencent.news:id/important_list_content")
>>> element.fling_from_bottom_to_top()
True
```
Updating...
## Other Operations
```python
# Drag this APP into the "Shopping" folder (modify according to the actual situation)
element.drag_to(Selector(text="购物"))
#########
# Find sibling or child elements
#########
# Sometimes there are duplicate elements or elements without distinct features, making them hard to locate.
# In such cases, you can narrow down the search scope by finding child/sibling elements.
# Child element example: In a chat login form, the input boxes are child elements of the login form.
# Sibling element example: In a chat input form, the username and password boxes are sibling elements (under normal circumstances).
form = d(resourceId="login_form")
form.child(index=1)
# This will get the element at index 0 under login_form
form.child(index=1).sibling()
# You can also find the "Forgot Password" button, which is a sibling of login_form, like this
# (though you could just identify it by its text, so this is not necessary, just for demonstration).
form.sibling(textContains="找回密码")
# They are elements themselves, and you can perform any element operation on them.
# Others, keep swiping down/left/right/up until the end is reached.
# Because it's not always possible to swipe to the end or detect if the end has been reached,
# the max_swipes parameter is required.
d().fling_from_top_to_bottom_to_end(max_swipes=32)
d().fling_from_bottom_to_top_to_end(max_swipes=32)
d().fling_from_left_to_right_to_end(max_swipes=32)
d().fling_from_right_to_left_to_end(max_swipes=32)
#########
# scroll: A more mechanical swipe
#########
step = 60
max_swipes = 32
# Scroll down from the top by `step` steps
d().scroll_from_top_to_bottom(step)
# Scroll up from the bottom by `step` steps
d().scroll_from_bottom_to_top(step)
# Scroll right from the left by `step` steps
d().scroll_from_left_to_right(step)
# Scroll left from the right by `step` steps
d().scroll_from_right_to_left(step)
# Others, keep swiping down/left/right/up until the end is reached.
# Same description as for fling above.
d().scroll_from_top_to_bottom_to_end(max_swipes, step)
d().scroll_from_bottom_to_top_to_end(max_swipes, step)
d().scroll_from_left_to_right_to_end(max_swipes, step)
d().scroll_from_right_to_left_to_end(max_swipes, step)
```
--- END OF ui-advanced.md ---
--- DOCUMENT: ui-basics.md ---
--- SOURCE: https://device-farm.com/docs/content/en/ui-basics.md ---
# Basic Automation Operations
This chapter describes the basic automation features provided by FIRERPA. More advanced usage will be covered later. This chapter introduces some commonly used basic function interfaces.
## Get Device Information
Gets current device information such as device name, screen size, screen orientation, and the current application.
```python
d.device_info()
```
```python
>>> d.device_info()
productName: "bumblebee"
sdkInt: 34
displayHeight: 2400
displaySizeDpX: 411
displaySizeDpY: 914
displayWidth: 1080
screenOn: true
naturalOrientation: true
currentPackageName: "com.android.launcher3"
```
```python
>>> result = d.device_info()
>>> print (result.displayWidth)
1080
```
## Get Service Information
Gets information about the current service, such as its version, device unique ID, architecture, ABI, etc.
```python
d.server_info()
```
```python
>>> d.server_info( )
uniqueId: "673abbe0-ff7b-9d82-1792-8876cb72cf56"
version: "8.28"
architecture: "arm64-v8a"
uptime: 293
secure: True
```
```python
>>> result = d.server_info()
>>> print (result.secure)
False
```
## Turn Screen Off
The following interface will turn off the current phone screen, which is equivalent to pressing the power button when the screen is on.
```python
d.sleep()
```
## Turn Screen On
The following interface will turn on the current phone screen, which is equivalent to pressing the power button when the screen is off.
```python
d.wake_up()
```
## Check if Screen is On
You can use the following interface to check if the device's screen is on, to determine if operations can be performed.
```python
d.is_screen_on()
```
## Check if Screen is Locked
You can use the following interface to check if the device's screen is unlocked, to determine if operations can be performed.
```python
d.is_screen_locked()
```
## Show Toast
You can use the following interface to display a Toast message "Hello from Lamda!" on the phone's screen.
```python
d.show_toast("Hello from Lamda!")
```
## Read Clipboard
The following interface is used to read the current content of the phone's clipboard. It does not currently support Android 10+.
```python
d.get_clipboard()
```
## Write to Clipboard
The following interface is used to write content to the current device's clipboard.
```python
d.set_clipboard("Clipboard content")
```
## Physical Keys
You can use the following methods to simulate key presses. It supports more than ten keys such as `KEY_BACK`, `KEY_DOWN`, `KEY_HOME`, etc.
```python
d.press_key(Keys.KEY_BACK)
d.press_key(Keys.KEY_CAMERA)
d.press_key(Keys.KEY_CENTER)
d.press_key(Keys.KEY_DELETE)
d.press_key(Keys.KEY_DOWN)
d.press_key(Keys.KEY_ENTER)
d.press_key(Keys.KEY_HOME)
d.press_key(Keys.KEY_LEFT)
d.press_key(Keys.KEY_MENU)
d.press_key(Keys.KEY_POWER)
d.press_key(Keys.KEY_RECENT)
d.press_key(Keys.KEY_RIGHT)
d.press_key(Keys.KEY_SEARCH)
d.press_key(Keys.KEY_UP)
d.press_key(Keys.KEY_VOLUME_DOWN)
d.press_key(Keys.KEY_VOLUME_MUTE)
d.press_key(Keys.KEY_VOLUME_UP)
```
To support more keys, you can also use this method for simulation. You can find all supported key names in the official Android documentation here: [https://developer.android.com/reference/android/view/KeyEvent](https://developer.android.com/reference/android/view/KeyEvent#KEYCODE_0).
```python
d.press_keycode(KeyCodes.KEYCODE_CALL)
```
## Screenshot
We provide a method for taking screenshots, allowing you to record workflows or perform image recognition tasks. The following call captures an image with a quality of 60 and saves it to the `screenshot.png` file in the current directory.
```python
d.screenshot(60).save("screenshot.png")
```
```python
>>> result = d.screenshot(60)
>>> result
>>> result.save("screenshot.png")
52917
>>> result.getvalue( )
b'\xff\xd8\xff\xe0\x00\x10JFIF\x00\x01....'
```
Currently, we also support region and element screenshots. Element screenshots are not covered in this chapter. Here, we will introduce region screenshots. You need to understand the concept and definition of a region. In our interface, a region is defined by `Bound`, which includes four parameters: `top`, `left`, `right`, and `bottom`. The Android screen coordinate system is different from a conventional one; the top-left corner of the device screen is the origin, with coordinates x=0, y=0. Assuming the current screen is in portrait mode with a resolution of 1080x1920, if you want to take a full-screen region screenshot, you can do it like this.
```python
d.screenshot(60, bound=Bound(top=0, left=0, right=1080, bottom=1920)).save("screenshot.png")
```
This will produce a full-screen screenshot. Of course, this is unnecessary because the default is a full-screen screenshot. So, if we want to capture a 200x200 image at the top-left corner, how do we do it? It's also very simple, you just need to do the following.
```python
d.screenshot(60, bound=Bound(top=0, left=0, right=200, bottom=200)).save("screenshot.png")
```
At this point, we should explain the meaning of these parameters. In the parameters, `top` and `bottom` represent the y-coordinates of the top and bottom edges of the rectangle, while `left` and `right` represent the x-coordinates of the left and right edges. Note that `top` must always be less than `bottom`, and `left` must always be less than `right`. Now let's demonstrate another example: capturing a 200x200 image at the bottom-right corner of the screen. You just need to call the interface like this.
```python
d.screenshot(60, bound=Bound(top=1920-200, bottom=1920, left=1080-200, right=1080)).save("screenshot.png")
```
## Click a Point on the Screen
You can use the following interface to simulate a screen click. In the example, we click the point at coordinates (100, 100) on the screen.
```python
d.click(Point(x=100, y=100))
```
## Drag from Point A to Point B
The following interface can be used to drag an item from point A to point B, for example, dragging an icon into a folder.
```python
A = Point(x=100, y=100)
B = Point(x=500, y=500)
d.drag(A, B)
```
## Swipe from Point A to Point B
The following interface can be used to swipe from coordinates (100, 100) to (500, 500) on the screen.
```python
A = Point(x=100, y=100)
B = Point(x=500, y=500)
d.swipe(A, B)
```
## More Complex Multi-point Swipe
The following interface can simulate a multi-point swipe. For example, the following call will swipe from (100, 100) to (500, 500) and then to (200, 200). The demonstration below only uses three points, but you can actually provide more points, even to implement a pattern lock.
```python
p1 = Point(x=100, y=100)
p2 = Point(x=500, y=500)
p3 = Point(x=200, y=200)
d.swipe_points(p1, p2, p3)
```
## Open Quick Settings
The following call can open the Quick Settings panel on the screen, but in a partially open state.
```python
d.open_quick_settings()
```
## Open Notification Shade
The following call can open the notification shade on the screen.
```python
d.open_notification()
```
## Get Page Layout
The following call can get the XML layout of the current page. You can also parse it yourself to support XPath-based automation.
```python
d.dump_window_hierarchy()
```
```python
>>> result = d.dump_window_hierarchy()
>>> result
>>> result.getvalue()
b'\r\n\r\n >> result = d.get_last_toast()
>>> print (result)
timestamp: 1700000000000
package: "com.android.settings"
message: "\346\202\250\345\267\262\345\244\204\344\272\216\345\274\200\345\217\221\350\200\205\346\250\241\345\274\217\357\274\214\346\227\240\351\234\200\350\277\233\350\241\214\346\255\244\346\223\215\344\275\234\343\200\202"
>>> print (result.message)
You are already a developer, no need to perform this operation.
```
--- END OF ui-basics.md ---
--- DOCUMENT: ui-watcher.md ---
--- SOURCE: https://device-farm.com/docs/content/en/ui-watcher.md ---
# UI Watcher
Watchers are used to monitor UI changes in real-time and execute preset actions, such as clicking elements, pressing keys, or recording occurrences, when preset conditions are met. You can think of it as the underlying implementation of features like **Li Tiaotiao** or similar ad-skipping tools. Since this feature performs clicks or key presses automatically, it may cause unintended actions when manual intervention is required. Please use it with caution.
```{tip}
Normally, watchers and event registration should be done at the very beginning of a script. They are generally not modified during execution.
```
## Enable the Watcher
The following interface enables the UI watcher. By default, the watcher is disabled.
```{attention}
Any matching events that occur on the UI before the watcher or a specific watch event is enabled will not be handled!
```
```python
d.set_watcher_loop_enabled(True)
```
## Get Watcher Status
You can use the following interface to check if the UI watcher is currently enabled.
```python
d.get_watcher_loop_enabled()
```
## Disable the Watcher
Disables the watcher loop, which will stop the automatic handling of registered events like clicks.
```python
d.set_watcher_loop_enabled(False)
```
```{attention}
Registering too many watch events may affect system performance or real-time responsiveness.
```
## Remove All Watchers
Removes all applied watch events. This can clear rules applied by previous or abnormally terminated scripts. It is recommended to run this before starting each script to prevent events registered by previous tasks from interfering with the current process.
```python
d.remove_all_watchers()
```
## Register a Click Event
A click event will automatically perform a click action when a matching selector appears on the screen. For example, it can be used to automatically bypass software pop-ups like user agreements or update prompts, or to perform automatic clicks on specific screens.
```{attention}
Any matching events that occur on the UI before the watcher or a specific watch event is enabled will not be handled!
```
```python
d.register_click_target_selector_watcher("ClickAcceptWhenShowAggrement", [Selector(textContains="User Agreement")], Selector(textContains="Agree", clickable=True))
```
```{hint}
The second parameter supports multiple Selectors, meaning the event will only be handled if all Selector conditions are met.
```
After registering the event above, when a screen containing the text "User Agreement" appears, it will automatically click the "Agree" button.
## Register a Key Press Event
A key press event will automatically perform a key press action when a matching selector appears. For example, it can be used for automatic "back" actions to avoid entering certain screens, although a click event could also achieve the same result.
```{attention}
Any matching events that occur on the UI before the watcher or a specific watch event is enabled will not be handled!
```
```python
d.register_press_key_watcher("PressBackWhenHomePageShows", [Selector(textContains="Personal Center")], Keys.KEY_HOME)
```
```{hint}
The second parameter supports multiple Selectors, meaning the event will only be handled if all Selector conditions are met.
```
After registering the event above, when a screen containing the text "Personal Center" appears, it will automatically press the phone's HOME key.
## Register a Count Event
A count event increments a counter by 1 when a matching selector appears on the screen. This can be used to track whether a certain screen has appeared or to count its occurrences, especially for important information that flashes by quickly.
```{attention}
Any matching events that occur on the UI before the watcher or a specific watch event is enabled will not be handled!
```
```python
d.register_none_op_watcher("RecordElementAppearTimes", [Selector(textContains="OK")])
```
```{hint}
The second parameter supports multiple Selectors, meaning the event will only be handled if all Selector conditions are met.
```
The event above records the number of times a screen containing "OK" appears. Use the following interface to get the triggered count for this event.
```python
d.get_watcher_triggered_count("RecordElementAppearTimes")
```
## Enable an Event
After an event is registered, it must be enabled to be added to the UI watcher loop; otherwise, it will not be applied.
```{attention}
Any matching events that occur on the UI before the watcher or a specific watch event is enabled will not be handled!
```
```python
d.set_watcher_enabled("RecordElementAppearTimes", True)
```
## Disable an Event
You can call the following interface to make the UI watcher stop monitoring a specific event.
```{attention}
Any matching events that occur on the UI before the watcher or a specific watch event is enabled will not be handled!
```
```python
d.set_watcher_enabled("RecordElementAppearTimes", False)
```
## Remove an Event
Completely removes an event from the watcher. It will also be deleted from the list of registered events.
```python
d.remove_watcher(name)
```
## Get Event Enabled Status
Call the following interface to check if an event is properly enabled, preventing cases where it is registered but not enabled.
```python
d.get_watcher_enabled(name)
```
## Advanced Selectors
In addition to simple selectors, you can also use more complex selectors for element matching. The following is an example of how to write a complex selector.
```python
d.register_press_key_watcher("PressBackWhenHomePageShows", [Selector(resourceId="com.android.market:id/v_app_item").child(index=3).sibling(index=2).child(index=2).child()], Keys.KEY_HOME)
```
## Complete Example Code
Below is a sample code block that enables the watcher loop and registers three types of watch events. When text containing "User Agreement" appears, it automatically clicks "Agree". When text containing "Personal Center" appears, it immediately returns to the home screen. When text containing "OK" appears, it records the number of times this screen has appeared.
```{attention}
Any matching events that occur on the UI before the watcher or a specific watch event is enabled will not be handled!
```
```python
d.remove_all_watchers()
d.set_watcher_loop_enabled(True)
d.register_click_target_selector_watcher("ClickAcceptWhenShowAggrement", [Selector(textContains="User Agreement")],
Selector(textContains="Agree", clickable=True))
d.register_press_key_watcher("PressBackWhenHomePageShows", [Selector(textContains="Personal Center")], Keys.KEY_HOME)
d.register_none_op_watcher("RecordElementAppearTimes", [Selector(textContains="OK")])
d.set_watcher_enabled("ClickAcceptWhenShowAggrement", True)
d.set_watcher_enabled("PressBackWhenHomePageShows", True)
d.set_watcher_enabled("RecordElementAppearTimes", True)
```
--- END OF ui-watcher.md ---
--- DOCUMENT: uninstall.md ---
--- SOURCE: https://device-farm.com/docs/content/en/uninstall.md ---
# Uninstalling the Server
FIRERPA manages its data in a very organized manner and will never place files randomly in your system. You can completely uninstall FIRERPA with a few commands. Before proceeding, please first follow the `Exit the Server` instructions above and wait at least 30 seconds to ensure the service has shut down properly. If you installed it via Magisk, simply remove the module; you do not need to perform the steps below.
```{danger}
Please be cautious when removing the /data/usr directory, as it contains your data related to the FIRERPA service.
```
```bash
rm -rf /data/server /data/usr
```
FIRERPA will then be completely removed from your device, leaving no other files behind. It is recommended to reboot the device after completion.
--- END OF uninstall.md ---
--- DOCUMENT: usage-prepare.md ---
--- SOURCE: https://device-farm.com/docs/content/en/usage-prepare.md ---
# Preparation
Before proceeding with this chapter and the following sections, please ensure that the FIRERPA server on your mobile device is running. The following sections will introduce you to the remote desktop, API automation interface, and other related features provided by the FIRERPA service.
Port `65000` on the device is the standard public port for this service, which you should remember. In most cases, you do not need to explicitly provide this port number (if you have changed this port, you will need to re-specify the default port as required).
Next, please obtain **the IP address of the current device** from your WLAN settings. If you encounter any issues, you can review the `Installation Preparation` chapter to confirm which IP address to use, as some devices may be behind a NAT. In the following tutorials, we will **assume** that the device's IP address is `192.168.0.2`.
--- END OF usage-prepare.md ---
--- DOCUMENT: virtual-debian.md ---
--- SOURCE: https://device-farm.com/docs/content/en/virtual-debian.md ---
# Virtual Debian Environment
You can create a complete Debian environment that runs within Android using a FIRERPA add-on module, similar to the functionality provided by `Termux` or `androdeb`. In this environment, you can use apt to install software and compile code. Similarly, you can compile and use bpf-related programs in this environment. It is a nearly complete Linux runtime environment operating on an Android device.
```{hint}
This Debian environment only includes basic packages. You will need to use apt to install common commands like git, python3, etc., yourself.
```
## Installing the Environment
You can find `lamda-mod-debian-arm64-v8a.tar.gz` on the project's release page (please download the installation package corresponding to your machine's architecture). After the download is complete, open the remote desktop and drag and drop the downloaded file to upload it to the device (we assume you have not modified the remote desktop's file upload directory). Then, perform the following installation steps. This installation procedure only needs to be done once.
```{hint}
Files you upload via the remote desktop are located in the `/data/usr/uploads` directory by default.
```
```bash
tar -C /data/usr/modules -xzf /data/usr/uploads/lamda-mod-debian-arm64-v8a.tar.gz
```
After executing the command, the installation is complete. The next section describes how to enter the environment.
## Entering the Environment
After installing the file system for the environment, we can execute a command to enter the virtual Debian environment. We know that the Debian environment package has just been installed to `/data/usr/modules/debian`. You can execute the following command to enter an interactive Debian terminal.
```bash
debian /bin/bash
```
If you only need to execute a single command, for example, the `id` command, you can use it like this:
```bash
debian /bin/bash -c id
```
```{attention}
Only one instance is supported to enter the virtual environment at a time. When you execute `debian /bin/bash` and keep it running, if you try to execute this command again in another terminal, it will return an error, unless you exit the first `debian /bin/bash` instance.
```
## Advanced Usage
We will introduce a simple advanced usage example. After completing it, you will be able to run an SSH service or Python scripts within the environment, and there will no longer be a session limit. First, execute the following command to enter the virtual environment.
```bash
debian /bin/bash
```
Now, you should be inside the virtual environment. Follow us to execute the commands below, making sure not to miss any.
```bash
root@localhost: apt update
root@localhost: apt install -y openssh-server procps python3 python3-pip python3-dev
root@localhost: echo 'PermitRootLogin yes' >>/etc/ssh/sshd_config
root@localhost: echo 'StrictModes no' >>/etc/ssh/sshd_config
root@localhost: mkdir -p /run/sshd
root@localhost: # Change the root password
root@localhost: echo root:lamda|chpasswd
root@localhost: # Exit the debian environment
root@localhost: exit
```
Okay, you have now successfully installed SSH and Python. It's time to execute the command to start our SSH server.
```bash
debian /usr/sbin/sshd -D -e
```
The command above will block your current terminal. To avoid this, we can also use the built-in scheduled tasks to make this example SSH service start automatically with the FIRERPA service. Next, please execute `crontab -e`, add the following rule, and then restart FIRERPA or the device. For documentation on using scheduled tasks, you can also refer to the `Scheduled Tasks` chapter.
```bash
@reboot debian /usr/sbin/sshd -D -e >/data/usr/sshd.log 2>&1
```
Now, get the IP address of this device, then execute the following command on your computer and enter the password `lamda` to log in.
```bash
ssh root@192.168.x.x
```
You can continue to explore various creative ideas for endless possibilities. It is essentially a small Linux server.
--- END OF virtual-debian.md ---
--- DOCUMENT: virtual-network.md ---
--- SOURCE: https://device-farm.com/docs/content/en/virtual-network.md ---
# Connecting to a Virtual Network (OpenVPN)
You can connect the current device to an OpenVPN network by calling the interfaces provided by FIRERPA. FIRERPA has built-in support for OpenVPN, allowing you to choose one of three authentication modes (depending on your OpenVPN server configuration): certificate-based authentication (CA/CERT/KEY), username/password authentication (CA/user/password), or certificate + username/password authentication (CA/CERT/KEY/user/password). It can coexist with the system proxy. It is important to note that this feature only includes the main functionalities of OpenVPN. Apart from `DNS` configuration, it cannot currently apply other automatic configuration information pushed by the server. These configurations include, but are not limited to, PAC proxy, HTTP proxy configurations, etc. To save you the trouble of installing an OpenVPN server, we provide a ready-to-use OpenVPN Docker image that comes with scripts to generate API call code and auto-start configurations.
## Connecting to VPN
We recommend you first read the `Deploying an OpenVPN Server` documentation to understand how to automatically generate this connection configuration. Writing it manually has a high probability of error. Below, we will only introduce the calling method for the main interface.
```python
profile = OpenVPNProfile()
# Paste the auto-generated code from your self-deployed server here
d.start_openvpn(profile)
```
## Disconnecting from VPN
The method for disconnecting from the VPN is also very simple. You only need to do the following to close the OpenVPN connection.
```python
d.stop_openvpn()
```
## Full Parameters
Below is the complete parameter configuration information for the VPN interface. We are only describing the meaning of each parameter. We do not recommend you write the parameters for this interface yourself; please generate the code through your self-deployed server.
Whether to enable a global VPN. If enabled, all system traffic will exit through the VPN server.
```python
profile.all_traffic = False
```
The connection protocol enabled on the server side. You can choose `OpenVPNProto.UDP` or `OpenVPNProto.TCP`. This option depends on your server's configuration.
```python
profile.proto = OpenVPNProto.UDP
```
Username and password configuration for OpenVPN username/password authentication.
```python
profile.login = "username"
profile.password = "password"
```
You can set your OpenVPN server's address and port using these two parameters.
```python
profile.host = server_address
profile.port = server_port
```
Sets the server-side channel encryption method. The interface supports `AES_128_GCM`, `AES_256_GCM`, `CHACHA20_POLY1305`, `AES_128_CBC`, and `AES_256_CBC` encryption methods.
```python
profile.cipher = OpenVPNCipher.AES_256_GCM
```
Sets OpenVPN tls-auth related parameters. You can visit the official documentation at [openvpn.net/community-resources/reference-manual-for-openvpn-2-5](https://openvpn.net/community-resources/reference-manual-for-openvpn-2-5/) to learn more.
```python
profile.tls_encryption = OpenVPNEncryption.TLS_CRYPT
profile.tls_key_direction = OpenVPNKeyDirection.KEY_DIRECTION_NONE
profile.tls_key = "-----BEGIN OpenVPN Static key V1-----"
```
Configuration for OpenVPN client certificate, client private key, and server certificate.
```python
profile.ca = "-----BEGIN CERTIFICATE-----"
profile.cert = "-----BEGIN CERTIFICATE-----"
profile.key = "-----BEGIN PRIVATE KEY-----"
```
## Auto-connecting to VPN
You can make FIRERPA automatically connect to the VPN server on startup by writing a `properties.local` file. Due to the complexity of this configuration, we still do not recommend writing it yourself. Please refer to our documentation on self-deploying an OpenVPN server to learn how to automatically generate the `properties.local` configuration information.
## Quickly Setting Up a VPN
Please go to our `Deploying an OpenVPN Server` related documentation to see how to deploy and use it.
--- END OF virtual-network.md ---
--- DOCUMENT: wifi.md ---
--- SOURCE: https://device-farm.com/docs/content/en/wifi.md ---
# Wi-Fi Operations
Wi-Fi operation features are experimental. We will only introduce some of the available implemented features. You can use the relevant interfaces to get the device's Wi-Fi status, retrieve Wi-Fi scan results, get signal strength, and blacklist BSSIDs.
## Get Wi-Fi Instance
First, you need to get a Wi-Fi feature instance. You can do this as follows.
```python
wifi = d.stub("Wifi")
```
## Get Wi-Fi Status
Get Wi-Fi information such as BSSID, SSID, and IP address.
```python
wifi.status()
```
```python
>>> wifi.status()
id: "0"
address: "c1:c2:c3:c4:c5:c6"
bssid: "00:12:34:56:78:90"
freq: "2447"
group_cipher: "TKIP"
ip_address: "192.168.1.158"
key_mgmt: "WPA2-PSK"
mode: "station"
pairwise_cipher: "CCMP"
ssid: "TPLINK_AE86"
wifi_generation: "4"
wpa_state: "COMPLETED"
```
```python
>>> result = wifi.status()
>>> print (result.ssid)
TPLINK_AE86
```
## Add to Wi-Fi Blacklist
Add a BSSID to the Wi-Fi blacklist. (After this, the corresponding Wi-Fi network will no longer appear in the Wi-Fi list).
```python
wifi.blacklist_add("3c:06:aa:8a:55:66")
```
## Get Wi-Fi Blacklist
Get all BSSIDs in the Wi-Fi blacklist.
```python
wifi.blacklist_get_all()
```
```python
>>> wifi.blacklist_get_all()
['3c:06:aa:8a:55:66']
```
## Clear Wi-Fi Blacklist
Clear all blacklisted BSSIDs from the Wi-Fi blacklist.
```python
wifi.blacklist_clear()
```
## Perform Wi-Fi Scan
Perform a Wi-Fi scan. This will initiate a scan for nearby Wi-Fi networks.
```python
wifi.scan()
```
## Get Wi-Fi Scan Results
Calling this interface will return the scan results for nearby Wi-Fi networks.
```python
wifi.scan_results()
```
```python
>>> wifi.scan_results()
[id: "0"
bssid: "00:12:34:56:78:90"
ssid: "TPLINK_AE86"
freq: "2447"
noise: "-89"
level: "-62"
tsf: "0000001234567890"
flags: "[WPA-PSK-CCMP+TKIP][WPA2-PSK-CCMP+TKIP][WPS][ESS]"
, id: "6"
bssid: "00:12:34:56:78:90"
ssid: "MIFI-97A5"
freq: "2437"
noise: "-89"
level: "-59"
tsf: "0000001234567890"
flags: "[WPA2-PSK-CCMP][WPS][ESS]"
...
```
```python
>>> result = wifi.scan_results()
>>> print (result[0].bssid)
00:12:34:56:78:90
```
## Get Wi-Fi Signal Strength
Call the following interface to get information such as Wi-Fi signal strength, link speed, and frequency.
```python
wifi.signal_poll()
```
```python
>>> wifi.signal_poll()
RSSI: "-59"
LINKSPEED: "39"
NOISE: "9999"
FREQUENCY: "2447"
```
```python
>>> result = wifi.signal_poll()
>>> print (result.LINKSPEED)
39
```
## Get Wi-Fi MAC Address
Call this interface to get the current Wi-Fi MAC address.
```python
wifi.get_mac_addr()
```
```python
>>> wifi.get_mac_addr()
'c1:c2:c3:c4:c5:c6'
```
--- END OF wifi.md ---
# SECTION: SOURCE CODE & PROTOS
--- MODULE: lamda | FILE: __init__.py ---
```python
# Copyright 2022 rev1si0n (lamda.devel@gmail.com). All rights reserved.
#
# Distributed under MIT license.
# See file LICENSE for detail or copy at https://opensource.org/licenses/MIT
__version__ = "9.20"
```
--- MODULE: lamda.client | FILE: client.py ---
```python
# Copyright 2022 rev1si0n (https://github.com/rev1si0n). All rights reserved.
#
# Distributed under MIT license.
# See file LICENSE for detail or copy at https://opensource.org/licenses/MIT
import os
import io
import re
import sys
import copy
import time
import uuid
import json
import base64
import hashlib
import platform
import warnings
import builtins
import logging
import msgpack
# fix protobuf>=4.0/win32, #10158
if sys.platform == "win32":
os.environ["PROTOCOL_BUFFERS_PYTHON_IMPLEMENTATION"] = "python"
import grpc
import pem as Pem
import collections.abc
# fix pyreadline, py310, Windows
collections.Callable = collections.abc.Callable
from urllib.parse import quote
from collections import defaultdict
from cryptography.fernet import Fernet
from os.path import basename, dirname, expanduser, join as joinpath
from google.protobuf.json_format import MessageToDict, MessageToJson
from grpc_interceptor import ClientInterceptor
from google.protobuf.message import Message
from asn1crypto import pem, x509
try:
import frida
_frida_dma = frida.get_device_manager()
except (ImportError, AttributeError):
_frida_dma = None
from . import __version__
from . types import AttributeDict, BytesIO
from . exceptions import (UnHandledException, DuplicateEntryError,
InvalidArgumentError, UiObjectNotFoundException,
IllegalStateException)
from . import exceptions
handler = logging.StreamHandler()
logger = logging.getLogger("lamda.client")
formatter = logging.Formatter("%(asctime)s %(process)d %(levelname)7s@%(module)s:%(funcName)s - %(message)s")
handler.setFormatter(formatter)
logger.addHandler(handler)
sys.path.append(joinpath(dirname(__file__)))
sys.path.append(joinpath(dirname(__file__), "rpc"))
# use native resolver to support mDNS
os.environ["GRPC_DNS_RESOLVER"] = "native"
protos, services = grpc.protos_and_services("services.proto")
__all__ = [
"Corner",
"Direction",
"GproxyType",
"GrantType",
"Group",
"CustomOcrBackend",
"OcrEngine",
"Key",
"Keys",
"KeyCode",
"KeyCodes",
"MetaKeyCode",
"MetaKeyCodes",
"BaseCryptor",
"FernetCryptor",
"OpenVPNAuth",
"OpenVPNEncryption",
"OpenVPNKeyDirection",
"FindImageMethod",
"FindImageArea",
"ToastDuration",
"OpenVPNCipher",
"OpenVPNProto",
"Orientation",
"OpenVPNProfile",
"GproxyProfile",
"TouchBuilder",
"ScriptRuntime",
"DataEncode",
"AudioStreamType",
"PlayAudioProfile",
"ApplicationInfo",
"Selector",
"TouchWait",
"TouchMove",
"TouchDown",
"TouchUp",
"TouchAction",
"TouchSequence",
"Point",
"Bound",
"load_proto",
"to_dict",
"Device",
"logger",
]
def getXY(p):
return p.x, p.y
def checkDupEntry(a, entries):
if a in entries:
raise DuplicateEntryError(a)
def checkArgumentTyp(a, types):
if not isinstance(a, types):
raise InvalidArgumentError(a)
def touchSequenceSave(s, fpath):
return BytesIO(s.SerializeToString()).save(fpath)
def touchSequenceLoad(s, fpath):
return s.FromString(BytesIO.load(fpath).getvalue())
def touchSequenceIndexer(s, index):
return s.sequence[index]
def touchSequenceIter(s):
yield from s.sequence
def touchSequenceAppendAction(s, **kwargs):
action = TouchAction(**kwargs)
s.sequence.append(action)
def touchSequenceAppendDown(s, **kwargs):
touchSequenceAppendAction(s, down=TouchDown(**kwargs))
def touchSequenceAppendMove(s, **kwargs):
touchSequenceAppendAction(s, move=TouchMove(**kwargs))
def touchSequenceAppendWait(s, **kwargs):
touchSequenceAppendAction(s, wait=TouchWait(**kwargs))
def touchSequenceAppendUp(s, **kwargs):
touchSequenceAppendAction(s, up=TouchUp(**kwargs))
def touchActionRealAction(a):
return getattr(a, a.type)
def touchActionType(a):
return a.WhichOneof("action")
def touchMoveShiftX(a, offset):
a.x = a.x + offset
return a.x
def touchMoveShiftY(a, offset):
a.y = a.y + offset
return a.y
def touchWaitShift(w, offset):
w.wait = w.wait + offset
return w.wait
def applicationInfoSet(application, app):
application.CopyFrom(app.info())
def height(b):
return b.bottom - b.top
def width(b):
return b.right - b.left
def center(b):
x = int(b.left + (b.right - b.left)/2)
y = int(b.top + (b.bottom - b.top)/2)
return Point(x=x, y=y)
def contain(a, b):
return all([b.top >= a.top,
b.left >= a.left,
b.bottom <= a.bottom,
b.right <= a.right])
def equal(a, b):
if not isinstance(b, protos.Bound):
return False
return all([b.top == a.top,
b.left == a.left,
b.bottom == a.bottom,
b.right == a.right])
def corner(b, position):
ca, cb = position.split("-")
return Point(x=getattr(b, cb),
y=getattr(b, ca))
# enum types
Corner = protos.Corner
Direction = protos.Direction
GproxyType = protos.GproxyType
GrantType = protos.GrantType
ScriptRuntime = protos.ScriptRuntime
DataEncode = protos.DataEncode
Group = protos.Group
Key = protos.Key
Keys = protos.Key # make an alias
KeyCode = protos.KeyCode
KeyCodes = protos.KeyCode # make an alias
MetaKeyCode = protos.MetaKeyCode
MetaKeyCodes = protos.MetaKeyCode # make an alias
OpenVPNAuth = protos.OpenVPNAuth
OpenVPNEncryption = protos.OpenVPNEncryption
OpenVPNKeyDirection = protos.OpenVPNKeyDirection
OpenVPNCipher = protos.OpenVPNCipher
OpenVPNProto = protos.OpenVPNProto
ToastDuration = protos.ToastDuration
Orientation = protos.Orientation
AudioStreamType = protos.AudioStreamType
PlayAudioProfile = protos.PlayAudioRequest
# proxy request alias
OpenVPNProfile = protos.OpenVPNConfigRequest
GproxyProfile = protos.GproxyConfigRequest
# multitouch
TouchMove = protos.TouchMove
TouchWait = protos.TouchWait
TouchDown = protos.TouchDown
TouchUp = protos.TouchUp
TouchSequence = protos.TouchSequence
TouchAction = protos.TouchAction
ApplicationInfo = protos.ApplicationInfo
# uiautomator types
_Selector = protos.Selector
Bound = protos.Bound
Point = protos.Point
Point.getXY = getXY
ApplicationInfo.set = applicationInfoSet
TouchWait.shift = touchWaitShift
TouchMove.shiftX = touchMoveShiftX
TouchMove.shiftY = touchMoveShiftY
TouchDown.shiftX = touchMoveShiftX
TouchDown.shiftY = touchMoveShiftY
TouchAction.type = property(touchActionType)
TouchAction.action = property(touchActionRealAction)
TouchSequence.load = classmethod(touchSequenceLoad)
TouchSequence.save = touchSequenceSave
TouchSequence.appendAction = touchSequenceAppendAction
TouchSequence.appendDown = touchSequenceAppendDown
TouchSequence.appendMove = touchSequenceAppendMove
TouchSequence.appendWait = touchSequenceAppendWait
TouchSequence.appendUp = touchSequenceAppendUp
TouchSequence.__getitem__ = touchSequenceIndexer
TouchSequence.__iter__ = touchSequenceIter
HookRpcRequest = protos.HookRpcRequest
HookRpcResponse = protos.HookRpcResponse
Bound.width = property(width)
Bound.height = property(height)
FindImageMethod = protos.FindImageMethod
FindImageArea = protos.FindImageArea
Bound.center = center
Bound.corner = corner
Bound.__contains__ = contain
Bound.__eq__ = equal
def load_proto(name):
""" 载入包下面的相关 proto 文件 """
return grpc.protos_and_services(name)
def to_dict(prot):
""" 将 proto 返回值转换为字典 """
r = MessageToJson(prot, preserving_proto_field_name=True)
return json.loads(r)
def Selector(**kwargs):
""" Selector wrapper """
kwargs.pop("fields", None)
sel = _Selector(**kwargs, fields=kwargs.keys())
return sel
def child_sibling(s, name, **selector):
s = copy.deepcopy(s)
s.childOrSibling.append(name)
s.childOrSiblingSelector.append(Selector(**selector))
return s
def child(s, **selector):
return child_sibling(s, "child", **selector)
def sibling(s, **selector):
return child_sibling(s, "sibling", **selector)
# bind Selector level child sibling
_Selector.child = child
_Selector.sibling = sibling
class CustomOcrBackend(object):
def __init__(self, *args, **kwargs):
raise NotImplementedError
def ocr(self, image):
raise NotImplementedError
class BaseCryptor(object):
def encrypt(self, data):
return data
def decrypt(self, data):
return data
class BaseServiceStub(object):
def __init__(self, stub):
self.stub = stub
class FernetCryptor(BaseCryptor):
def __init__(self, key=None):
key = self._get_key(key)
self.encoder = Fernet(key)
def encrypt(self, data):
return self.encoder.encrypt(data)
def decrypt(self, data):
return self.encoder.decrypt(data)
def _get_key(self, key):
key = (key or "").encode()
key = hashlib.sha256(key).digest()
key = base64.b64encode(key)
return key
class TouchBuilder(object):
def __init__(self):
self.s = TouchSequence()
def down(self, x, y, pressure=50, track=0):
self.s.appendDown(tid=track, x=x, y=y,
pressure=pressure)
return self
def move(self, x, y, pressure=50, track=0):
self.s.appendMove(tid=track, x=x, y=y,
pressure=pressure)
return self
def up(self, track=0):
self.s.appendUp(tid=track)
return self
def wait(self, mills):
self.s.appendWait(wait=mills)
return self
def build(self):
sequence = TouchSequence()
sequence.CopyFrom(self.s)
return sequence
class ClientLoggingInterceptor(ClientInterceptor):
def truncate_string(self, s):
return "{:.1024}...".format(s) if len(s) > 1024 else s
def intercept(self, function, request, details):
"""
日志记录各个接口的调用及参数
"""
displayable = isinstance(request, Message)
args = MessageToDict(request) if displayable else "-"
args = json.dumps(args, ensure_ascii=False, separators=(",", ":"))
args = self.truncate_string(args)
logger.debug("rpc {} {}".format(details.method, args))
res = function(request, details)
return res
class ClientSessionMetadataInterceptor(ClientInterceptor):
def __init__(self, session):
super(ClientSessionMetadataInterceptor, self).__init__()
self.session = session
def intercept(self, function, request, details):
metadata = {}
metadata["version"] = __version__
default = (self.session, platform.node())
session, name = self.session() if callable(self.session) else default
metadata["instance"] = session
metadata["hostname"] = quote(name)
details = details._replace(metadata=metadata.items())
return function(request, details)
class GrpcRemoteExceptionInterceptor(ClientInterceptor):
def intercept(self, function, request, details):
"""
处理远程调用中发生的异常并抛出本地异常
"""
res = function(request, details)
self.raise_remote_exception(res)
return res
def remote_exception(self, exception):
exc = json.loads(exception)
name, args = exc["name"], exc["args"]
default = lambda *p: UnHandledException(name, *p)
clazz = getattr(builtins, name, default)
clazz = getattr(exceptions, name, clazz)
return clazz(*args)
def raise_remote_exception(self, res):
metadata = dict(res.initial_metadata() or [])
exception = metadata.get("exception", None)
if exception != None:
raise self.remote_exception(exception)
class ObjectUiAutomatorOpStub:
def __init__(self, caller, selector):
"""
UiAutomator 子接口,用来模拟出实例的意味
"""
self._selector = selector
self.selector = Selector(**selector)
self.stub = caller.stub
self.caller = caller
def __str__(self):
selector = ", ".join(["{}={}".format(k, v) \
for k, v in self._selector.items()])
return "Object: {}".format(selector)
__repr__ = __str__
def child(self, **selector):
"""
匹配选择器里面的子节点
"""
selector = self.selector.child(**selector)
s = MessageToDict(selector, preserving_proto_field_name=True)
return self.__class__(self.caller, s)
def sibling(self, **selector):
"""
匹配选择器的同级节点
"""
selector = self.selector.sibling(**selector)
s = MessageToDict(selector, preserving_proto_field_name=True)
return self.__class__(self.caller, s)
def take_screenshot(self, quality=100):
"""
对选择器选中元素进行截图
"""
req = protos.SelectorTakeScreenshotRequest(selector=self.selector,
quality=quality)
r = self.stub.selectorTakeScreenshot(req)
return BytesIO(r.value)
def screenshot(self, quality=100):
return self.take_screenshot(quality=quality)
def get_text(self):
"""
获取选择器选中输入控件中的文本
"""
req = protos.SelectorOnlyRequest(selector=self.selector)
r = self.stub.selectorGetText(req)
return r.value
def clear_text_field(self):
"""
清空选择器选中输入控件中的文本
"""
req = protos.SelectorOnlyRequest(selector=self.selector)
r = self.stub.selectorClearTextField(req)
return r.value
def set_text(self, text):
"""
向选择器选中输入控件中填入文本
"""
req = protos.SelectorSetTextRequest(selector=self.selector,
text=text)
r = self.stub.selectorSetText(req)
return r.value
def click(self, corner=Corner.COR_CENTER):
"""
点击选择器选中的控件
"""
req = protos.SelectorClickRequest(selector=self.selector,
corner=corner)
r = self.stub.selectorClick(req)
return r.value
def click_exists(self, corner=Corner.COR_CENTER):
"""
点击选择器选中的控件(不存在将不会产生异常)
"""
req = protos.SelectorClickRequest(selector=self.selector,
corner=corner)
r = self.stub.selectorClickExists(req)
return r.value
def long_click(self, corner=Corner.COR_CENTER):
"""
长按选择器选中的控件
"""
req = protos.SelectorClickRequest(selector=self.selector,
corner=corner)
r = self.stub.selectorLongClick(req)
return r.value
def exists(self):
"""
是否存在选择器选中的控件
"""
req = protos.SelectorOnlyRequest(selector=self.selector)
r = self.stub.selectorExists(req)
return r.value
def info(self):
"""
获取选择器选中控件的信息
"""
req = protos.SelectorOnlyRequest(selector=self.selector)
return self.stub.selectorObjInfo(req)
def _new_object(self, **kwargs):
selector = copy.deepcopy(self._selector)
child_sibling = selector.get("childOrSiblingSelector")
target = child_sibling[-1] if child_sibling else selector
target.update(**kwargs)
return self.caller(**selector)
def text(self, txt):
return self._new_object(text=txt)
def resourceId(self, name):
return self._new_object(resourceId=name)
def description(self, desc):
return self._new_object(description=desc)
def packageName(self, name):
return self._new_object(packageName=name)
def className(self, name):
return self._new_object(className=name)
def textContains(self, needle):
return self._new_object(textContains=needle)
def descriptionContains(self, needle):
return self._new_object(descriptionContains=needle)
def textStartsWith(self, needle):
return self._new_object(textStartsWith=needle)
def descriptionStartsWith(self, needle):
return self._new_object(descriptionStartsWith=needle)
def textMatches(self, match):
return self._new_object(textMatches=match)
def descriptionMatches(self, match):
return self._new_object(descriptionMatches=match)
def resourceIdMatches(self, match):
return self._new_object(resourceIdMatches=match)
def packageNameMatches(self, match):
return self._new_object(packageNameMatches=match)
def classNameMatches(self, match):
return self._new_object(classNameMatches=match)
def checkable(self, value):
return self._new_object(checkable=value)
def clickable(self, value):
return self._new_object(clickable=value)
def focusable(self, value):
return self._new_object(focusable=value)
def scrollable(self, value):
return self._new_object(scrollable=value)
def longClickable(self, value):
return self._new_object(longClickable=value)
def enabled(self, value):
return self._new_object(enabled=value)
def checked(self, value):
return self._new_object(checked=value)
def focused(self, value):
return self._new_object(focused=value)
def selected(self, value):
return self._new_object(selected=value)
def index(self, idx):
return self._new_object(index=idx)
def instance(self, idx):
return self._new_object(instance=idx)
def get(self, idx):
"""
获取匹配的第 N 个索引的元素
"""
return self.instance(idx)
def __iter__(self):
"""
遍历所有符合选择器条件的元素实例
"""
yield from [self.instance(i) for i in \
range(self.count())]
def count(self):
"""
获取选择器选中控件的数量
"""
req = protos.SelectorOnlyRequest(selector=self.selector)
r = self.stub.selectorCount(req)
return r.value
def _set_target_Point(self, req, target):
req.point.CopyFrom(target)
def _set_target_Selector(self, req, target):
req.target.CopyFrom(target)
def drag_to(self, target, step=32):
"""
将选择器选中的控件拖动到另一个选择器或者点上
"""
checkArgumentTyp(target, (Point, _Selector))
func = "_set_target_{}".format(target.DESCRIPTOR.name)
req = protos.SelectorDragToRequest(selector=self.selector,
step=step)
getattr(self, func)(req, target)
r = self.stub.selectorDragTo(req)
return r.value
def wait_for_exists(self, timeout):
"""
等待选择器选中控件出现
"""
req = protos.SelectorWaitRequest(selector=self.selector,
timeout=timeout)
r = self.stub.selectorWaitForExists(req)
return r.value
def wait_until_gone(self, timeout):
"""
等待选择器选中控件消失
"""
req = protos.SelectorWaitRequest(selector=self.selector,
timeout=timeout)
r = self.stub.selectorWaitUntilGone(req)
return r.value
def swipe(self, direction=Direction.DIR_UP, step=32):
"""
在选择器选中的元素上进行滑动操作
"""
req = protos.SelectorSwipeRequest(selector=self.selector,
direction=direction,
step=step)
r = self.stub.selectorSwipe(req)
return r.value
def pinch_in(self, percent, step=16):
"""
双指捏紧(缩小)
"""
req = protos.SelectorPinchRequest(selector=self.selector,
percent=percent, step=step)
r = self.stub.selectorPinchIn(req)
return r.value
def pinch_out(self, percent, step=16):
"""
双指放开(放大)
"""
req = protos.SelectorPinchRequest(selector=self.selector,
percent=percent, step=step)
r = self.stub.selectorPinchOut(req)
return r.value
def scroll_to(self, target, is_vertical=True):
"""
滚动 scrollable 直到匹配目标元素的选择器
"""
checkArgumentTyp(target, _Selector)
req = protos.SelectorScrollRequest(selector=self.selector,
vertical=is_vertical,
target=target)
r = self.stub.selectorScrollTo(req)
return r.value
def _fling_forward(self, is_vertical=True):
req = protos.SelectorFlingRequest(selector=self.selector,
vertical=is_vertical)
r = self.stub.selectorFlingForward(req)
return r.value
def _fling_backward(self, is_vertical=True):
req = protos.SelectorFlingRequest(selector=self.selector,
vertical=is_vertical)
r = self.stub.selectorFlingBackward(req)
return r.value
def _fling_to_end(self, max_swipes, is_vertical=True):
req = protos.SelectorFlingRequest(selector=self.selector,
maxSwipes=max_swipes,
vertical=is_vertical)
r = self.stub.selectorFlingToEnd(req)
return r.value
def _fling_to_beginning(self, max_swipes, is_vertical=True):
req = protos.SelectorFlingRequest(selector=self.selector,
maxSwipes=max_swipes,
vertical=is_vertical)
r = self.stub.selectorFlingToBeginning(req)
return r.value
def fling_from_top_to_bottom(self):
"""
在选择器选中元素上进行从上至下阅读式滑动(单次)
"""
return self._fling_backward(is_vertical=True)
def fling_from_bottom_to_top(self):
"""
在选择器选中元素上进行从下至上阅读式滑动(单次)
"""
return self._fling_forward(is_vertical=True)
def fling_from_left_to_right(self):
"""
在选择器选中元素上进行从左至右阅读式滑动(单次)
"""
return self._fling_backward(is_vertical=False)
def fling_from_right_to_left(self):
"""
在选择器选中元素上进行从右至左阅读式滑动(单次)
"""
return self._fling_forward(is_vertical=False)
def fling_from_top_to_bottom_to_end(self, max_swipes):
"""
在选择器选中元素上进行从上至下阅读式滑动直至无法滑动或达到 max_swipes 次
"""
return self._fling_to_beginning(max_swipes, is_vertical=True)
def fling_from_bottom_to_top_to_end(self, max_swipes):
"""
在选择器选中元素上进行从下至上阅读式滑动直至无法滑动或达到 max_swipes 次
"""
return self._fling_to_end(max_swipes, is_vertical=True)
def fling_from_left_to_right_to_end(self, max_swipes):
"""
在选择器选中元素上进行从左至右阅读式滑动直至无法滑动或达到 max_swipes 次
"""
return self._fling_to_beginning(max_swipes, is_vertical=False)
def fling_from_right_to_left_to_end(self, max_swipes):
"""
在选择器选中元素上进行从右至左阅读式滑动直至无法滑动或达到 max_swipes 次
"""
return self._fling_to_end(max_swipes, is_vertical=False)
def _scroll_forward(self, step, is_vertical=True):
req = protos.SelectorScrollRequest(selector=self.selector,
vertical=is_vertical,
step=step)
r = self.stub.selectorScrollForward(req)
return r.value
def _scroll_backward(self, step, is_vertical=True):
req = protos.SelectorScrollRequest(selector=self.selector,
vertical=is_vertical,
step=step)
r = self.stub.selectorScrollBackward(req)
return r.value
def _scroll_to_end(self, max_swipes, step, is_vertical=True):
req = protos.SelectorScrollRequest(selector=self.selector,
maxSwipes=max_swipes,
vertical=is_vertical,
step=step)
r = self.stub.selectorScrollToEnd(req)
return r.value
def _scroll_to_beginning(self, max_swipes, step, is_vertical=True):
req = protos.SelectorScrollRequest(selector=self.selector,
maxSwipes=max_swipes,
vertical=is_vertical,
step=step)
r = self.stub.selectorScrollToBeginning(req)
return r.value
def scroll_from_top_to_bottom(self, step):
"""
在选择器选中元素上进行从上至下普通滑动
"""
return self._scroll_backward(step, is_vertical=True)
def scroll_from_bottom_to_top(self, step):
"""
在选择器选中元素上进行从下至上普通滑动
"""
return self._scroll_forward(step, is_vertical=True)
def scroll_from_left_to_right(self, step):
"""
在选择器选中元素上进行从左至右普通滑动
"""
return self._scroll_backward(step, is_vertical=False)
def scroll_from_right_to_left(self, step):
"""
在选择器选中元素上进行从右至左普通滑动
"""
return self._scroll_forward(step, is_vertical=False)
def scroll_from_top_to_bottom_to_end(self, max_swipes, step):
"""
在选择器选中元素上进行从上至下普通滑动直至无法滑动或达到 max_swipes 次
"""
return self._scroll_to_beginning(max_swipes, step, is_vertical=True)
def scroll_from_bottom_to_top_to_end(self, max_swipes, step):
"""
在选择器选中元素上进行从下至上普通滑动直至无法滑动或达到 max_swipes 次
"""
return self._scroll_to_end(max_swipes, step, is_vertical=True)
def scroll_from_left_to_right_to_end(self, max_swipes, step):
"""
在选择器选中元素上进行从左至右普通滑动直至无法滑动或达到 max_swipes 次
"""
return self._scroll_to_beginning(max_swipes, step, is_vertical=False)
def scroll_from_right_to_left_to_end(self, max_swipes, step):
"""
在选择器选中元素上进行从右至左普通滑动直至无法滑动或达到 max_swipes 次
"""
return self._scroll_to_end(max_swipes, step, is_vertical=False)
class UiAutomatorStub(BaseServiceStub):
def __init__(self, *args, **kwargs):
super(UiAutomatorStub, self).__init__(*args, **kwargs)
self.watchers = defaultdict(dict)
def device_info(self):
"""
获取设备基本/分辨率等信息
"""
r = self.stub.deviceInfo(protos.Empty())
return r
def set_watcher_loop_enabled(self, enabled):
"""
设置是否启用设备上的 watcher UI 检测
"""
req = protos.Boolean(value=enabled)
r = self.stub.setWatcherLoopEnabled(req)
return r.value
def get_watcher_loop_enabled(self):
"""
获取是否启用设备上的 watcher UI 检测
"""
r = self.stub.getWatcherLoopEnabled(protos.Empty())
return r.value
def get_watcher_triggered_count(self, name):
"""
获取这个 watcher 被触发的次数
"""
req = protos.String(value=name)
r = self.stub.getWatcherTriggeredCount(req)
return r.value
def reset_watcher_triggered_count(self, name):
"""
重置这个 watcher 的触发次数为 0
"""
req = protos.String(value=name)
r = self.stub.resetWatcherTriggeredCount(req)
return r.value
def get_applied_watchers(self):
"""
获取已经在系统应用的 watcher 名称列表
"""
r = self.stub.getAppliedWatchers(protos.Empty())
return r.watchers
# 注意:下面这些 watcher 实现不是安全的
# 注册时都是统一存储到本地实例的变量中,直至 enable 时才会应用至服务端
# 这样做的原因是让你知道你都干了什么,过多的 watcher 会影响性能
def remove_all_watchers(self):
"""
移除所有应用/未应用的 watcher
"""
for name in list(self.get_applied_watchers()):
self.remove_watcher(name)
for name in list(self.watchers.keys()):
self.remove_watcher(name)
def register_click_target_selector_watcher(self, name, conditions,
target):
"""
注册一个满足条件点击 selector 的 watcher
"""
checkDupEntry(name, self.watchers)
req = protos.WatcherRegistRequest(name=name, selectors=conditions,
target=target)
self.watchers[name]["enabled"] = False
func = lambda: self.stub.registerClickUiObjectWatcher(req).value
self.watchers[name]["enable"] = func
def register_press_key_watcher(self, name, conditions, key):
"""
注册一个满足条件点击 key 的 watcher
"""
checkDupEntry(name, self.watchers)
req = protos.WatcherRegistRequest(name=name, selectors=conditions,
key=key)
self.watchers[name]["enabled"] = False
func = lambda: self.stub.registerPressKeysWatcher(req).value
self.watchers[name]["enable"] = func
def register_none_op_watcher(self, name, conditions):
"""
注册一个满足条件无操作的 watcher(用来检测是否出现过某个场景)
"""
checkDupEntry(name, self.watchers)
req = protos.WatcherRegistRequest(name=name, selectors=conditions)
self.watchers[name]["enabled"] = False
func = lambda: self.stub.registerNoneOpWatcher(req).value
self.watchers[name]["enable"] = func
def _remove_watcher(self, name):
return self.stub.removeWatcher(protos.String(value=name)).value
def set_watcher_enabled(self, name, enable):
"""
设置是否启用此 watcher
"""
if name not in self.watchers:
return False
self.watchers[name]["enabled"] = enable
if self.watchers[name]["enabled"]:
return self.watchers[name]["enable"]()
return self._remove_watcher(name)
def get_watcher_enabled(self, name):
"""
获取此 watcher 是否启用
"""
return self.watchers.get(name, {}).get("enable")
def get_last_toast(self):
"""
获取系统中最后一个 toast 消息
"""
r = self.stub.getLastToast(protos.Empty())
return r
def remove_watcher(self, name):
"""
移除一个 watcher
"""
self.watchers.pop(name, None)
return self._remove_watcher(name)
def click(self, point):
"""
点击屏幕中的某个点(Point)
"""
req = protos.ClickPointRequest(point=point)
r = self.stub.click(req)
return r.value
def drag(self, A, B, step=32):
"""
从点(Point) A 拖动到点(Point) B
"""
req = protos.DragPointRequest(A=A, B=B, step=step)
r = self.stub.drag(req)
return r.value
def swipe(self, A, B, step=32):
"""
从点(Point) A 滑动到点(Point) B
"""
req = protos.SwipePointRequest(A=A, B=B, step=step)
r = self.stub.swipe(req)
return r.value
def swipe_points(self, *points, step=32):
"""
滑动一个点(Point)序列(超过两个点)
"""
req = protos.SwipePointsRequest(points=points, step=step)
r = self.stub.swipePoints(req)
return r.value
def open_notification(self):
"""
打开通知栏(状态栏)
"""
r = self.stub.openNotification(protos.Empty())
return r.value
def open_quick_settings(self):
"""
打开设置栏(状态栏)
"""
r = self.stub.openQuickSettings(protos.Empty())
return r.value
def wake_up(self):
"""
唤醒设备(点亮屏幕)
"""
r = self.stub.wakeUp(protos.Empty())
return r.value
def sleep(self):
"""
关闭设备(熄灭屏幕)
"""
r = self.stub.sleep(protos.Empty())
return r.value
def is_screen_on(self):
"""
设备是否处于唤醒状态
"""
r = self.stub.isScreenOn(protos.Empty())
return r.value
def is_screen_locked(self):
"""
设备屏幕是否已经锁定
"""
r = self.stub.isScreenLocked(protos.Empty())
return r.value
def set_clipboard(self, text):
"""
设置剪切板文字
"""
req = protos.ClipboardRequest(ID=str(uuid.uuid4()), value=text)
r = self.stub.setClipboard(req)
return r.value
def get_clipboard(self):
"""
获取剪切板文字(小于 Android10)
"""
r = self.stub.getClipboard(protos.Empty())
return r.value
def _set_target_Area(self, req, area):
req.area = area
def _set_target_Bound(self, req, bound):
req.bound.CopyFrom(bound)
def find_similar_image(self, data, threshold=0.0, distance=250,
scale=1.0, area=FindImageArea.FIA_WHOLE_SCREEN,
method=FindImageMethod.FIM_TEMPLATE):
"""
根据提供的目标图片从屏幕中获取相似图片位置
"""
req = protos.FindImageRequest()
checkArgumentTyp(area, (Bound, int))
name = getattr(getattr(area, "DESCRIPTOR", None),
"name", "Area")
func = "_set_target_{}".format(name)
getattr(self, func)(req, area)
req.method = method
req.distance = distance
req.threshold = threshold
req.scale = scale
req.partial = data
r = self.stub.findSimilarImage(req)
return r.bounds
def freeze_rotation(self, freeze=True):
"""
锁定屏幕旋转
"""
r = self.stub.freezeRotation(protos.Boolean(value=freeze))
return r.value
def set_orientation(self, orien=Orientation.ORIEN_NATURE):
"""
设置屏幕旋转方向
"""
req = protos.OrientationRequest(orientation=orien)
r = self.stub.setOrientation(req)
return r.value
def press_key(self, key):
"""
按下设备物理按键(HOME/VOLUME/BACK)
"""
req = protos.PressKeyRequest(key=key)
r = self.stub.pressKey(req)
return r.value
def press_keycode(self, code, meta=0):
"""
通过 Keycode(整数)按下未定义的按键
ref: https://developer.android.com/reference/android/view/KeyEvent
"""
req = protos.PressKeyRequest(code=code, meta=meta)
r = self.stub.pressKeyCode(req)
return r.value
def take_screenshot(self, quality, bound=None):
"""
截取全屏幕截图
"""
req = protos.TakeScreenshotRequest(quality=quality,
bound=bound)
r = self.stub.takeScreenshot(req)
return BytesIO(r.value)
def screenshot(self, quality, bound=None):
return self.take_screenshot(quality, bound=bound)
def dump_window_hierarchy(self, compressed=False):
"""
获取屏幕界面布局 XML 文档
"""
req = protos.Boolean(value=compressed)
r = self.stub.dumpWindowHierarchy(req)
return BytesIO(r.value)
def wait_for_idle(self, timeout):
"""
等待当前屏幕处于闲置状态(无频繁活动切换)
"""
r = self.stub.waitForIdle(protos.Integer(value=timeout))
return r.value
def __call__(self, **kwargs):
return ObjectUiAutomatorOpStub(self, kwargs)
class AppScriptRpcInterface(object):
def __init__(self, stub, application,
name):
self.application = application
self.stub = stub
self.name = name
def __str__(self):
return "{}:Script:{}".format(self.application,
self.name)
__repr__ = __str__
def __call__(self, *args):
call_args = dict()
call_args["method"] = self.name
call_args["args"] = args
req = HookRpcRequest()
req.package = self.application.applicationId
req.user = self.application.user
req.callinfo = json.dumps(call_args)
result = self.stub.callScript(req)
data = json.loads(result.callresult)
return data
class ApplicationOpStub:
def __init__(self, stub, applicationId, user=0):
"""
Application 子接口,用来模拟出实例的意味
"""
self.user = user
self.applicationId = applicationId
self.stub = stub
def __str__(self):
return "Application:{}@{}".format(self.applicationId,
self.user)
__repr__ = __str__
def is_foreground(self):
"""
应用是否正处于前台运行
"""
req = protos.ApplicationRequest(name=self.applicationId)
req.user = self.user
r = self.stub.isForeground(req)
return r.value
def permissions(self):
"""
获取应用的所有权限列表
"""
req = protos.ApplicationRequest(name=self.applicationId)
req.user = self.user
r = self.stub.getPermissions(req)
return r.permissions
def grant(self, permission, mode=GrantType.GRANT_ALLOW):
"""
授予应用某个权限(应用需要运行时获取的权限)
"""
req = protos.ApplicationRequest(name=self.applicationId,
permission=permission,
mode=mode)
req.user = self.user
r = self.stub.grantPermission(req)
return r.value
def revoke(self, permission):
"""
撤销授予应用的权限(应用需要运行时获取的权限)
"""
req = protos.ApplicationRequest(name=self.applicationId,
permission=permission)
req.user = self.user
r = self.stub.revokePermission(req)
return r.value
def query_launch_activity(self):
"""
获取应用的启动 activity 信息
"""
req = protos.ApplicationRequest(name=self.applicationId)
req.user = self.user
r = self.stub.queryLaunchActivity(req)
return to_dict(r)
def is_permission_granted(self, permission):
"""
检查是否已经授予应用某权限(应用需要运行时获取的权限)
"""
req = protos.ApplicationRequest(name=self.applicationId,
permission=permission)
req.user = self.user
r = self.stub.isPermissionGranted(req)
return r.value
def clear_cache(self):
"""
清空应用的缓存数据(非数据仅缓存)
"""
req = protos.ApplicationRequest(name=self.applicationId)
req.user = self.user
r = self.stub.deleteApplicationCache(req)
return r.value
def reset(self):
"""
清空应用的所有数据
"""
req = protos.ApplicationRequest(name=self.applicationId)
req.user = self.user
r = self.stub.resetApplicationData(req)
return r.value
def start(self):
"""
启动应用
"""
req = protos.ApplicationRequest(name=self.applicationId)
req.user = self.user
r = self.stub.startApplication(req)
return r.value
def stop(self):
"""
停止应用
"""
req = protos.ApplicationRequest(name=self.applicationId)
req.user = self.user
r = self.stub.stopApplication(req)
return r.value
def info(self):
"""
获取应用信息
"""
req = protos.ApplicationRequest(name=self.applicationId)
req.user = self.user
r = self.stub.applicationInfo(req)
return r
def uninstall(self):
"""
卸载应用 (always return true)
"""
req = protos.ApplicationRequest(name=self.applicationId)
req.user = self.user
r = self.stub.uninstallApplication(req)
return r.value
def enable(self):
"""
启用应用
"""
req = protos.ApplicationRequest(name=self.applicationId)
req.user = self.user
r = self.stub.enableApplication(req)
return r.value
def disable(self):
"""
禁用应用(这将使应用从启动器消失)
"""
req = protos.ApplicationRequest(name=self.applicationId)
req.user = self.user
r = self.stub.disableApplication(req)
return r.value
def add_to_doze_mode_whitelist(self):
"""
将APP加入省电白名单(可以一直运行,可能不会覆盖所有系统)
"""
req = protos.ApplicationRequest(name=self.applicationId)
req.user = self.user
r = self.stub.addToDozeModeWhiteList(req)
return True
def remove_from_doze_mode_whitelist(self):
"""
将APP移除省电白名单 (always return true)
"""
req = protos.ApplicationRequest(name=self.applicationId)
req.user = self.user
r = self.stub.removeFromDozeModeWhiteList(req)
return True
def is_installed(self):
"""
检查应用是否已经安装
"""
req = protos.ApplicationRequest(name=self.applicationId)
req.user = self.user
r = self.stub.isInstalled(req)
return r.value
def attach_script(self, script, runtime=ScriptRuntime.RUNTIME_QJS,
emit="",
encode=DataEncode.DATA_ENCODE_NONE,
spawn=False,
standup=5):
"""
向应用注入持久化 Hook 脚本
"""
s = isinstance(script, str)
script = script.encode() if s else script
req = protos.HookRequest()
req.package = self.applicationId
req.script = script
req.runtime = runtime
req.standup = standup
req.spawn = spawn
req.destination = emit
req.encode = encode
req.user = self.user
r = self.stub.attachScript(req)
return r.value
def detach_script(self):
"""
移除注入应用的 Hook 脚本
"""
req = protos.HookRequest()
req.package = self.applicationId
req.user = self.user
r = self.stub.detachScript(req)
return r.value
def is_attached_script(self):
"""
检查使用在此应用注入了 Hook 脚本
"""
req = protos.HookRequest()
req.package = self.applicationId
req.user = self.user
r = self.stub.isScriptAttached(req)
return r.value
def is_script_alive(self):
"""
检查应用中的 Hook 脚本是否正常
"""
req = protos.HookRequest()
req.package = self.applicationId
req.user = self.user
r = self.stub.isScriptAlive(req)
return r.value
def __getattr__(self, name):
"""
调用注入应用 Hook 脚本的导出方法
"""
return AppScriptRpcInterface(self.stub, self,
name)
class ApplicationStub(BaseServiceStub):
def current_application(self):
"""
获取当前处于前台的应用的信息
"""
top = self.stub.currentApplication(protos.Empty())
app = self.__call__(top.packageName, user=top.user)
app.activity = top.activity
return app
def get_application_by_name(self, name, user=0):
req = protos.String(value=name)
r = self.stub.getIdentifierByLabel(req)
app = self.__call__(r.value, user=user)
return app
def enumerate_running_processes(self):
"""
列出设备上所有正在运行的安卓应用进程
"""
r = self.stub.enumerateRunningProcesses(protos.Empty())
return r.processes
def enumerate_all_pkg_names(self):
"""
列出所有已安装的应用的 applicationId
"""
r = self.stub.enumerateAllPkgNames(protos.Empty())
return r.names
def get_last_activities(self, count=3):
"""
获取系统中最后一个活动的详细信息
"""
req = protos.Integer(value=count)
r = self.stub.getLastActivities(req).activities
return list(map(to_dict, r))
def start_activity(self, **activity):
"""
启动 activity(总是返回 True)
"""
activity.setdefault("extras", {})
extras = activity.pop("extras")
req = protos.ApplicationActivityRequest(**activity)
req.extras.update(extras)
r = self.stub.startActivity(req)
return r.value
def install_local_file(self, fpath, user=0):
"""
安装设备上的 apk 文件(注意此路径为设备上的 apk 路径)
"""
req = protos.ApplicationRequest(path=fpath)
req.user = user
r = self.stub.installFromLocalFile(req)
return r
def __call__(self, applicationId, user=0):
return ApplicationOpStub(self.stub, applicationId, user)
class StorageOpStub:
# 用于容器值序列化的方法
def _decrypt(self, data):
return self.cryptor.decrypt(data)
def _encrypt(self, data):
return self.cryptor.encrypt(data)
def _unpack(self, value):
return msgpack.loads(self._decrypt(value))
def _pack(self, value):
return self._encrypt(msgpack.dumps(value))
# 注意:此接口可能并不是跨语言通用
def __init__(self, stub, name, cryptor=None):
self.cryptor = cryptor
self.name = name
self.stub = stub
def delete(self, key):
"""
删除一个 KEY
"""
req = protos.StorageRequest(key=key)
req.container = self.name
res = self.stub.delete(req)
return res.value
def exists(self, key):
"""
检查一个 KEY 是否存在
"""
req = protos.StorageRequest(key=key)
req.container = self.name
res = self.stub.exists(req)
return res.value
def get(self, key, default=None):
"""
获取 KEY 对应的键值
"""
req = protos.StorageRequest(key=key)
req.container = self.name
val = self.stub.get(req).value
res = self._unpack(val) if val else default
return res
def set(self, key, value):
"""
设置 KEY 对应的键值
"""
value = self._pack(value)
req = protos.StorageRequest(key=key, value=value)
req.container = self.name
res = self.stub.set(req)
return res.value
def setex(self, key, value, ttl):
"""
设置 KEY 对应的键值,该 KEY 在 TTL 秒后自动删除
"""
value = self._pack(value)
req = protos.StorageRequest(key=key, value=value)
req.container = self.name
req.ttl = ttl
res = self.stub.setex(req)
return res.value
def setnx(self, key, value):
"""
设置 KEY 对应的键值 (仅当该键不存在时)
"""
value = self._pack(value)
req = protos.StorageRequest(key=key, value=value)
req.container = self.name
res = self.stub.setnx(req)
return res.value
def expire(self, key, ttl):
"""
设置 KEY 在 TTL 秒后过期
"""
req = protos.StorageRequest(key=key, ttl=ttl)
req.container = self.name
res = self.stub.expire(req)
return res.value
def ttl(self, key):
"""
获取 KEY 的 TTL (过期时间)
"""
req = protos.StorageRequest(key=key)
req.container = self.name
res = self.stub.ttl(req)
return res.value
class StorageStub(BaseServiceStub):
def clear(self):
"""
删除所有 Storage 容器
"""
r = self.stub.clearAll(protos.Empty())
return r.value
def use(self, name, cryptor=BaseCryptor, **kwargs):
"""
使用一个 Storage 容器
"""
return StorageOpStub(self.stub, name, cryptor(**kwargs))
def remove(self, name):
"""
删除一个 Storage 容器
"""
req = protos.String(value=name)
r = self.stub.clearContainer(req)
return r.value
class UtilStub(BaseServiceStub):
def _get_file_content(self, certfile):
with open(certfile, "rb") as fd:
return fd.read()
def is_ca_certificate_installed(self, certfile):
"""
安装系统证书(用于 MITM)
"""
data = self._get_file_content(certfile)
req = protos.CertifiRequest(cert=data)
r = self.stub.isCACertificateInstalled(req)
return r.value
def install_ca_certificate(self, certfile):
"""
安装系统证书(用于 MITM)
"""
data = self._get_file_content(certfile)
req = protos.CertifiRequest(cert=data)
r = self.stub.installCACertificate(req)
return r.value
def uninstall_ca_certificate(self, certfile):
"""
移除系统证书(用于 MITM)
"""
data = self._get_file_content(certfile)
req = protos.CertifiRequest(cert=data)
r = self.stub.uninstallCACertificate(req)
return r.value
def record_touch(self):
"""
录制滑动轨迹
"""
r = self.stub.recordTouch(protos.Empty())
return r
def perform_touch(self, tas, wait=True):
"""
在设备上进行真实滑动(重放录制的滑动轨迹)
"""
checkArgumentTyp(tas, TouchSequence)
req = protos.PerformTouchRequest(sequence=tas, wait=wait)
r = self.stub.performTouch(req)
return r.value
def reboot(self):
"""
重启系统(宿主设备)
"""
r = self.stub.reboot(protos.Empty())
return r.value
def shutdown(self):
"""
关闭系统(宿主设备)
"""
r = self.stub.shutdown(protos.Empty())
return r.value
def reload(self, clean=False):
"""
重载设备上运行的服务端
"""
req = protos.Boolean(value=clean)
r = self.stub.reload(req)
return r.value
def exit(self):
"""
退出设备上运行的服务端
"""
r = self.stub.exit(protos.Empty())
return r.value
def beep(self):
"""
播放一声蜂鸣(物理查找)
"""
r = self.stub.beepBeep(protos.Empty())
return r.value
def play_audio(self, file, type=AudioStreamType.AST_SYSTEM,
loop=1, interval=0):
"""
播放 wav 音频
"""
profile = PlayAudioProfile()
profile.file = file
profile.type = type
profile.loop = loop
profile.interval = interval
r = self.stub.playAudio(profile)
return r.value
def show_toast(self, text, duration=ToastDuration.TD_SHORT):
"""
在系统界面底部显示一个 Toast 消息
"""
req = protos.ShowToastRequest(text=text, duration=duration)
r = self.stub.showToast(req)
return r.value
def setprop(self, name, value):
"""
设置系统属性(aka: setprop,支持设置 ro.xx 只读属性)
"""
req = protos.SetPropRequest(name=name, value=value)
r = self.stub.setProp(req)
return r.value
def getprop(self, name):
"""
获取系统属性(aka: getprop)
"""
req = protos.String(value=name)
r = self.stub.getProp(req)
return r.value
def server_info(self):
"""
获取服务端ID、版本等信息
"""
r = self.stub.serverInfo(protos.Empty())
return r
def hex_patch(self, pattern, replacement, path,
maxreplace=-1,
dryrun=False):
"""
对设备上的文件进行十六进制字节替换
"""
req = protos.HexPatchRequest()
req.pattern = pattern
req.replacement = replacement
req.path = path
req.maxreplace = maxreplace
req.dryrun = dryrun
return self.stub.hexPatch(req)
class DebugStub(BaseServiceStub):
def _read_pubkey(self, pubkey):
with open(pubkey, "rb") as fd:
return fd.read()
def install_adb_pubkey(self, pubkey):
"""
给内置 adb 服务添加公钥
"""
req = protos.ADBDConfigRequest()
req.adb_pubkey = self._read_pubkey(pubkey)
r = self.stub.installADBPubKey(req)
return r.value
def uninstall_adb_pubkey(self, pubkey):
"""
从内置 adb 服务移除公钥
"""
req = protos.ADBDConfigRequest()
req.adb_pubkey = self._read_pubkey(pubkey)
r = self.stub.uninstallADBPubKey(req)
return r.value
def is_android_debug_bridge_running(self):
"""
远端 adb daemon 是否在运行
"""
r = self.stub.isAndroidDebugBridgeRunning(protos.Empty())
return r.value
def start_android_debug_bridge(self):
"""
启动内置 adbd (默认随框架启动)
"""
r = self.stub.startAndroidDebugBridge(protos.Empty())
return r.value
def stop_android_debug_bridge(self):
"""
停止内置 adb daemon
"""
r = self.stub.stopAndroidDebugBridge(protos.Empty())
return r.value
class SettingsStub(BaseServiceStub):
def _put(self, group, name, value):
req = protos.SettingsRequest(group=group, name=name,
value=value)
r = self.stub.putSettings(req)
return r.value
def _get(self, group, name):
req = protos.SettingsRequest(group=group,name=name)
r = self.stub.getSettings(req)
return r.value
def get_system(self, name):
"""
等价于 settings get system xxxx
"""
return self._get(Group.GROUP_SYSTEM, name)
def put_system(self, name, value):
"""
等价于 settings put system xxxx xxxx
"""
return self._put(Group.GROUP_SYSTEM, name, value)
def get_global(self, name):
"""
等价于 settings get global xxxx
"""
return self._get(Group.GROUP_GLOBAL, name)
def put_global(self, name, value):
"""
等价于 settings put global xxxx xxxx
"""
return self._put(Group.GROUP_GLOBAL, name, value)
def get_secure(self, name):
"""
等价于 settings get secure xxxx
"""
return self._get(Group.GROUP_SECURE, name)
def put_secure(self, name, value):
"""
等价于 settings put secure xxxx xxxx
"""
return self._put(Group.GROUP_SECURE, name, value)
class ShellStub(BaseServiceStub):
def execute_script(self, script, alias=None,
timeout=60):
"""
前台执行一段脚本(支持标准的多行脚本)
"""
req = protos.ShellRequest(name=alias, script=script,
timeout=timeout)
r = self.stub.executeForeground(req)
return r
def execute_background_script(self, script, alias=None):
"""
后台执行一段脚本(支持标准的多行脚本)
"""
req = protos.ShellRequest(name=alias, script=script)
r = self.stub.executeBackground(req)
return r.tid
def is_background_script_finished(self, tid):
"""
后台脚本是否已经结束
"""
req = protos.ShellTask(tid=tid)
r = self.stub.isBackgroundFinished(req)
return r.value
def kill_background_script(self, tid):
"""
强行停止后台脚本
"""
req = protos.ShellTask(tid=tid)
r = self.stub.killBackground(req)
return r.value
class StatusStub(BaseServiceStub):
def get_boot_time(self):
"""
获取设备启动时间 Unix 时间戳
"""
r = self.stub.getBootTime(protos.Empty())
return r.value
def get_disk_usage(self, mountpoint="/data"):
"""
获取分区数据使用情况
"""
req = protos.String(value=mountpoint)
r = self.stub.getDiskUsage(req)
return r
def get_battery_info(self):
"""
获取电池信息
"""
r = self.stub.getBatteryInfo(protos.Empty())
return r
def get_cpu_info(self):
"""
获取 CPU 用量等信息
"""
r = self.stub.getCpuInfo(protos.Empty())
return r
def get_overall_disk_io_info(self):
"""
获取全局的设备磁盘读写状况
"""
r = self.stub.getOverallDiskIOInfo(protos.Empty())
return r
def get_overall_net_io_info(self):
"""
获取全局的设备网络收发状况
"""
r = self.stub.getOverallNetIOInfo(protos.Empty())
return r
def get_userdata_disk_io_info(self):
"""
获取用户数据设备磁盘读写状况
"""
r = self.stub.getUserDataDiskIOInfo(protos.Empty())
return r
def get_net_io_info(self, interface):
"""
获取特定接口的网络收发状况
"""
req = protos.String(value=interface)
r = self.stub.getNetIOInfo(req)
return r
def get_mem_info(self):
"""
获取设备内存状况
"""
r = self.stub.getMemInfo(protos.Empty())
return r
class ProxyStub(BaseServiceStub):
def is_openvpn_running(self):
"""
检查 OPENVPN 是否正在运行
"""
r = self.stub.isOpenVPNRunning(protos.Empty())
return r.value
def is_gproxy_running(self):
"""
检查 GPROXY 是否正在运行
"""
r = self.stub.isGproxyRunning(protos.Empty())
return r.value
def start_openvpn(self, profile):
"""
启动 OPENVPN
"""
checkArgumentTyp(profile, OpenVPNProfile)
r = self.stub.startOpenVPN(profile)
return r.value
def start_gproxy(self, profile):
"""
启动 GPROXY
"""
checkArgumentTyp(profile, GproxyProfile)
r = self.stub.startGproxy(profile)
return r.value
def stop_openvpn(self):
"""
停止 OPENVPN
"""
r = self.stub.stopOpenVPN(protos.Empty())
return r.value
def stop_gproxy(self):
"""
停止 GPROXY
"""
r = self.stub.stopGproxy(protos.Empty())
return r.value
class SelinuxPolicyStub(BaseServiceStub):
def allow(self, source, target, tclass, action):
"""
selinux allow
"""
req = protos.SelinuxPolicyRequest(source=source, target=target,
tclass=tclass, action=action)
r = self.stub.policySetAllow(req)
return r.value
def disallow(self, source, target, tclass, action):
"""
selinux disallow
"""
req = protos.SelinuxPolicyRequest(source=source, target=target,
tclass=tclass, action=action)
r = self.stub.policySetDisallow(req)
return r.value
def get_enforce(self):
"""
获取当前 selinux enforce 状态
"""
r = self.stub.getEnforce(protos.Empty())
return r.value
def set_enforce(self, enforced=True):
"""
设置当前 selinux enforce 状态 (aka: setenforce 0/1)
"""
req = protos.Boolean(value=enforced)
r = self.stub.setEnforce(req)
return r.value
def enabled(self):
"""
获取设备上的 selinux 是否已经启用
"""
r = self.stub.isEnabled(protos.Empty())
return r.value
def enforce(self, name):
"""
设置一个域为 enforce
"""
req = protos.String(value=name)
r = self.stub.policySetEnforce(req)
return r.value
def permissive(self, name):
"""
设置一个域为 permissive
"""
req = protos.String(value=name)
r = self.stub.policySetPermissive(req)
return r.value
def create_domain(self, name):
"""
新建一个 selinux 域
"""
req = protos.String(value=name)
r = self.stub.policyCreateDomain(req)
return r.value
class FileStub(BaseServiceStub):
def _fd_stream_read(self, fd, chunksize):
for chunk in iter(lambda: fd.read(chunksize), bytes()):
yield chunk
def _fd_streaming_send(self, fd, dest, chunksize):
yield protos.FileRequest(path=dest)
for chunk in self._fd_stream_read(fd, chunksize):
yield protos.FileRequest(payload=chunk)
def _fd_streaming_recv(self, fd, iterator):
for chunk in iterator:
fd.write(chunk.payload)
def download_fd(self, fpath, fd):
"""
从设备下载文件到文件描述符
"""
req = protos.FileRequest(path=fpath)
iterator = self.stub.downloadFile(req)
self._fd_streaming_recv(fd, iterator)
st = self.file_stat(fpath)
return st
def upload_fd(self, fd, dest):
"""
上传文件描述符至设备
"""
chunksize = 1024*1024*1
streaming = self._fd_streaming_send(fd, dest,
chunksize)
self.stub.uploadFile(streaming)
st = self.file_stat(dest)
return st
def download_file(self, fpath, dest):
"""
从设备下载文件到本地
"""
with io.open(dest, mode="wb") as fd:
return self.download_fd(fpath, fd)
def upload_file(self, fpath, dest):
"""
上传本地文件至设备
"""
with io.open(fpath, mode="rb") as fd:
return self.upload_fd(fd, dest)
def delete_file(self, fpath):
"""
删除设备上的文件
"""
req = protos.FileRequest(path=fpath)
r = self.stub.deleteFile(req)
return r.value
def file_chmod(self, fpath, mode=0o644):
"""
更改设备上文件的权限
"""
req = protos.FileRequest(path=fpath, mode=mode)
r = self.stub.fileChmod(req)
return r
def file_stat(self, fpath):
"""
获取设备上文件的信息
"""
req = protos.FileRequest(path=fpath)
r = self.stub.fileStat(req)
return r
class LockStub(BaseServiceStub):
def acquire_lock(self, leaseTime=60):
"""
获取用于控制设备的锁,成功返回 true,被占用则会引发异常提示
"""
req = protos.Integer(value=leaseTime)
r = self.stub.acquireLock(req)
return r.value
def get_session_token(self):
"""
获取当前会话的动态令牌
"""
r = self.stub.getSessionToken(protos.Empty())
return r.value
def refresh_lock(self, leaseTime=60):
"""
刷新用于控制设备的锁,应该在定时任务每60s内调用以保持会话
"""
req = protos.Integer(value=leaseTime)
r = self.stub.refreshLock(req)
return r.value
def release_lock(self):
"""
释放控制设备的锁,释放后该设备可被其他客户端控制
"""
r = self.stub.releaseLock(protos.Empty())
return r.value
class WifiStub(BaseServiceStub):
def status(self):
"""
获取当前已连接 WIFI 的信息
"""
r = self.stub.status(protos.Empty())
return r
def blacklist_add(self, bssid):
"""
将 BSSID 加入 WIFI BSSID 黑名单(将不会在WIFI列表显示)
"""
r = self.stub.blacklistAdd(protos.String(value=bssid))
return r.value
def blacklist_clear(self):
"""
清空 WIFI BSSID 黑名单
"""
r = self.stub.blacklistClear(protos.Empty())
return r.value
def blacklist_get_all(self):
"""
获取在 WIFI BSSID 黑名单中的所有 BSSID
"""
r = self.stub.blacklistAll(protos.Empty())
return r.bssids
def scan(self):
"""
请求扫描附近 WIFI
"""
r = self.stub.scan(protos.Empty())
return r.value
def scan_results(self):
"""
获取已扫描到的附近 WIFI
"""
r = self.stub.scanResults(protos.Empty())
return r.stations
def get_mac_addr(self):
"""
获取当前 WIFI 的 MAC 地址
"""
r = self.stub.getMacAddr(protos.Empty())
return r.value
def signal_poll(self):
"""
获取当前已连接 WIFI 的信号强度等信息
"""
r = self.stub.signalPoll(protos.Empty())
return r
def list_networks(self):
"""
列出已连接过的 WIFI 网络
"""
r = self.stub.listNetworks(protos.Empty())
return r.networks
def select_network(self, networkId):
raise NotImplementedError
def enable_network(self, networkId):
raise NotImplementedError
def disable_network(self, networkId):
raise NotImplementedError
def add_network(self):
raise NotImplementedError
def remove_network(self, networkId):
raise NotImplementedError
def set_network_config(self, networkId, name, value):
raise NotImplementedError
def get_network_config(self, networkId, name):
raise NotImplementedError
def disconnect(self):
"""
断开 WIFI 连接
"""
r = self.stub.disconnect(protos.Empty())
return r.value
def reconnect(self):
"""
重连 WIFI
"""
r = self.stub.reconnect(protos.Empty())
return r.value
def set_config(self, name, value):
raise NotImplementedError
def set_auto_connect(self, auto=True):
raise NotImplementedError
def save_config(self):
raise NotImplementedError
class OcrOperator(object):
def __init__(self, device, elements=None,
**kwargs):
self.elements = elements
self.index = kwargs.pop("index", 0)
self.func, self.rule = kwargs.popitem()
self.match = getattr(self, self.func)
self.device = device
def text(self, item):
return self.rule == item["text"]
def textMatches(self, item):
return bool(re.match(self.rule, item["text"],
re.DOTALL))
def textContains(self, item):
return self.rule in item["text"]
def find_target_item(self):
m = [e for e in self.elements \
if self.match(e)]
o = (m and len(m) > self.index) != True
return None if o else m[self.index]
def find_item_or_throw(self):
item = self.find_target_item()
msg = "OcrSelector[{}={}]".format(self.func, self.rule)
item or self.throw(UiObjectNotFoundException, msg)
return item
def find_cb(self, func, ret, *args):
item = self.find_target_item()
return func(item, *args) if item else ret
def find_or_throw_cb(self, func, *args):
item = self.find_item_or_throw()
return func(item, *args)
def throw(self, exception, *args):
raise exception(*args)
def _screenshot(self, item, quality):
return self.device.screenshot(quality,
bound=item["bound"])
def _click(self, item):
point = item["bound"].center()
return self.device.click(point)
def __str__(self):
return "Ocr: {}={}".format(self.func, self.rule)
__repr__ = __str__
def exists(self):
"""
OCR - 检查元素是否存在
"""
return bool(self.find_target_item())
def click(self):
"""
OCR - 点击元素(不存在则报错)
"""
return self.find_or_throw_cb(self._click)
def click_exists(self):
"""
OCR - 点击元素(不存在将不会产生异常)
"""
return self.find_cb(self._click, False)
def screenshot(self, quality=100):
"""
OCR - 对元素进行截图
"""
return self.find_or_throw_cb(self._screenshot,
quality)
def take_screenshot(self, quality=100):
"""
OCR - 对元素进行截图
"""
return self.screenshot(quality)
def info(self):
"""
OCR - 获取匹配元素的信息
"""
item = self.find_item_or_throw()
return item
class OcrEngine(object):
def __init__(self, service, *args,
**kwargs):
args = list(args)
if type(service) == type:
args.insert(0, service)
service = "custom"
func = getattr(self, "init_{}".format(service))
func(*args, **kwargs)
def init_paddleocr(self, *args, **kwargs):
from paddleocr import PaddleOCR
self._service = PaddleOCR(*args, **kwargs)
self._ocr = self.ocr_paddleocr
def init_easyocr(self, *args, **kwargs):
from easyocr import Reader
self._service = Reader(*args, **kwargs)
self._ocr = self.ocr_easyocr
def init_custom(self, service, *args, **kwargs):
self._service = service(*args, **kwargs)
self._ocr = self.ocr_custom
def ocr_custom(self, image):
result = self._service.ocr(image)
return result
def ocr_paddleocr(self, image):
r = self._service.ocr(image)
n = bool(r and r[0] and type(r[0][-1])==float)
result = (r if n else r[0]) or []
output = [[n[0], n[1][0], n[1][1]] for n in result]
return output
def ocr_easyocr(self, image):
result = self._service.readtext(image)
return result
def ocr(self, screenshot):
img = screenshot.getvalue()
result = self._ocr(img) or []
output = [self.format(*n) for n in result]
return output
def format(self, box, text, confidence):
bound = Bound()
bound.left = int(min(p[0] for p in box))
bound.top = int(min(p[1] for p in box))
bound.bottom = int(max(p[1] for p in box))
bound.right = int(max(p[0] for p in box))
info = dict(text=text, confidence=confidence,
bound=bound)
return info
class Device(object):
def __init__(self, host, port=65000,
certificate=None,
session=None):
self.certificate = certificate
self.server = "{0}:{1}".format(host, port)
policy = dict()
policy["maxAttempts"] = 5
policy["retryableStatusCodes"] = ["UNAVAILABLE"]
policy["backoffMultiplier"] = 2
policy["initialBackoff"] = "0.5s"
policy["maxBackoff"] = "15s"
config = json.dumps(dict(methodConfig=[{"name": [{}],
"retryPolicy": policy,}]))
option = dict()
option["grpc.max_send_message_length"] = 64*1024*1024
option["grpc.max_receive_message_length"] = 128*1024*1024
option["grpc.keepalive_time_ms"] = 30*1000
option["grpc.keepalive_timeout_ms"] = 15*1000
option["grpc.keepalive_permit_without_calls"] = True
option["grpc.max_pings_without_data"] = 0
option["grpc.service_config"] = config
option["grpc.enable_http_proxy"] = 0
if certificate is not None:
with open(certificate, "rb") as fd:
key, crt, ca = self._parse_certdata(fd.read())
creds = grpc.ssl_channel_credentials(root_certificates=ca,
certificate_chain=crt,
private_key=key)
self._chan = grpc.secure_channel(self.server, creds,
options=(("grpc.ssl_target_name_override",
self._parse_cname(crt)),
*tuple(option.items()),))
else:
self._chan = grpc.insecure_channel(self.server,
options=(*tuple(option.items()),)
)
session = session or uuid.uuid4().hex
interceptors = [ClientSessionMetadataInterceptor(session),
GrpcRemoteExceptionInterceptor(),
ClientLoggingInterceptor()]
self._ocr = None
self._ocr_img_quality = 75
self.channel = grpc.intercept_channel(self._chan,
*interceptors)
self.session = session
@property
def frida(self):
if _frida_dma is None:
raise ModuleNotFoundError("frida")
try:
device = _frida_dma.get_device_matching(
lambda d: d.name==self.server)
# make a call to check server connectivity
device.query_system_parameters()
return device
except:
""" No-op """
kwargs = {}
if self.certificate is not None:
kwargs["certificate"] = self.certificate
if self._get_session_token():
kwargs["token"] = self._get_session_token()
try:
_frida_dma.remove_remote_device(self.server)
except frida.InvalidArgumentError:
""" No-op """
device = _frida_dma.add_remote_device(self.server,
**kwargs)
return device
def __str__(self):
return "Device@{}".format(self.server)
__repr__ = __str__
def _parse_certdata(self, data):
key, crt, ca = Pem.parse(data)
ca = ca.as_bytes()
crt = crt.as_bytes()
key = key.as_bytes()
return key, crt, ca
def _parse_cname(self, crt):
_, _, der = pem.unarmor(crt)
subject = x509.Certificate.load(der).subject
return subject.native["common_name"]
def _get_service_stub(self, module):
stub = getattr(services, "{0}Stub".format(module))
return stub(self.channel)
def stub(self, module):
modu = sys.modules[__name__]
stub = self._get_service_stub(module)
wrap = getattr(modu, "{0}Stub".format(module))
inst = getattr(self, module, wrap(stub))
self.__setattr__(module, inst)
return inst
# 快速调用: File
def download_fd(self, fpath, fd):
return self.stub("File").download_fd(fpath, fd)
def upload_fd(self, fd, dest):
return self.stub("File").upload_fd(fd, dest)
def download_file(self, fpath, dest):
return self.stub("File").download_file(fpath, dest)
def upload_file(self, fpath, dest):
return self.stub("File").upload_file(fpath, dest)
def delete_file(self, fpath):
return self.stub("File").delete_file(fpath)
def file_chmod(self, fpath, mode=0o644):
return self.stub("File").file_chmod(fpath, mode=mode)
def file_stat(self, fpath):
return self.stub("File").file_stat(fpath)
# 快速调用: Application
def install_local_file(self, rpath, user=0):
return self.stub("Application").install_local_file(rpath, user=user)
def current_application(self):
return self.stub("Application").current_application()
def enumerate_all_pkg_names(self):
return self.stub("Application").enumerate_all_pkg_names()
def enumerate_running_processes(self):
return self.stub("Application").enumerate_running_processes()
def get_last_activities(self, count=3):
return self.stub("Application").get_last_activities(count=count)
def start_activity(self, **activity):
return self.stub("Application").start_activity(**activity)
def get_application_by_name(self, name):
return self.stub("Application").get_application_by_name(name)
def application(self, applicationId, user=0):
return self.stub("Application")(applicationId, user=user)
# 快速调用: Util
def record_touch(self):
return self.stub("Util").record_touch()
def perform_touch(self, sequence, wait=True):
return self.stub("Util").perform_touch(sequence, wait=wait)
def show_toast(self, text, duration=ToastDuration.TD_SHORT):
return self.stub("Util").show_toast(text, duration=duration)
def is_ca_certificate_installed(self, certdata):
return self.stub("Util").is_ca_certificate_installed(certdata)
def uninstall_ca_certificate(self, certfile):
return self.stub("Util").uninstall_ca_certificate(certfile)
def install_ca_certificate(self, certfile):
return self.stub("Util").install_ca_certificate(certfile)
def reboot(self):
return self.stub("Util").reboot()
def shutdown(self):
return self.stub("Util").shutdown()
def exit(self):
return self.stub("Util").exit()
def reload(self, clean=False):
return self.stub("Util").reload(clean)
def beep(self):
return self.stub("Util").beep()
def play_audio(self, file, type=AudioStreamType.AST_SYSTEM,
loop=1, interval=0):
return self.stub("Util").play_audio(file, type=type, loop=loop,
interval=interval)
def setprop(self, name, value):
return self.stub("Util").setprop(name, value)
def getprop(self, name):
return self.stub("Util").getprop(name)
def hex_patch(self, pattern, replacement, path,
maxreplace=-1, dryrun=False):
return self.stub("Util").hex_patch(pattern, replacement, path,
maxreplace=maxreplace,
dryrun=dryrun)
# 快速调用: Debug
def install_adb_pubkey(self, pubkey):
return self.stub("Debug").install_adb_pubkey(pubkey)
def uninstall_adb_pubkey(self, pubkey):
return self.stub("Debug").uninstall_adb_pubkey(pubkey)
def start_android_debug_bridge(self):
return self.stub("Debug").start_android_debug_bridge()
def is_android_debug_bridge_running(self):
return self.stub("Debug").is_android_debug_bridge_running()
def stop_android_debug_bridge(self):
return self.stub("Debug").stop_android_debug_bridge()
# 快速调用: Proxy
def is_openvpn_running(self):
return self.stub("Proxy").is_openvpn_running()
def is_gproxy_running(self):
return self.stub("Proxy").is_gproxy_running()
def start_openvpn(self, profile):
return self.stub("Proxy").start_openvpn(profile)
def start_gproxy(self, profile):
return self.stub("Proxy").start_gproxy(profile)
def stop_openvpn(self):
return self.stub("Proxy").stop_openvpn()
def stop_gproxy(self):
return self.stub("Proxy").stop_gproxy()
# 快速调用: Shell
def execute_script(self, script, alias=None, timeout=60):
return self.stub("Shell").execute_script(script, alias=alias,
timeout=timeout)
def execute_background_script(self, script, alias=None):
return self.stub("Shell").execute_background_script(script, alias=alias)
def is_background_script_finished(self, tid):
return self.stub("Shell").is_background_script_finished(tid)
def kill_background_script(self, tid):
return self.stub("Shell").kill_background_script(tid)
# 快速调用: UiAutomator
def click(self, point):
return self.stub("UiAutomator").click(point)
def drag(self, A, B, step=32):
return self.stub("UiAutomator").drag(A, B, step=step)
def swipe(self, A, B, step=32):
return self.stub("UiAutomator").swipe(A, B, step=step)
def swipe_points(self, *points, step=32):
return self.stub("UiAutomator").swipe_points(*points, step=step)
def open_notification(self):
return self.stub("UiAutomator").open_notification()
def open_quick_settings(self):
return self.stub("UiAutomator").open_quick_settings()
def wake_up(self):
return self.stub("UiAutomator").wake_up()
def sleep(self):
return self.stub("UiAutomator").sleep()
def is_screen_on(self):
return self.stub("UiAutomator").is_screen_on()
def is_screen_locked(self):
return self.stub("UiAutomator").is_screen_locked()
def set_clipboard(self, text):
return self.stub("UiAutomator").set_clipboard(text)
def get_clipboard(self):
return self.stub("UiAutomator").get_clipboard()
def freeze_rotation(self, freeze=True):
return self.stub("UiAutomator").freeze_rotation(freeze=freeze)
def set_orientation(self, orien=Orientation.ORIEN_NATURE):
return self.stub("UiAutomator").set_orientation(orien)
def press_key(self, key):
return self.stub("UiAutomator").press_key(key)
def press_keycode(self, code, meta=0):
return self.stub("UiAutomator").press_keycode(code, meta)
def take_screenshot(self, quality=100, bound=None):
return self.stub("UiAutomator").take_screenshot(quality, bound=bound)
def screenshot(self, quality=100, bound=None):
return self.stub("UiAutomator").screenshot(quality, bound=bound)
def dump_window_hierarchy(self, compressed=False):
return self.stub("UiAutomator").dump_window_hierarchy(compressed=compressed)
def wait_for_idle(self, timeout):
return self.stub("UiAutomator").wait_for_idle(timeout)
def get_last_toast(self):
return self.stub("UiAutomator").get_last_toast()
def find_similar_image(self, data, threshold=0.0, distance=250,
scale=1.0, area=FindImageArea.FIA_WHOLE_SCREEN,
method=FindImageMethod.FIM_TEMPLATE):
return self.stub("UiAutomator").find_similar_image(data, threshold=threshold,
distance=distance, scale=scale,
area=area, method=method)
# watcher
def remove_all_watchers(self):
return self.stub("UiAutomator").remove_all_watchers()
def set_watcher_loop_enabled(self, enabled):
return self.stub("UiAutomator").set_watcher_loop_enabled(enabled)
def get_watcher_loop_enabled(self):
return self.stub("UiAutomator").get_watcher_loop_enabled()
def get_watcher_triggered_count(self, name):
return self.stub("UiAutomator").get_watcher_triggered_count(name)
def reset_watcher_triggered_count(self, name):
return self.stub("UiAutomator").reset_watcher_triggered_count(name)
def get_applied_watchers(self):
return self.stub("UiAutomator").get_applied_watchers()
def register_click_target_selector_watcher(self, name, conditions,
target):
return self.stub("UiAutomator").register_click_target_selector_watcher(
name, conditions, target
)
def register_press_key_watcher(self, name, conditions, key):
return self.stub("UiAutomator").register_press_key_watcher(
name, conditions, key
)
def register_none_op_watcher(self, name, conditions):
return self.stub("UiAutomator").register_none_op_watcher(
name, conditions
)
def set_watcher_enabled(self, name, enable):
return self.stub("UiAutomator").set_watcher_enabled(name, enable)
def get_watcher_enabled(self, name):
return self.stub("UiAutomator").get_watcher_enabled(name)
def remove_watcher(self, name):
return self.stub("UiAutomator").remove_watcher(name)
def device_info(self):
return self.stub("UiAutomator").device_info()
def server_info(self):
return self.stub("Util").server_info()
def __call__(self, **kwargs):
return self.stub("UiAutomator")(**kwargs)
# OCR 功能扩展
def ocr(self, index=0, **kwargs):
if not isinstance(self._ocr, OcrEngine):
raise IllegalStateException("Ocr engine is not setted up")
if any(r not in ["text", "textContains", "textMatches"] \
for r in kwargs.keys()):
raise InvalidArgumentError("Only text* matches are supported")
if len(kwargs) != 1:
raise InvalidArgumentError("Only or at least one rule can be used")
image = self.screenshot(self._ocr_img_quality)
return OcrOperator(self,
elements=self._ocr.ocr(image),
index=index,
**kwargs
)
def setup_ocr_backend(self, service, *args, quality=75,
**kwargs):
self._ocr_img_quality = quality
self._ocr = OcrEngine(service, *args,
**kwargs)
# 日志打印
def set_debug_log_enabled(self, enable):
level = logging.DEBUG if enable else logging.WARN
logger.setLevel(level)
return enable
# 接口锁定
def _get_session_token(self):
return self.stub("Lock").get_session_token()
def _acquire_lock(self, leaseTime=60):
return self.stub("Lock").acquire_lock(leaseTime)
def _refresh_lock(self, leaseTime=60):
return self.stub("Lock").refresh_lock(leaseTime)
def _release_lock(self):
return self.stub("Lock").release_lock()
def __enter__(self):
self._acquire_lock(leaseTime=sys.maxsize)
return self
def __exit__(self, type, value, traceback):
self._release_lock()
if __name__ == "__main__":
import code
import readline
import rlcompleter
import argparse
parser = argparse.ArgumentParser()
crt = os.environ.get("CERTIFICATE", None)
port = int(os.environ.get("PORT", 65000))
parser.add_argument("-device", type=str, default="127.0.0.1",
help="service ip address")
parser.add_argument("-port", type=int, default=port,
help="service port")
parser.add_argument("-cert", type=str, default=crt,
help="ssl cert")
args = parser.parse_args()
readline.parse_and_bind("tab: complete")
d = Device(args.device, port=args.port,
certificate=args.cert)
code.interact(local=globals())
```
--- MODULE: lamda.const | FILE: const.py ---
```python
# Copyright 2022 rev1si0n (https://github.com/rev1si0n). All rights reserved.
#
# Distributed under MIT license.
# See file LICENSE for detail or copy at https://opensource.org/licenses/MIT
# Android runtime permissions
PERMISSION_READ_SMS = "android.permission.READ_SMS"
PERMISSION_READ_CALENDAR = "android.permission.READ_CALENDAR"
PERMISSION_READ_CALL_LOG = "android.permission.READ_CALL_LOG"
PERMISSION_ACCESS_FINE_LOCATION = "android.permission.ACCESS_FINE_LOCATION"
PERMISSION_ANSWER_PHONE_CALLS = "android.permission.ANSWER_PHONE_CALLS"
PERMISSION_RECEIVE_WAP_PUSH = "android.permission.RECEIVE_WAP_PUSH"
PERMISSION_BODY_SENSORS = "android.permission.BODY_SENSORS"
PERMISSION_READ_PHONE_NUMBERS = "android.permission.READ_PHONE_NUMBERS"
PERMISSION_RECEIVE_MMS = "android.permission.RECEIVE_MMS"
PERMISSION_RECEIVE_SMS = "android.permission.RECEIVE_SMS"
PERMISSION_READ_EXTERNAL_STORAGE = "android.permission.READ_EXTERNAL_STORAGE"
PERMISSION_ACCESS_COARSE_LOCATION = "android.permission.ACCESS_COARSE_LOCATION"
PERMISSION_READ_PHONE_STATE = "android.permission.READ_PHONE_STATE"
PERMISSION_SEND_SMS = "android.permission.SEND_SMS"
PERMISSION_CALL_PHONE = "android.permission.CALL_PHONE"
PERMISSION_WRITE_CONTACTS = "android.permission.WRITE_CONTACTS"
PERMISSION_ACCEPT_HANDOVER = "android.permission.ACCEPT_HANDOVER"
PERMISSION_CAMERA = "android.permission.CAMERA"
PERMISSION_WRITE_CALENDAR = "android.permission.WRITE_CALENDAR"
PERMISSION_WRITE_CALL_LOG = "android.permission.WRITE_CALL_LOG"
PERMISSION_USE_SIP = "android.permission.USE_SIP"
PERMISSION_PROCESS_OUTGOING_CALLS = "android.permission.PROCESS_OUTGOING_CALLS"
PERMISSION_READ_CELL_BROADCASTS = "android.permission.READ_CELL_BROADCASTS"
PERMISSION_GET_ACCOUNTS = "android.permission.GET_ACCOUNTS"
PERMISSION_WRITE_EXTERNAL_STORAGE = "android.permission.WRITE_EXTERNAL_STORAGE"
PERMISSION_ACTIVITY_RECOGNITION = "android.permission.ACTIVITY_RECOGNITION"
PERMISSION_RECORD_AUDIO = "android.permission.RECORD_AUDIO"
PERMISSION_READ_CONTACTS = "android.permission.READ_CONTACTS"
PERMISSION_ACCESS_BACKGROUND_LOCATION = "android.permission.ACCESS_BACKGROUND_LOCATION"
PERMISSION_ACCESS_MEDIA_LOCATION = "android.permission.ACCESS_MEDIA_LOCATION"
# Android activity flags
FLAG_ACTIVITY_BROUGHT_TO_FRONT = 0x00400000
FLAG_ACTIVITY_CLEAR_TASK = 0x00008000
FLAG_ACTIVITY_CLEAR_TOP = 0x04000000
FLAG_ACTIVITY_EXCLUDE_FROM_RECENTS = 0x00800000
FLAG_ACTIVITY_FORWARD_RESULT = 0x02000000
FLAG_ACTIVITY_LAUNCHED_FROM_HISTORY = 0x00100000
FLAG_ACTIVITY_LAUNCH_ADJACENT = 0x00001000
FLAG_ACTIVITY_MATCH_EXTERNAL = 0x00000800
FLAG_ACTIVITY_MULTIPLE_TASK = 0x08000000
FLAG_ACTIVITY_NEW_DOCUMENT = 0x00080000
FLAG_ACTIVITY_NEW_TASK = 0x10000000
FLAG_ACTIVITY_NO_ANIMATION = 0x00010000
FLAG_ACTIVITY_NO_HISTORY = 0x40000000
FLAG_ACTIVITY_NO_USER_ACTION = 0x00040000
FLAG_ACTIVITY_PREVIOUS_IS_TOP = 0x01000000
FLAG_ACTIVITY_REORDER_TO_FRONT = 0x00020000
FLAG_ACTIVITY_REQUIRE_DEFAULT = 0x00000200
FLAG_ACTIVITY_REQUIRE_NON_BROWSER = 0x00000400
FLAG_ACTIVITY_RESET_TASK_IF_NEEDED = 0x00200000
FLAG_ACTIVITY_RETAIN_IN_RECENTS = 0x00002000
FLAG_ACTIVITY_SINGLE_TOP = 0x20000000
FLAG_ACTIVITY_TASK_ON_HOME = 0x00004000
```
--- MODULE: lamda.exceptions | FILE: exceptions.py ---
```python
# Copyright 2022 rev1si0n (https://github.com/rev1si0n). All rights reserved.
#
# Distributed under MIT license.
# See file LICENSE for detail or copy at https://opensource.org/licenses/MIT
class CompatibilityException(Exception):
""" Exception """
class DeadSystemException(Exception):
""" Exception """
class DeviceUnavailable(Exception):
""" Exception """
class DuplicateEntryError(Exception):
""" Exception """
class IllegalArgumentException(Exception):
""" Exception """
class IllegalStateException(Exception):
""" Exception """
class InstallPackageFailed(Exception):
""" Exception """
class InternalRpcException(Exception):
""" Exception """
class InvalidAndroidPackage(Exception):
""" Exception """
class InvalidArgumentError(Exception):
""" Exception """
class InvalidOperationError(Exception):
""" Exception """
class InvalidRootCertificate(Exception):
""" Exception """
class MethodNotFoundException(Exception):
""" Exception """
class NameNotFoundException(Exception):
""" Exception """
class NotImplementedException(Exception):
""" Exception """
class NullPointerException(Exception):
""" Exception """
class SecurityException(Exception):
""" Exception """
class ServiceUnavailable(Exception):
""" Exception """
class StaleObjectException(Exception):
""" Exception """
class StartupActivityNotFound(Exception):
""" Exception """
class StorageOutOfMemory(Exception):
""" Exception """
class UiAutomatorException(Exception):
""" Exception """
class UiObjectNotFoundException(Exception):
""" Exception """
class UnHandledException(Exception):
""" Exception """
```
--- MODULE: lamda.types | FILE: types.py ---
```python
# Copyright 2022 rev1si0n (lamda.devel@gmail.com). All rights reserved.
#
# Distributed under MIT license.
# See file LICENSE for detail or copy at https://opensource.org/licenses/MIT
import io
import codecs
__all__ = ["AttributeDict", "BytesIO"]
class AttributeDict(dict):
def __getattr__(self, attr):
return self[attr]
def __setattr__(self, attr, value):
self[attr] = value
def remove(self, key):
key in self and self.pop(key)
class BytesIO(io.BytesIO):
@classmethod
def decode_from(cls, data, encoding):
return cls(codecs.decode(data, encoding))
def encode(self, encoding):
return codecs.encode(self.getvalue(), encoding)
def decode(self, encoding):
return codecs.decode(self.getvalue(), encoding)
def save(self, fpath):
with open(fpath, "wb") as fd:
return fd.write(self.getvalue())
@classmethod
def load(cls, fpath):
with open(fpath, "rb") as fd:
return cls(fd.read())
```
--- FILE: rpc/application.proto ---
```protobuf
// Copyright 2022 rev1si0n (lamda.devel@gmail.com). All rights reserved.
//
// Distributed under MIT license.
// See file LICENSE for detail or copy at https://opensource.org/licenses/MIT
syntax = "proto3";
package lamda.rpc;
import "google/protobuf/struct.proto";
enum GrantType {
GRANT_ALLOW = 0;
GRANT_DENY = 1;
GRANT_IGNORE = 2;
}
enum DataEncode {
DATA_ENCODE_NONE = 0;
DATA_ENCODE_ZLIB = 1;
}
enum ScriptRuntime {
RUNTIME_QJS = 0;
RUNTIME_V8 = 1;
}
message ApplicationRequest {
string name = 1;
string permission = 2;
GrantType mode = 3;
string path = 4;
uint32 user = 5;
}
message ApplicationActivityRequest {
string package = 1;
string action = 2;
string category = 3;
string component = 4;
google.protobuf.Struct extras = 5;
repeated string categories = 6;
int64 flags = 7;
bool debug = 8;
string data = 9;
uint32 user = 10;
}
message ApplicationActivityInfo {
string package = 1;
string action = 2;
string category = 3;
string component = 4;
google.protobuf.Struct extras = 5;
repeated string categories = 6;
int64 flags = 7;
bool debug = 8;
string data = 9;
uint32 user = 10;
}
message ApplicationActivityInfoList {
repeated ApplicationActivityInfo activities = 1;
}
message ApplicationPermissions {
repeated string permissions = 1;
}
message ApplicationInfo {
string packageName = 1;
uint32 uid = 2;
bool enabled = 3;
string processName = 4;
string sourceDir = 5;
string dataDir = 6;
uint32 baseRevisionCode = 7;
int64 firstInstallTime = 8;
int64 lastUpdateTime = 9;
uint32 versionCode = 10;
string versionName = 11;
string activity = 12;
uint32 user = 13;
}
message ApplicationProcess {
repeated string packages = 1;
string processName = 2;
int64 uid = 3;
int64 pid = 4;
}
message ApplicationProcesses {
repeated ApplicationProcess processes = 1;
}
message ApplicationPkgNames {
repeated string names = 1;
}
message HookRequest {
string package = 1;
bytes script = 2;
ScriptRuntime runtime = 3;
string destination = 4;
DataEncode encode = 5;
uint32 standup = 6;
bool spawn = 7;
uint32 user = 8;
}
message HookRpcRequest {
string package = 1;
string callinfo = 2;
uint32 user = 3;
}
message HookRpcResponse {
string package = 1;
string callresult = 2;
}
```
--- FILE: rpc/debug.proto ---
```protobuf
// Copyright 2022 rev1si0n (lamda.devel@gmail.com). All rights reserved.
//
// Distributed under MIT license.
// See file LICENSE for detail or copy at https://opensource.org/licenses/MIT
syntax = "proto3";
package lamda.rpc;
import "google/protobuf/struct.proto";
message ADBDConfigRequest {
string adb_pubkey = 1;
}
```
--- FILE: rpc/file.proto ---
```protobuf
// Copyright 2022 rev1si0n (lamda.devel@gmail.com). All rights reserved.
//
// Distributed under MIT license.
// See file LICENSE for detail or copy at https://opensource.org/licenses/MIT
syntax = "proto3";
package lamda.rpc;
message FileStat {
string name = 1;
string path = 2;
bool directory = 3;
int64 st_mode = 4;
int64 st_atime = 5;
int64 st_mtime = 6;
int64 st_ctime = 7;
int32 st_uid = 8;
int32 st_gid = 9;
int64 st_size = 10;
}
message FileRequest {
string path = 1;
uint64 mode = 2;
bytes payload = 3;
}
message FileDataResponse {
bytes payload = 1;
}
```
--- FILE: rpc/policy.proto ---
```protobuf
// Copyright 2022 rev1si0n (lamda.devel@gmail.com). All rights reserved.
//
// Distributed under MIT license.
// See file LICENSE for detail or copy at https://opensource.org/licenses/MIT
syntax = "proto3";
package lamda.rpc;
message SelinuxPolicyRequest {
string source = 1;
string target = 2;
string tclass = 3;
string action = 4;
}
```
--- FILE: rpc/proxy.proto ---
```protobuf
// Copyright 2022 rev1si0n (lamda.devel@gmail.com). All rights reserved.
//
// Distributed under MIT license.
// See file LICENSE for detail or copy at https://opensource.org/licenses/MIT
syntax = "proto3";
package lamda.rpc;
import "application.proto";
// Supported Shadowsocks Ciphers (no ref)
enum ShadowCipher {
SS_AES_128_CFB = 0;
SS_AES_192_CFB = 1;
SS_AES_256_CFB = 2;
SS_AES_128_CTR = 3;
SS_AES_192_CTR = 4;
SS_AES_256_CTR = 5;
SS_CAMELLIA_128_CFB = 6;
SS_CAMELLIA_192_CFB = 7;
SS_CAMELLIA_256_CFB = 8;
SS_DES_CFB = 9;
SS_AES_128_GCM = 20;
SS_AES_192_GCM = 21;
SS_AES_256_GCM = 22;
SS_CHACHA20_IETF_POLY1305 = 23;
}
enum GproxyType {
SOCKS5 = 0;
HTTP_CONNECT = 1;
HTTP_RELAY = 2;
HTTPS_CONNECT = 3;
SHADOWSOCKS = 4;
}
message GproxyConfigRequest {
ApplicationInfo application = 1;
GproxyType type = 2;
string nameserver = 3;
string login = 4;
string password = 5;
string host = 6;
uint32 port = 7;
bool bypass_local_subnet = 8;
bool drop_udp = 9;
bool udp_proxy = 10;
bool dns_proxy = 11;
}
enum OpenVPNProto {
TCP = 0;
UDP = 1;
}
enum OpenVPNAuth {
SHA1 = 0;
SHA224 = 1;
SHA256 = 2;
SHA384 = 3;
SHA512 = 4;
RIPEMD160 = 5;
RSA_SHA1 = 6;
RSA_SHA224 = 7;
RSA_SHA256 = 8;
RSA_SHA384 = 9;
RSA_SHA512 = 10;
RSA_RIPEMD160 = 11;
}
enum OpenVPNCipher {
AES_128_GCM = 0;
AES_256_GCM = 1;
CHACHA20_POLY1305= 2;
AES_128_CBC = 3;
AES_256_CBC = 4;
}
enum OpenVPNKeyDirection {
// because 0 is a default value
// so we use 1 as key-direction 0
KEY_DIRECTION_NONE = 0;
KEY_DIRECTION_0 = 1;
KEY_DIRECTION_1 = 2;
}
enum OpenVPNEncryption {
TLS_NONE = 0;
TLS_AUTH = 1;
TLS_CRYPT = 2;
TLS_CRYPT_V2 = 3;
}
message OpenVPNConfigRequest {
bool all_traffic = 1;
OpenVPNProto proto = 2;
string host = 3;
uint32 port = 4;
OpenVPNCipher cipher = 5;
string ca = 6;
string cert = 7;
string key = 8;
OpenVPNEncryption tls_encryption = 9;
OpenVPNKeyDirection tls_key_direction = 10;
string tls_key = 11;
OpenVPNAuth auth = 12;
string login = 13;
string password = 14;
}
```
--- FILE: rpc/settings.proto ---
```protobuf
// Copyright 2022 rev1si0n (lamda.devel@gmail.com). All rights reserved.
//
// Distributed under MIT license.
// See file LICENSE for detail or copy at https://opensource.org/licenses/MIT
syntax = "proto3";
package lamda.rpc;
enum Group {
GROUP_SYSTEM = 0;
GROUP_SECURE = 1;
GROUP_GLOBAL = 2;
}
message SettingsRequest {
Group group = 1;
string name = 2;
string value = 3;
}
```
--- FILE: rpc/shell.proto ---
```protobuf
// Copyright 2022 rev1si0n (lamda.devel@gmail.com). All rights reserved.
//
// Distributed under MIT license.
// See file LICENSE for detail or copy at https://opensource.org/licenses/MIT
syntax = "proto3";
package lamda.rpc;
message ShellRequest {
string tid = 1;
string name = 2;
string script = 3;
int32 timeout = 4;
}
message ShellResult {
int32 exitstatus = 1;
bytes stdout = 2;
bytes stderr = 3;
}
message ShellTask {
string tid = 1;
string name = 2;
int32 pid = 3;
}
```
--- FILE: rpc/status.proto ---
```protobuf
// Copyright 2022 rev1si0n (lamda.devel@gmail.com). All rights reserved.
//
// Distributed under MIT license.
// See file LICENSE for detail or copy at https://opensource.org/licenses/MIT
syntax = "proto3";
package lamda.rpc;
message BatteryInfo {
bool batt_charging = 1;
int32 batt_percent = 2;
float batt_temperature = 3;
}
message CpuInfo {
float cpu_percent = 1;
int32 cpu_count = 2;
float cpu_freq_current = 3;
float cpu_freq_max = 4;
float cpu_freq_min = 5;
float cpu_times_user = 6;
float cpu_times_system = 7;
float cpu_times_idle = 8;
}
message DiskUsage {
int64 disk_total = 1;
int64 disk_used = 2;
int64 disk_free = 3;
float disk_percent = 4;
}
message DiskIOInfo {
int64 disk_io_read_bytes = 1;
int64 disk_io_read_count = 2;
int64 disk_io_write_bytes = 3;
int64 disk_io_write_count = 4;
int64 disk_io_read_time = 5;
int64 disk_io_write_time = 6;
int64 disk_io_busy_time = 7;
}
message NetIOInfo {
int64 net_io_bytes_sent = 1;
int64 net_io_packets_sent = 2;
int64 net_io_bytes_recv = 3;
int64 net_io_packets_recv = 4;
int64 net_io_dropin = 5;
int64 net_io_dropout = 6;
int64 net_io_errin = 7;
int64 net_io_errout = 8;
}
message MemInfo {
int64 mem_total = 1;
int64 mem_available = 2;
float mem_percent = 3;
int64 mem_used = 4;
int64 mem_free = 5;
int64 mem_active = 6;
int64 mem_inactive = 7;
int64 mem_buffers = 8;
int64 mem_cached = 9;
int64 mem_shared = 10;
int64 mem_slab = 11;
}
```
--- FILE: rpc/storage.proto ---
```protobuf
// Copyright 2022 rev1si0n (lamda.devel@gmail.com). All rights reserved.
//
// Distributed under MIT license.
// See file LICENSE for detail or copy at https://opensource.org/licenses/MIT
syntax = "proto3";
package lamda.rpc;
message StorageRequest {
string container = 1;
string key = 2;
bytes value = 3;
uint32 ttl = 4;
}
```
--- FILE: rpc/types.proto ---
```protobuf
// Copyright 2022 rev1si0n (lamda.devel@gmail.com). All rights reserved.
//
// Distributed under MIT license.
// See file LICENSE for detail or copy at https://opensource.org/licenses/MIT
syntax = "proto3";
package lamda.rpc;
message Boolean {
bool value = 1;
}
message Integer {
int64 value = 1;
}
message String {
string value = 1;
}
message Bytes {
bytes value = 1;
}
message Empty {
}
```
--- FILE: rpc/uiautomator.proto ---
```protobuf
// Copyright 2022 rev1si0n (lamda.devel@gmail.com). All rights reserved.
//
// Distributed under MIT license.
// See file LICENSE for detail or copy at https://opensource.org/licenses/MIT
syntax = "proto3";
package lamda.rpc;
message Point {
uint32 x = 1;
uint32 y = 2;
}
message Bound {
uint32 top = 1;
uint32 left = 2;
uint32 bottom = 3;
uint32 right = 4;
}
enum Orientation {
ORIEN_NATURE = 0;
ORIEN_LEFT = 1;
ORIEN_UPSIDEDOWN = 2;
ORIEN_RIGHT = 3;
}
enum Key {
KEY_BACK = 0;
KEY_CAMERA = 1;
KEY_CENTER = 2;
KEY_DELETE = 3;
KEY_DOWN = 4;
KEY_ENTER = 5;
KEY_HOME = 6;
KEY_LEFT = 7;
KEY_MENU = 8;
KEY_POWER = 9;
KEY_RECENT = 10;
KEY_RIGHT = 11;
KEY_SEARCH = 12;
KEY_UP = 13;
KEY_VOLUME_DOWN = 14;
KEY_VOLUME_MUTE = 15;
KEY_VOLUME_UP = 16;
}
enum KeyCode {
KEYCODE_UNKNOWN = 0;
KEYCODE_SOFT_LEFT = 1;
KEYCODE_SOFT_RIGHT = 2;
KEYCODE_HOME = 3;
KEYCODE_BACK = 4;
KEYCODE_CALL = 5;
KEYCODE_ENDCALL = 6;
KEYCODE_0 = 7;
KEYCODE_1 = 8;
KEYCODE_2 = 9;
KEYCODE_3 = 10;
KEYCODE_4 = 11;
KEYCODE_5 = 12;
KEYCODE_6 = 13;
KEYCODE_7 = 14;
KEYCODE_8 = 15;
KEYCODE_9 = 16;
KEYCODE_STAR = 17;
KEYCODE_POUND = 18;
KEYCODE_DPAD_UP = 19;
KEYCODE_DPAD_DOWN = 20;
KEYCODE_DPAD_LEFT = 21;
KEYCODE_DPAD_RIGHT = 22;
KEYCODE_DPAD_CENTER = 23;
KEYCODE_VOLUME_UP = 24;
KEYCODE_VOLUME_DOWN = 25;
KEYCODE_POWER = 26;
KEYCODE_CAMERA = 27;
KEYCODE_CLEAR = 28;
KEYCODE_A = 29;
KEYCODE_B = 30;
KEYCODE_C = 31;
KEYCODE_D = 32;
KEYCODE_E = 33;
KEYCODE_F = 34;
KEYCODE_G = 35;
KEYCODE_H = 36;
KEYCODE_I = 37;
KEYCODE_J = 38;
KEYCODE_K = 39;
KEYCODE_L = 40;
KEYCODE_M = 41;
KEYCODE_N = 42;
KEYCODE_O = 43;
KEYCODE_P = 44;
KEYCODE_Q = 45;
KEYCODE_R = 46;
KEYCODE_S = 47;
KEYCODE_T = 48;
KEYCODE_U = 49;
KEYCODE_V = 50;
KEYCODE_W = 51;
KEYCODE_X = 52;
KEYCODE_Y = 53;
KEYCODE_Z = 54;
KEYCODE_COMMA = 55;
KEYCODE_PERIOD = 56;
KEYCODE_ALT_LEFT = 57;
KEYCODE_ALT_RIGHT = 58;
KEYCODE_SHIFT_LEFT = 59;
KEYCODE_SHIFT_RIGHT = 60;
KEYCODE_TAB = 61;
KEYCODE_SPACE = 62;
KEYCODE_SYM = 63;
KEYCODE_EXPLORER = 64;
KEYCODE_ENVELOPE = 65;
KEYCODE_ENTER = 66;
KEYCODE_DEL = 67;
KEYCODE_GRAVE = 68;
KEYCODE_MINUS = 69;
KEYCODE_EQUALS = 70;
KEYCODE_LEFT_BRACKET = 71;
KEYCODE_RIGHT_BRACKET = 72;
KEYCODE_BACKSLASH = 73;
KEYCODE_SEMICOLON = 74;
KEYCODE_APOSTROPHE = 75;
KEYCODE_SLASH = 76;
KEYCODE_AT = 77;
KEYCODE_NUM = 78;
KEYCODE_HEADSETHOOK = 79;
KEYCODE_FOCUS = 80;
KEYCODE_PLUS = 81;
KEYCODE_MENU = 82;
KEYCODE_NOTIFICATION = 83;
KEYCODE_SEARCH = 84;
KEYCODE_MEDIA_PLAY_PAUSE= 85;
KEYCODE_MEDIA_STOP = 86;
KEYCODE_MEDIA_NEXT = 87;
KEYCODE_MEDIA_PREVIOUS = 88;
KEYCODE_MEDIA_REWIND = 89;
KEYCODE_MEDIA_FAST_FORWARD = 90;
KEYCODE_MUTE = 91;
KEYCODE_PAGE_UP = 92;
KEYCODE_PAGE_DOWN = 93;
KEYCODE_PICTSYMBOLS = 94;
KEYCODE_SWITCH_CHARSET = 95;
KEYCODE_BUTTON_A = 96;
KEYCODE_BUTTON_B = 97;
KEYCODE_BUTTON_C = 98;
KEYCODE_BUTTON_X = 99;
KEYCODE_BUTTON_Y = 100;
KEYCODE_BUTTON_Z = 101;
KEYCODE_BUTTON_L1 = 102;
KEYCODE_BUTTON_R1 = 103;
KEYCODE_BUTTON_L2 = 104;
KEYCODE_BUTTON_R2 = 105;
KEYCODE_BUTTON_THUMBL = 106;
KEYCODE_BUTTON_THUMBR = 107;
KEYCODE_BUTTON_START = 108;
KEYCODE_BUTTON_SELECT = 109;
KEYCODE_BUTTON_MODE = 110;
KEYCODE_ESCAPE = 111;
KEYCODE_FORWARD_DEL = 112;
KEYCODE_CTRL_LEFT = 113;
KEYCODE_CTRL_RIGHT = 114;
KEYCODE_CAPS_LOCK = 115;
KEYCODE_SCROLL_LOCK = 116;
KEYCODE_META_LEFT = 117;
KEYCODE_META_RIGHT = 118;
KEYCODE_FUNCTION = 119;
KEYCODE_SYSRQ = 120;
KEYCODE_BREAK = 121;
KEYCODE_MOVE_HOME = 122;
KEYCODE_MOVE_END = 123;
KEYCODE_INSERT = 124;
KEYCODE_FORWARD = 125;
KEYCODE_MEDIA_PLAY = 126;
KEYCODE_MEDIA_PAUSE = 127;
KEYCODE_MEDIA_CLOSE = 128;
KEYCODE_MEDIA_EJECT = 129;
KEYCODE_MEDIA_RECORD = 130;
KEYCODE_F1 = 131;
KEYCODE_F2 = 132;
KEYCODE_F3 = 133;
KEYCODE_F4 = 134;
KEYCODE_F5 = 135;
KEYCODE_F6 = 136;
KEYCODE_F7 = 137;
KEYCODE_F8 = 138;
KEYCODE_F9 = 139;
KEYCODE_F10 = 140;
KEYCODE_F11 = 141;
KEYCODE_F12 = 142;
KEYCODE_NUM_LOCK = 143;
KEYCODE_NUMPAD_0 = 144;
KEYCODE_NUMPAD_1 = 145;
KEYCODE_NUMPAD_2 = 146;
KEYCODE_NUMPAD_3 = 147;
KEYCODE_NUMPAD_4 = 148;
KEYCODE_NUMPAD_5 = 149;
KEYCODE_NUMPAD_6 = 150;
KEYCODE_NUMPAD_7 = 151;
KEYCODE_NUMPAD_8 = 152;
KEYCODE_NUMPAD_9 = 153;
KEYCODE_NUMPAD_DIVIDE = 154;
KEYCODE_NUMPAD_MULTIPLY = 155;
KEYCODE_NUMPAD_SUBTRACT = 156;
KEYCODE_NUMPAD_ADD = 157;
KEYCODE_NUMPAD_DOT = 158;
KEYCODE_NUMPAD_COMMA = 159;
KEYCODE_NUMPAD_ENTER = 160;
KEYCODE_NUMPAD_EQUALS = 161;
KEYCODE_NUMPAD_LEFT_PAREN = 162;
KEYCODE_NUMPAD_RIGHT_PAREN = 163;
KEYCODE_VOLUME_MUTE = 164;
KEYCODE_INFO = 165;
KEYCODE_CHANNEL_UP = 166;
KEYCODE_CHANNEL_DOWN = 167;
KEYCODE_ZOOM_IN = 168;
KEYCODE_ZOOM_OUT = 169;
KEYCODE_TV = 170;
KEYCODE_WINDOW = 171;
KEYCODE_GUIDE = 172;
KEYCODE_DVR = 173;
KEYCODE_BOOKMARK = 174;
KEYCODE_CAPTIONS = 175;
KEYCODE_SETTINGS = 176;
KEYCODE_TV_POWER = 177;
KEYCODE_TV_INPUT = 178;
KEYCODE_STB_POWER = 179;
KEYCODE_STB_INPUT = 180;
KEYCODE_AVR_POWER = 181;
KEYCODE_AVR_INPUT = 182;
KEYCODE_PROG_RED = 183;
KEYCODE_PROG_GREEN = 184;
KEYCODE_PROG_YELLOW = 185;
KEYCODE_PROG_BLUE = 186;
KEYCODE_APP_SWITCH = 187;
KEYCODE_BUTTON_1 = 188;
KEYCODE_BUTTON_2 = 189;
KEYCODE_BUTTON_3 = 190;
KEYCODE_BUTTON_4 = 191;
KEYCODE_BUTTON_5 = 192;
KEYCODE_BUTTON_6 = 193;
KEYCODE_BUTTON_7 = 194;
KEYCODE_BUTTON_8 = 195;
KEYCODE_BUTTON_9 = 196;
KEYCODE_BUTTON_10 = 197;
KEYCODE_BUTTON_11 = 198;
KEYCODE_BUTTON_12 = 199;
KEYCODE_BUTTON_13 = 200;
KEYCODE_BUTTON_14 = 201;
KEYCODE_BUTTON_15 = 202;
KEYCODE_BUTTON_16 = 203;
KEYCODE_LANGUAGE_SWITCH = 204;
KEYCODE_MANNER_MODE = 205;
KEYCODE_3D_MODE = 206;
KEYCODE_CONTACTS = 207;
KEYCODE_CALENDAR = 208;
KEYCODE_MUSIC = 209;
KEYCODE_CALCULATOR = 210;
KEYCODE_ZENKAKU_HANKAKU = 211;
KEYCODE_EISU = 212;
KEYCODE_MUHENKAN = 213;
KEYCODE_HENKAN = 214;
KEYCODE_KATAKANA_HIRAGANA = 215;
KEYCODE_YEN = 216;
KEYCODE_RO = 217;
KEYCODE_KANA = 218;
KEYCODE_ASSIST = 219;
KEYCODE_BRIGHTNESS_DOWN = 220;
KEYCODE_BRIGHTNESS_UP = 221;
KEYCODE_MEDIA_AUDIO_TRACK = 222;
KEYCODE_SLEEP = 223;
KEYCODE_WAKEUP = 224;
KEYCODE_PAIRING = 225;
KEYCODE_MEDIA_TOP_MENU = 226;
KEYCODE_11 = 227;
KEYCODE_12 = 228;
KEYCODE_LAST_CHANNEL = 229;
KEYCODE_TV_DATA_SERVICE = 230;
KEYCODE_VOICE_ASSIST = 231;
KEYCODE_TV_RADIO_SERVICE = 232;
KEYCODE_TV_TELETEXT = 233;
KEYCODE_TV_NUMBER_ENTRY = 234;
KEYCODE_TV_TERRESTRIAL_ANALOG = 235;
KEYCODE_TV_TERRESTRIAL_DIGITAL = 236;
KEYCODE_TV_SATELLITE = 237;
KEYCODE_TV_SATELLITE_BS = 238;
KEYCODE_TV_SATELLITE_CS = 239;
KEYCODE_TV_SATELLITE_SERVICE = 240;
KEYCODE_TV_NETWORK = 241;
KEYCODE_TV_ANTENNA_CABLE = 242;
KEYCODE_TV_INPUT_HDMI_1 = 243;
KEYCODE_TV_INPUT_HDMI_2 = 244;
KEYCODE_TV_INPUT_HDMI_3 = 245;
KEYCODE_TV_INPUT_HDMI_4 = 246;
KEYCODE_TV_INPUT_COMPOSITE_1 = 247;
KEYCODE_TV_INPUT_COMPOSITE_2 = 248;
KEYCODE_TV_INPUT_COMPONENT_1 = 249;
KEYCODE_TV_INPUT_COMPONENT_2 = 250;
KEYCODE_TV_INPUT_VGA_1 = 251;
KEYCODE_TV_AUDIO_DESCRIPTION = 252;
KEYCODE_TV_AUDIO_DESCRIPTION_MIX_UP = 253;
KEYCODE_TV_AUDIO_DESCRIPTION_MIX_DOWN = 254;
KEYCODE_TV_ZOOM_MODE = 255;
KEYCODE_TV_CONTENTS_MENU = 256;
KEYCODE_TV_MEDIA_CONTEXT_MENU = 257;
KEYCODE_TV_TIMER_PROGRAMMING = 258;
KEYCODE_HELP = 259;
KEYCODE_NAVIGATE_PREVIOUS = 260;
KEYCODE_NAVIGATE_NEXT = 261;
KEYCODE_NAVIGATE_IN = 262;
KEYCODE_NAVIGATE_OUT = 263;
KEYCODE_STEM_PRIMARY = 264;
KEYCODE_STEM_1 = 265;
KEYCODE_STEM_2 = 266;
KEYCODE_STEM_3 = 267;
KEYCODE_DPAD_UP_LEFT = 268;
KEYCODE_DPAD_DOWN_LEFT = 269;
KEYCODE_DPAD_UP_RIGHT = 270;
KEYCODE_DPAD_DOWN_RIGHT = 271;
KEYCODE_MEDIA_SKIP_FORWARD = 272;
KEYCODE_MEDIA_SKIP_BACKWARD = 273;
KEYCODE_MEDIA_STEP_FORWARD = 274;
KEYCODE_MEDIA_STEP_BACKWARD = 275;
KEYCODE_SOFT_SLEEP = 276;
KEYCODE_CUT = 277;
KEYCODE_COPY = 278;
KEYCODE_PASTE = 279;
KEYCODE_SYSTEM_NAVIGATION_UP = 280;
KEYCODE_SYSTEM_NAVIGATION_DOWN = 281;
KEYCODE_SYSTEM_NAVIGATION_LEFT = 282;
KEYCODE_SYSTEM_NAVIGATION_RIGHT = 283;
KEYCODE_ALL_APPS = 284;
KEYCODE_REFRESH = 285;
KEYCODE_THUMBS_UP = 286;
KEYCODE_THUMBS_DOWN = 287;
KEYCODE_PROFILE_SWITCH = 288;
}
enum MetaKeyCode {
META_UNKNOWN = 0;
META_SHIFT_ON = 1;
META_ALT_ON = 2;
META_SYM_ON = 4;
META_FUNCTION_ON = 8;
META_ALT_LEFT_ON = 16;
META_ALT_RIGHT_ON = 32;
META_ALT_MASK = 50;
META_SHIFT_LEFT_ON = 64;
META_SHIFT_RIGHT_ON = 128;
META_SHIFT_MASK = 193;
META_CTRL_ON = 4096;
META_CTRL_LEFT_ON = 8192;
META_CTRL_RIGHT_ON = 16384;
META_CTRL_MASK = 28672;
META_META_ON = 65536;
META_META_LEFT_ON = 131072;
META_META_RIGHT_ON = 262144;
META_META_MASK = 458752;
META_CAPS_LOCK_ON = 1048576;
META_NUM_LOCK_ON = 2097152;
META_SCROLL_LOCK_ON = 4194304;
}
enum Corner {
COR_CENTER = 0;
COR_BOTTOMRIGHT = 1;
COR_TOPLEFT = 2;
}
enum Direction {
DIR_UP = 0;
DIR_LEFT = 1;
DIR_DOWN = 2;
DIR_RIGHT = 3;
}
message ObjInfo {
Bound bounds = 1;
bool checkable = 2;
bool checked = 3;
uint32 childCount = 4;
string className = 5;
bool clickable = 6;
string contentDescription = 7;
bool enabled = 8;
bool focusable = 9;
bool focused = 10;
bool longClickable = 11;
string packageName = 12;
string resourceName = 13;
bool scrollable = 14;
bool selected = 15;
string text = 16;
Bound visibleBounds = 17;
}
message ToastInfo {
uint64 timestamp = 1;
string package = 2;
string message = 3;
}
message ObjInfoList {
repeated ObjInfo objects = 1;
}
message Selector {
uint32 mask = 1;
string text = 2;
string textContains = 3;
string textMatches = 4;
string textStartsWith = 5;
string className = 6;
string classNameMatches = 7;
string description = 8;
string descriptionContains = 9;
string descriptionMatches = 10;
string descriptionStartsWith = 11;
bool checkable = 12;
bool checked = 13;
bool clickable = 14;
bool longClickable = 15;
bool scrollable = 16;
bool enabled = 17;
bool focusable = 18;
bool focused = 19;
bool selected = 20;
string packageName = 21;
string packageNameMatches = 22;
string resourceId = 23;
string resourceIdMatches = 24;
uint32 index = 25;
uint32 instance = 26;
repeated string childOrSibling = 27;
repeated Selector childOrSiblingSelector = 28;
repeated string fields = 50;
}
message DeviceInfo {
string productName = 1;
uint32 sdkInt = 2;
uint32 displayHeight = 3;
uint32 displayRotation = 4;
uint32 displaySizeDpX = 5;
uint32 displaySizeDpY = 6;
uint32 displayWidth = 7;
bool screenLocked = 8;
bool screenOn = 9;
bool naturalOrientation = 10;
string currentPackageName = 11;
}
message SelectorTakeScreenshotRequest {
Selector selector = 1;
uint32 quality = 3;
}
message SelectorSetTextRequest {
Selector selector = 1;
string text = 3;
}
message SelectorClickRequest {
Selector selector = 1;
Corner corner = 3;
}
message SelectorOnlyRequest {
Selector selector = 1;
}
message SelectorDragToRequest {
Selector selector = 1;
oneof _target {
Selector target = 3;
Point point = 4;
}
uint32 step = 5;
}
message SelectorWaitRequest {
Selector selector = 1;
uint32 timeout = 3;
}
message SelectorSwipeRequest {
Selector selector = 1;
Direction direction = 3;
uint32 step = 4;
}
message SelectorFlingRequest {
Selector selector = 1;
bool vertical = 3;
uint32 maxSwipes = 4;
}
message SelectorScrollRequest {
Selector selector = 1;
Selector target = 2;
bool vertical = 3;
uint32 maxSwipes = 4;
uint32 step = 5;
}
message SelectorPinchRequest {
Selector selector = 1;
uint32 percent = 3;
uint32 step = 4;
}
message ClickPointRequest {
Point point = 1;
}
message DragPointRequest {
Point A = 1;
Point B = 2;
uint32 step = 3;
}
message SwipePointRequest {
Point A = 1;
Point B = 2;
uint32 step = 3;
}
message SwipePointsRequest {
repeated Point points = 1;
uint32 step = 2;
}
message OrientationRequest {
Orientation orientation = 1;
}
message PressKeyRequest {
Key key = 1;
uint32 code = 2;
uint32 meta = 3;
}
message TakeScreenshotRequest {
Bound bound = 1;
uint32 quality = 2;
}
message ClipboardRequest {
string ID = 1;
string value = 2;
}
message WatcherNameList {
repeated string watchers = 1;
}
message WatcherRegistRequest {
string name = 1;
repeated Selector selectors = 2;
oneof _target {
Selector target = 3;
Key key = 4;
}
}
enum FindImageMethod {
FIM_TEMPLATE = 0;
FIM_FEATURE = 1;
}
enum FindImageArea {
FIA_WHOLE_SCREEN = 0;
FIA_LEFT = 1;
FIA_TOP_LEFT = 2;
FIA_TOP = 3;
FIA_TOP_RIGHT = 4;
FIA_RIGHT = 5;
FIA_BOTTOM_RIGHT = 6;
FIA_BOTTOM = 7;
FIA_BOTTOM_LEFT = 8;
}
message FindImageRequest {
bytes partial = 1;
FindImageMethod method = 2;
oneof _area {
FindImageArea area = 3;
Bound bound = 4;
}
uint32 distance = 5;
float threshold = 6;
float scale = 7;
}
message FindImageResponse {
repeated Bound bounds = 1;
}
```
--- FILE: rpc/util.proto ---
```protobuf
// Copyright 2022 rev1si0n (lamda.devel@gmail.com). All rights reserved.
//
// Distributed under MIT license.
// See file LICENSE for detail or copy at https://opensource.org/licenses/MIT
syntax = "proto3";
package lamda.rpc;
enum ToastDuration {
TD_SHORT = 0;
TD_LONG = 1;
}
enum AudioStreamType {
AST_ALARM = 0;
AST_MEDIA = 1;
AST_NOTIFICATION = 2;
AST_RING = 3;
AST_SYSTEM = 4;
AST_VOICE = 5;
}
message TouchDown {
int32 tid = 1;
int32 x = 2;
int32 y = 3;
int32 pressure = 4;
}
message TouchUp {
int32 tid = 1;
}
message TouchMove {
int32 tid = 1;
int32 x = 2;
int32 y = 3;
int32 pressure = 4;
}
message TouchWait {
uint32 wait = 1;
}
message TouchAction {
oneof action {
TouchDown down = 1;
TouchMove move = 2;
TouchWait wait = 3;
TouchUp up = 4;
}
}
message TouchSequence {
repeated TouchAction sequence = 1;
}
message PerformTouchRequest {
TouchSequence sequence = 1;
bool wait = 2;
}
message SetPropRequest {
string name = 1;
string value = 2;
}
message CertifiRequest {
bytes cert = 1;
}
message ShowToastRequest {
string text = 1;
ToastDuration duration = 2;
}
message ServerInfoResponse {
string uniqueId = 1;
string version = 2;
string architecture = 3;
uint64 uptime = 4;
bool secure = 5;
}
message HexPatchRequest {
string pattern = 1;
string replacement = 2;
string path = 3;
int32 maxreplace = 4;
bool dryrun = 5;
}
message HexPatchItem {
string path = 1;
int32 index = 2;
uint64 offset = 3;
}
message HexPatchResponse {
int32 count = 1;
repeated HexPatchItem replaces = 2;
}
message PlayAudioRequest {
string file = 1;
AudioStreamType type = 2;
int32 loop = 3;
int32 interval = 4;
}
```
--- FILE: rpc/wifi.proto ---
```protobuf
// Copyright 2022 rev1si0n (lamda.devel@gmail.com). All rights reserved.
//
// Distributed under MIT license.
// See file LICENSE for detail or copy at https://opensource.org/licenses/MIT
syntax = "proto3";
package lamda.rpc;
message WifiStatus {
string id = 1;
string address = 2;
string bssid = 3;
string freq = 4;
string group_cipher = 5;
string ip_address = 6;
string key_mgmt = 7;
string mode = 8;
string pairwise_cipher = 9;
string ssid = 10;
string wifi_generation = 11;
string wpa_state = 12;
}
message SignalPoll {
string RSSI = 1;
string LINKSPEED = 2;
string NOISE = 3;
string FREQUENCY = 4;
string WIDTH = 5;
string AVG_RSSI = 6;
string AVG_BEACON_RSSI = 7;
string CENTER_FRQ1 = 8;
}
message WifiInfo {
string id = 1;
string bssid = 2;
string ssid = 3;
string freq = 4;
string noise = 5;
string level = 6;
string tsf = 7;
string flags = 8;
}
message ScanResult {
repeated WifiInfo stations = 1;
}
message Network {
int32 nid = 1;
string bssid = 2;
string ssid = 3;
string flags = 4;
}
message NetworkList {
repeated Network networks = 1;
}
message NetworkConfig {
Network network = 1;
string name = 2;
string value = 3;
}
message WifiConfig {
string name = 1;
string value = 2;
}
message WifiBlacklist {
repeated string bssids = 1;
}
```